
May 3, 2024

Let's discuss how we can host our helm charts on GitHub pages and allow other people to use our charts on ArtifactHub. Before understanding the process we will try to understand these terms in the simplest form
What is a Helm Chart
Helm charts is the way you templatize your Kubernetes resources that you want to deploy. If you want to create kubernetes resource in multiple clusters (or even in the same cluster)with different values you create a template for the resources and package it. This package is known as helm chart.
GitHub Pages
GitHub Pages is a feature of GitHub that allows you to create a website or a web page hosted on GitHub servers. If you have a simple index.html file then you can host this HTML file using GitHub provided domain name which generally goes in the format username.github.io . It’s a way for you to share your work or showcase your projects online without the need for a separate web hosting service. In our case we will host our helm charts on GitHub Pages.
ArtifactHub
ArtifactHub is a web based platform that acts as a central repo for various software distributions like helm charts, OPA etc. Once we have created our helm chart, hosted it on GitHub pages, we will make it discoverable to the community by showcasing it on Artifacthub.
ArtifactHub does not host the Helm charts itself, but rather serves as a registry for Helm chart repositories. Developers can publish their Helm charts to their preferred repository, such as GitHub, GitLab, or Bitbucket, and then register their repository with ArtifactHub.
Hosting Helm Charts via GitHub Pages
Now we will see how we can leverage the Pages features of GitHub to host our application's helm charts. In this example I am taking a sample helm charts but you can also use your own customized helm charts in the same way
Step 1 : Creating a sample helm chart
We will start by creating a sample helm chart
helm create sample-nginx
Step 2 : Create a GitHub repo
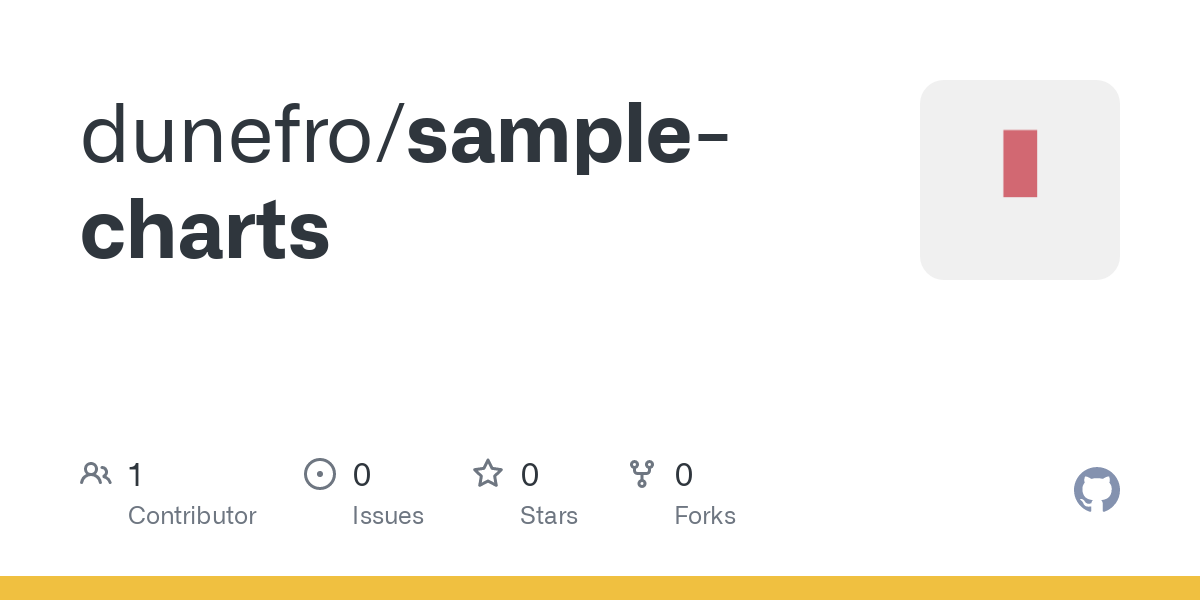
We will create a public GitHub repo where we will host the charts.
- Create a GitHub repo
- Make sure it is public
- Create a directory with the name of
chartswhich will contain your helm chart chartsdirectory is at the root level of your repository- Push your charts to the repository’s
mainbranch
$ tree .
.
├── README.md
└── charts
    └── sample-nginx
        ├── Chart.yaml
        ├── charts
        ├── templates
        │   ├── NOTES.txt
        │   ├── _helpers.tpl
        │   ├── deployment.yaml
        │   ├── hpa.yaml
        │   ├── ingress.yaml
        │   ├── service.yaml
        │   ├── serviceaccount.yaml
        │   └── tests
        │       └── test-connection.yaml
        └── values.yaml
We have created a repo and it is hosted here:
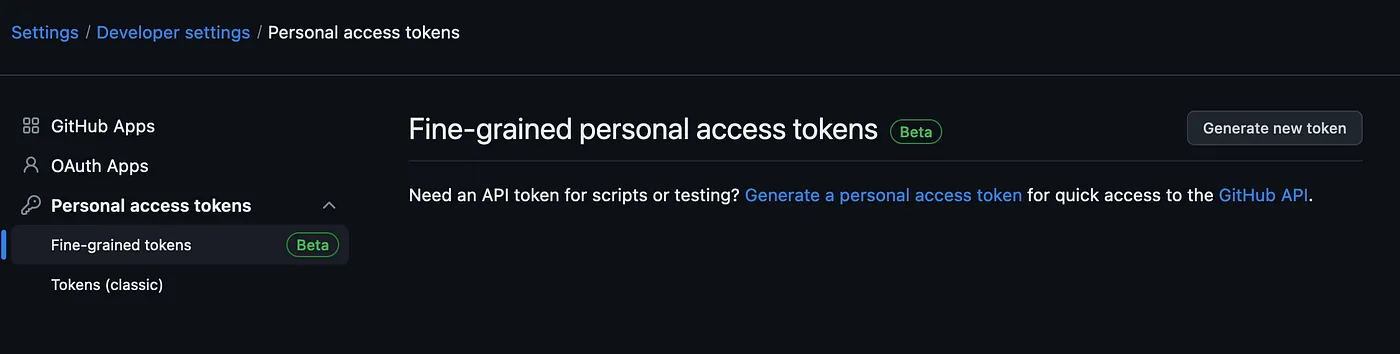
Step 3 : Create Github Access token
Once our charts are in the main branch we need to create a pipeline that can create a GitHub release. This GitHub release will in return publish our charts. For this we require a token to be created with specific set of permissions which will then be used in our pipeline to release charts.
- Click on your GitHub profile in top right corner
- Go to Settings.
- Go to Developer Settings in the last option in the left panel.
- Go to Personal Access tokens and select Fine-grained tokens.
- Click on Generate new token
- Given a token name and select expiration date. For now I am using 7 days post which token will become useless.
- In the Repository Access select Only select repositories and chose our github repo where we are working
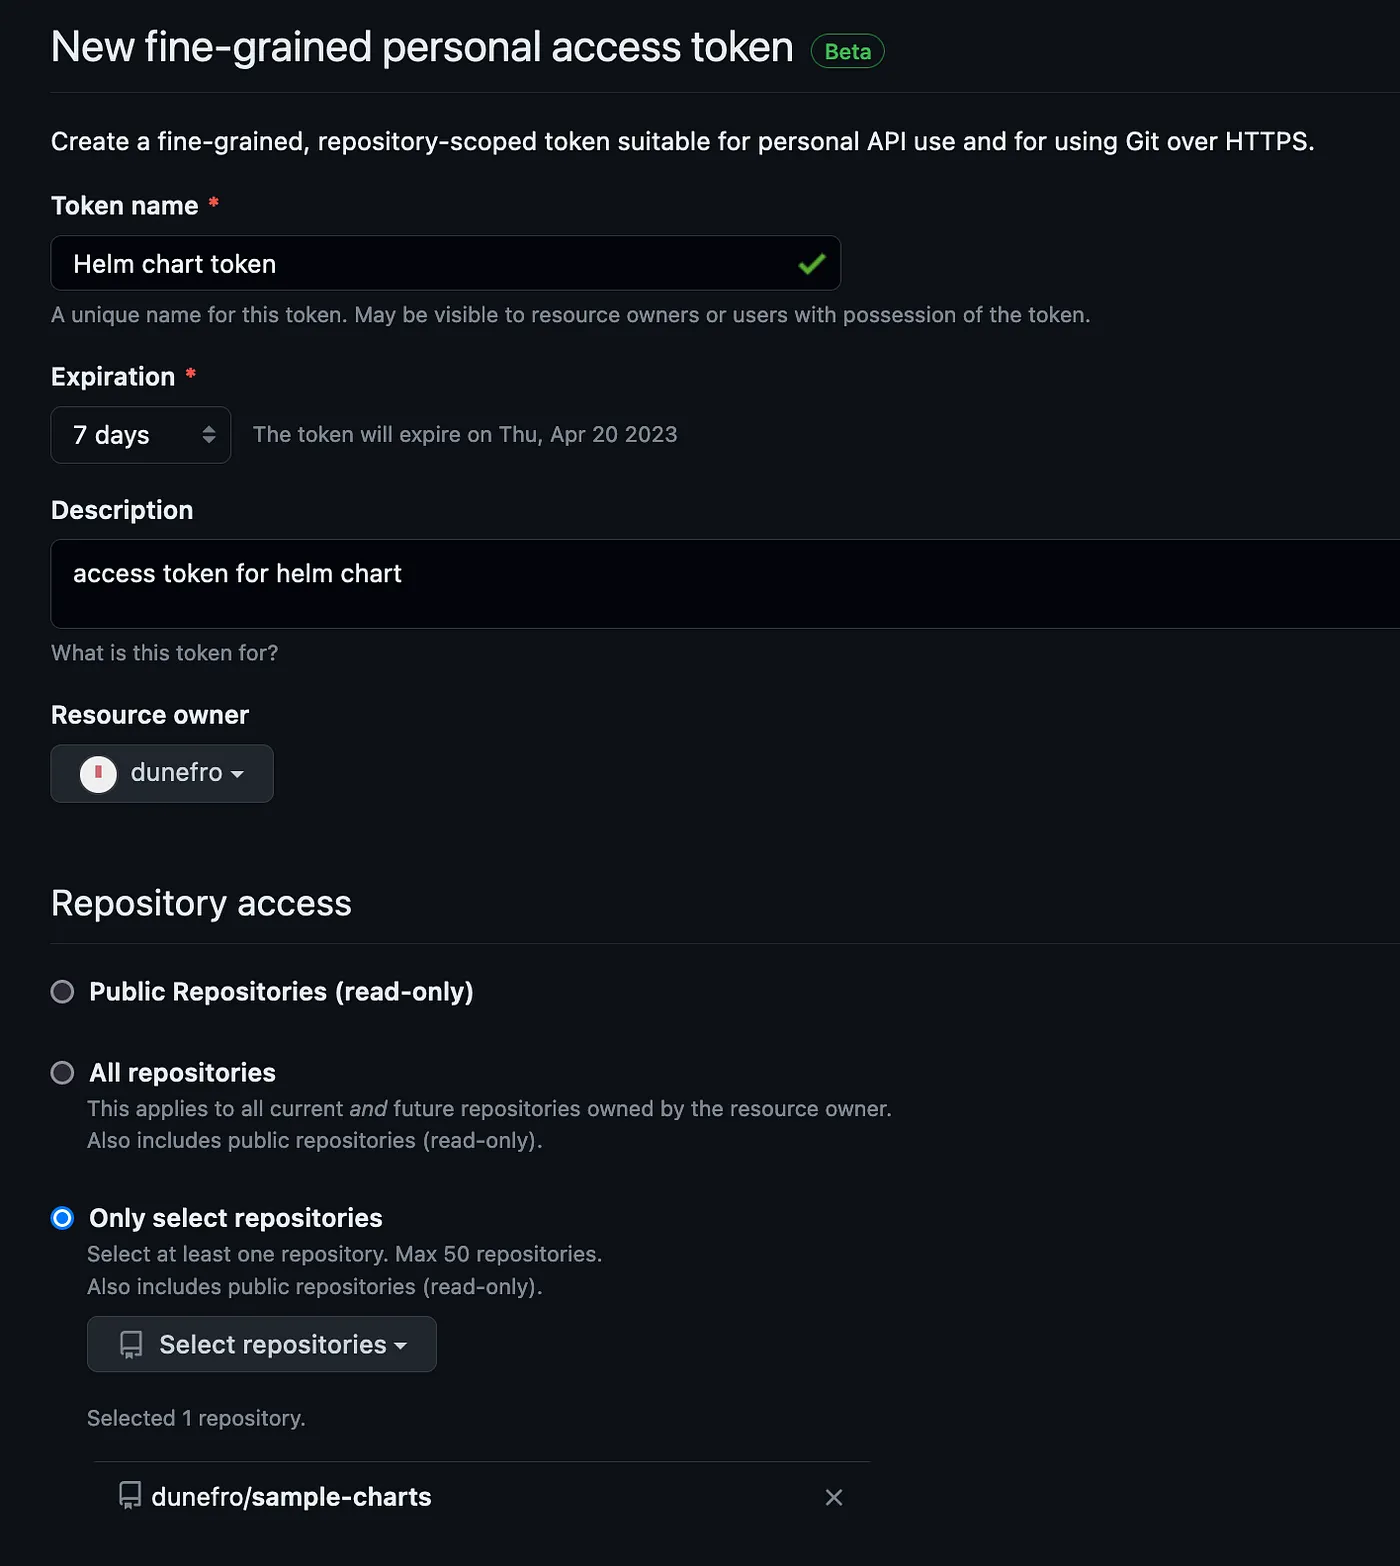
- In the permissions section we only need to use Repository permissions.
- In this select we need
Read and writeforContents
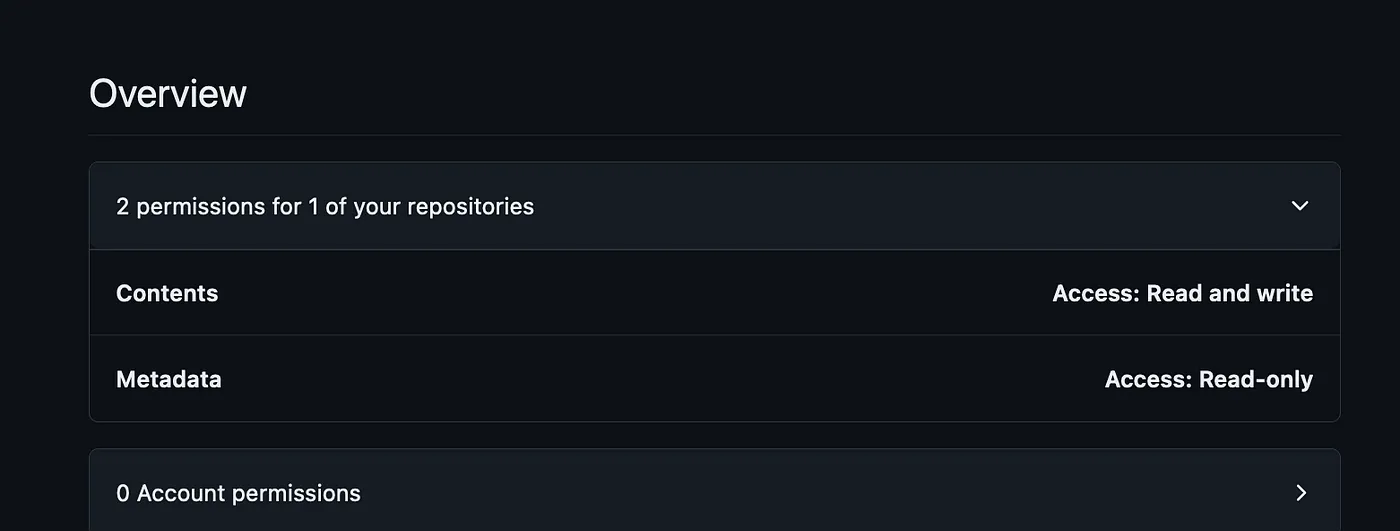
- In overview we must have only these much permissions
- Once the token is generated, keep it safe with you for the next step.
Step 4 : Setting up GitHub Pages
We can use GitHub Pages to host our website directly on GitHub (statically).
- Let’s create another branch in the repository by the name
gh-pagesand make sure to name the branch bygh-pagesonly. - In this branch remove everything and just create a simple file
index.htmlto test the hosting. Push your changes to GitHub.
<!DOCTYPE html>
<html>
<head>
 <title>Sample charts</title>
 <style>
  .chart {
   width: 400px;
   height: 300px;
   margin: 20px;
   border: 1px solid #ccc;
   box-shadow: 2px 2px 5px #ccc;
   display: inline-block;
   vertical-align: top;
   padding: 10px;
   box-sizing: border-box;
   font-size: 14px;
   line-height: 1.5;
  }

  .chart h3 {
   margin-top: 0;
   font-size: 18px;
   font-weight: bold;
  }

  .chart p {
   margin: 0;
  }
 </style>
</head>
<body>
 <h1>Sample charts</h1>
 <div class="chart">
  <h3>Chart 1</h3>
  <p>Lorem ipsum dolor sit amet, consectetur adipiscing elit. Integer euismod diam et purus hendrerit mollis.</p>
  <!-- add your chart code here -->
 </div>
 <div class="chart">
  <h3>Chart 2</h3>
  <p>Lorem ipsum dolor sit amet, consectetur adipiscing elit. Integer euismod diam et purus hendrerit mollis.</p>
  <!-- add your chart code here -->
 </div>
 <div class="chart">
  <h3>Chart 3</h3>
  <p>Lorem ipsum dolor sit amet, consectetur adipiscing elit. Integer euismod diam et purus hendrerit mollis.</p>
  <!-- add your chart code here -->
 </div>
</body>
</html>
- Go to Settings under the name of your repository and click on Pages in the left panel.

- In the Build and deployment section chose the Branch
gh-pagesand wait for some time for GitHub to process it. Once it is done you will get a URL in the same window. Clicking on it will show you theindex.htmlwe created. - Click here to check our index.html — https://dunefro.github.io/sample-charts/
- Now rather then hosting this HTML file we will host our helm charts.
Step 5 :Creating pipeline in GitHub Actions
In the previous steps we discussed about the pipeline which will use the Access token to create a GitHub Release. You can chose any preferred tool for performing this task but I will chose GitHub Actions for this. GitHub Actions is yet another tool natively supported in GitHub to perform CI/CD tasks.
Before creating the pipeline we will create a secret variable to pass the token we created in the previous task.
- Go to your repository and click on Settings under the name of your repo
- Go to Secrets and Variables in left panel and click on Actions
- Click on New Repository Secret and paste the token
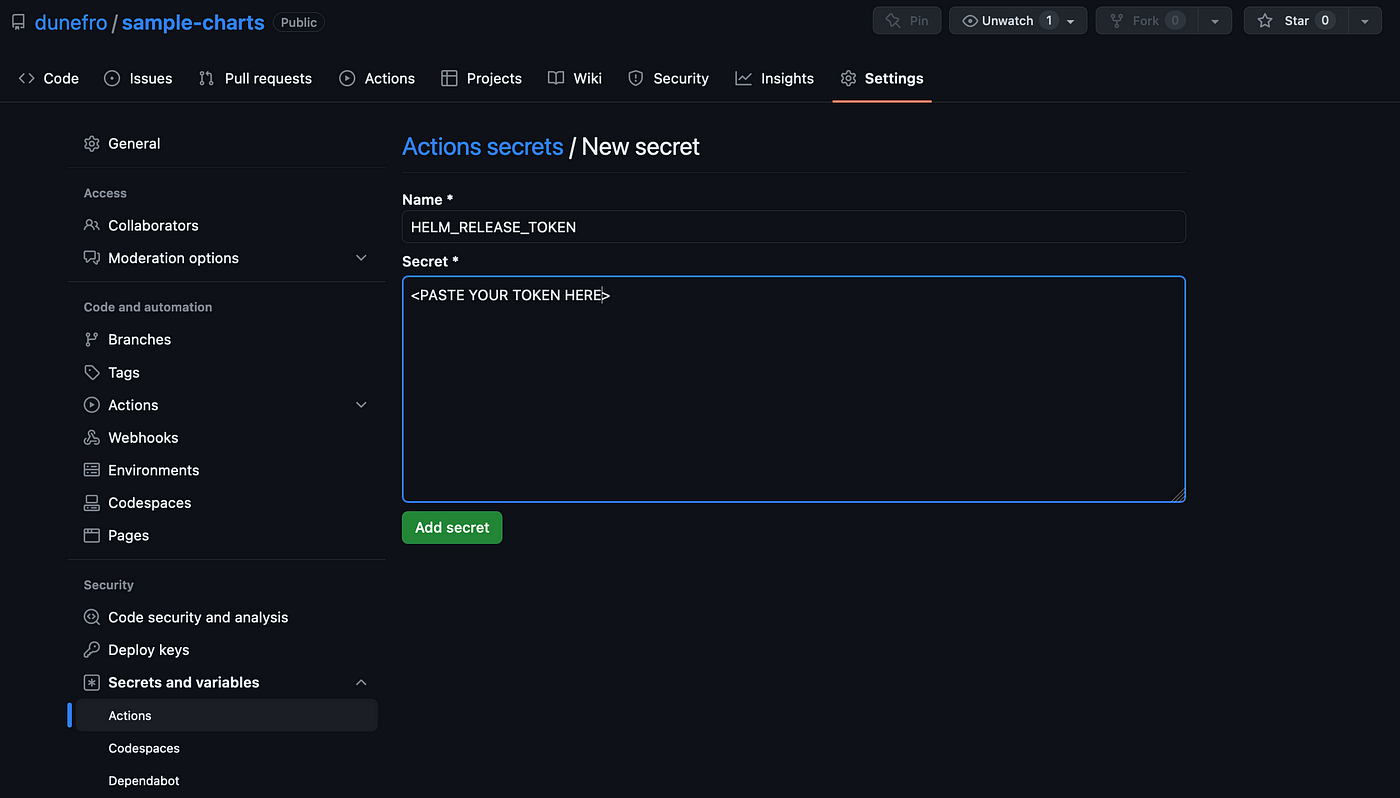
This token can now be used in the pipeline to push the releases.
Now we will create the GitHub Action pipeline
- Create a directory
.github/workflowsin the root level of your repository in themainbranch. - This directory is the default directory where we keep all the CI/CD pipelines for GitHub Actions to run.
- Create a file named
release.yamlinside the above directory. - Paste the following content
name: Release Charts

on:
  push:
    branches:
      - main

jobs:
  release:
    permissions:
      contents: write # to push chart release and create a release (helm/chart-releaser-action)

    runs-on: ubuntu-latest
    steps:
      - name: Checkout Code
        uses: actions/checkout@v3
        with:
          fetch-depth: 0

      - name: Configure Git
        run: |
          git config user.name "$GITHUB_ACTOR"
          git config user.email "$GITHUB_ACTOR@users.noreply.github.com"
      - name: Set up Helm
        uses: azure/setup-helm@v3.5
        with:
          version: v3.9.2

      - name: Run chart-releaser
        uses: helm/chart-releaser-action@v1.5.0
        env:
          CR_TOKEN: "${{ secrets.HELM_RELEASE_TOKEN }}"
This pipeline is very simple. Let’s understand it very quickly
name— name of the pipelineon— condition to run the pipeline, here we specify to run it on each push tomainbranch.jobs— the actual job that contains the pipeline code. It checks for permissions ofwritein contents which we have already givenstepsdefine the pipeline steps. In which the first step is to useactions/checkout@v3. Ideally if you are creating the pipeline you would firstly checkout the code. Rather then writing the code for checking out GitHub provides anactionwhich can be directly used rather then writing the code.- In the second step we run the commands to configure git. Similarly in the third step we uses
azure/setup-helmaction which will set up helm for us. - In the last step we use
helm/chart-releaser-actionto release the helm chart. As for release we require the secret token which we have already created and passed in the pipeline via the token nameHELM_RELEASE_TOKEN. This action will also create anindex.yamlingh-pagesbranch which will make the GitHub page acts as a static registry for the helm charts.
Step 6 : Run the pipeline and check if the releases are created or not
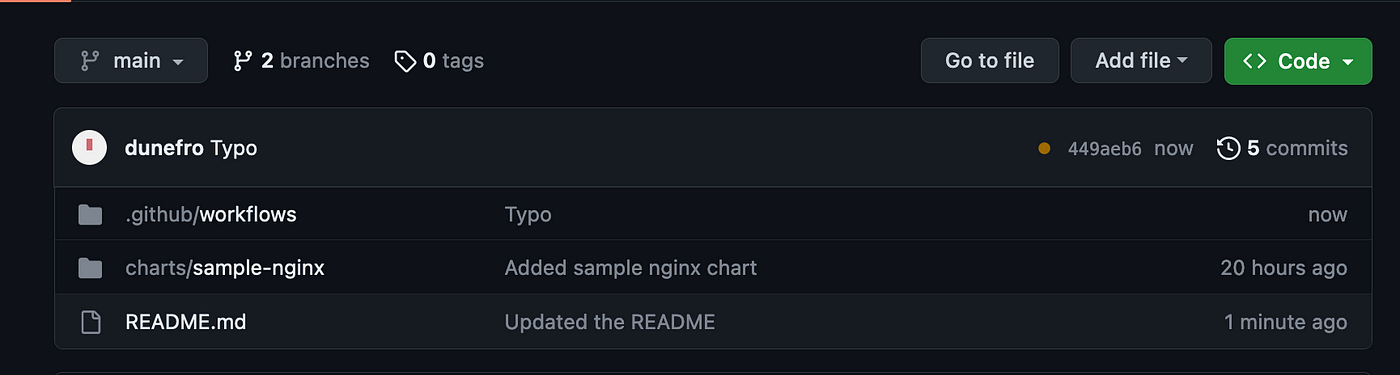
Now we will make very small change in the README.md file of the repository in the main branch so that the pipeline is triggered. When I pushed the changes I am able to see a small orange dot which signifies that a pipeline is running
- Go to Actions under the repository name and check for the running pipelines.
- Once the pipeline finishes we can go to
gh-pagesbranch and check ifindex.yamlis created or not. index.yamlis a way through which helm is able to identify any statically hosted website as helm registry.- Once the pipeline finishes another pipeline will trigger automatically with the name of
pages build and deploymentwhich is created automatically by GitHub to host the changes we make in thegh-pages branchmakingindex.yamlavailable publicly. — https://dunefro.github.io/sample-charts/index.yaml - We can go ahead and check releases in GitHub to observe that our helm chart was released in the Releases page. — https://github.com/dunefro/sample-charts/releases
Step 7 : Confirm the release by deploying it in a minikube cluster
To test if our helm registry is created successfully or not
- Create a
minikubecluster - Run the below command
# add the repo
helm repo add sample-charts https://dunefro.github.io/sample-charts/
helm repo update

# install the charts
helm upgrade --install test-nginx sample-charts/sample-nginx

# check pods
$ kubectl get pods
NAME                                      READY   STATUS    RESTARTS   AGE
test-nginx-sample-nginx-b95bb4f46-tbppn   1/1     Running   0          30s
Our charts are working fine.
Setting up ArtifactHub
Now we will try to see how we can set up an account on ArtifactHub so that we can show our helm charts to the community. You might also find some other community charts like
Step 1 : Create account on ArtifactHub and create a repo
Now our charts are hosted. We need to make sure they can be used from other developers via ArtifactHub.
- Go to https://artifcathub.io and sign up.
- Post this click on your profile from top left corner icon and then click on Control panel.
- Click on + Add Repostiory and add the repository details. Make sure you use the URL at which your charts are hosted in GitHub pages.
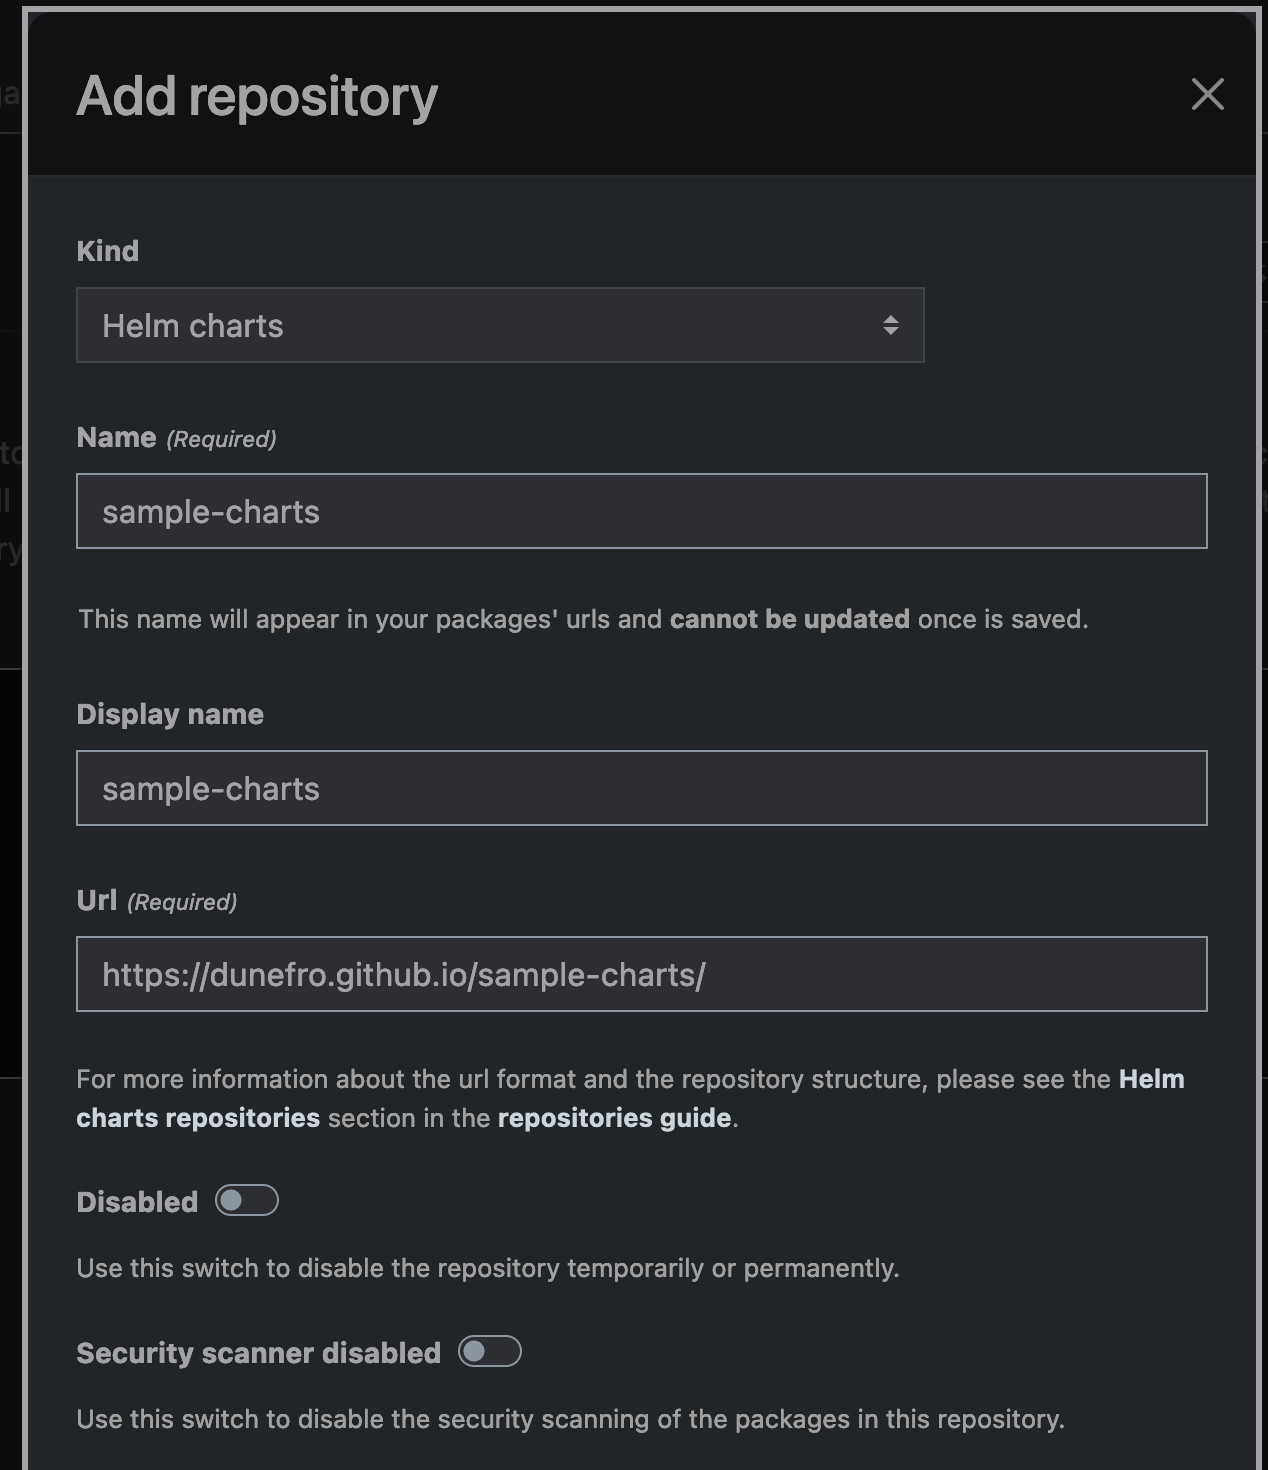
- Now wait and relax. ArtifactHub will automatically pull the details using the
index.yamlhosted in our pages
Step 2 : Verify your repo
We can see our repo being created and once ArtifactHub is able to pull the data it will also start to reflect in the searches. Now we want to apply the verified publisher tag something like this
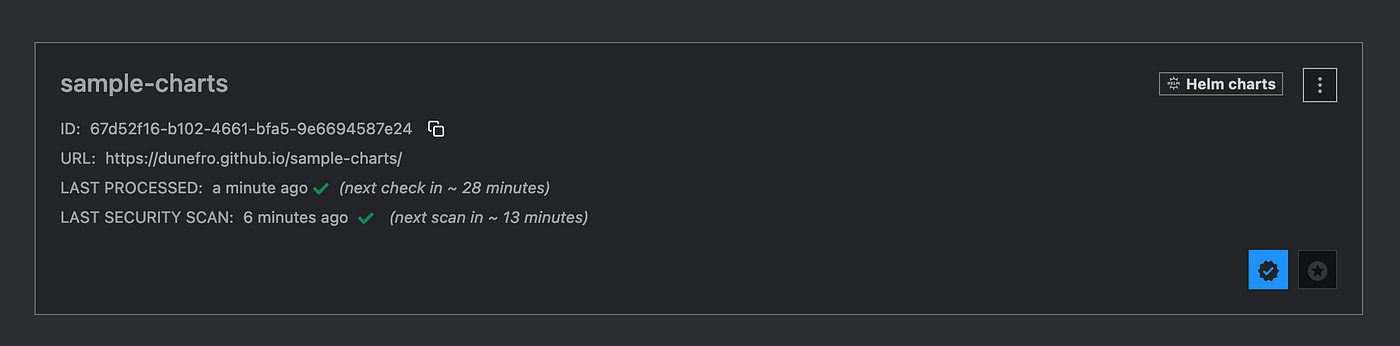
For this we need to add a file artifacthub-repo.yml in the gh-pages branch as a metadata file which will be read by ArtifactHub in return verifying that we are the owner of the registry.
- Copy the ID from the repository we created.
- Create a file named
artifacthub-repo.ymlin thegh-pagesbranch with the following contents
repositoryID: 67d52f16-b102-4661-bfa5-9e6694587e24
owners: # (optional, used to claim repository ownership)
  - name: Vedant Pareek
    email: dunefro@gmail.com
- Update the version of your chart so that ArtifactHub and GitHub Actions can pick it up.
- Wait for sometime for ArtifactHub to perform the check on the registry.
This is the same way we used to host our public helm charts at Truefoundry. TrueFoundry is MLOps, LLMOps platform that eases out the entire lifecycle journey of bringing the machine learning models from development to production. It takes into considerations all the pain points throughout the journey of Machine learning lifecycle to bring an ease and comfort while building models.

Subscribe to our Newsletter

Delivered twice a month
Join AI/ML leaders for the latest on product, community, and GenAI developments

%20(11).png)