

March 17, 2026
|
5 min read

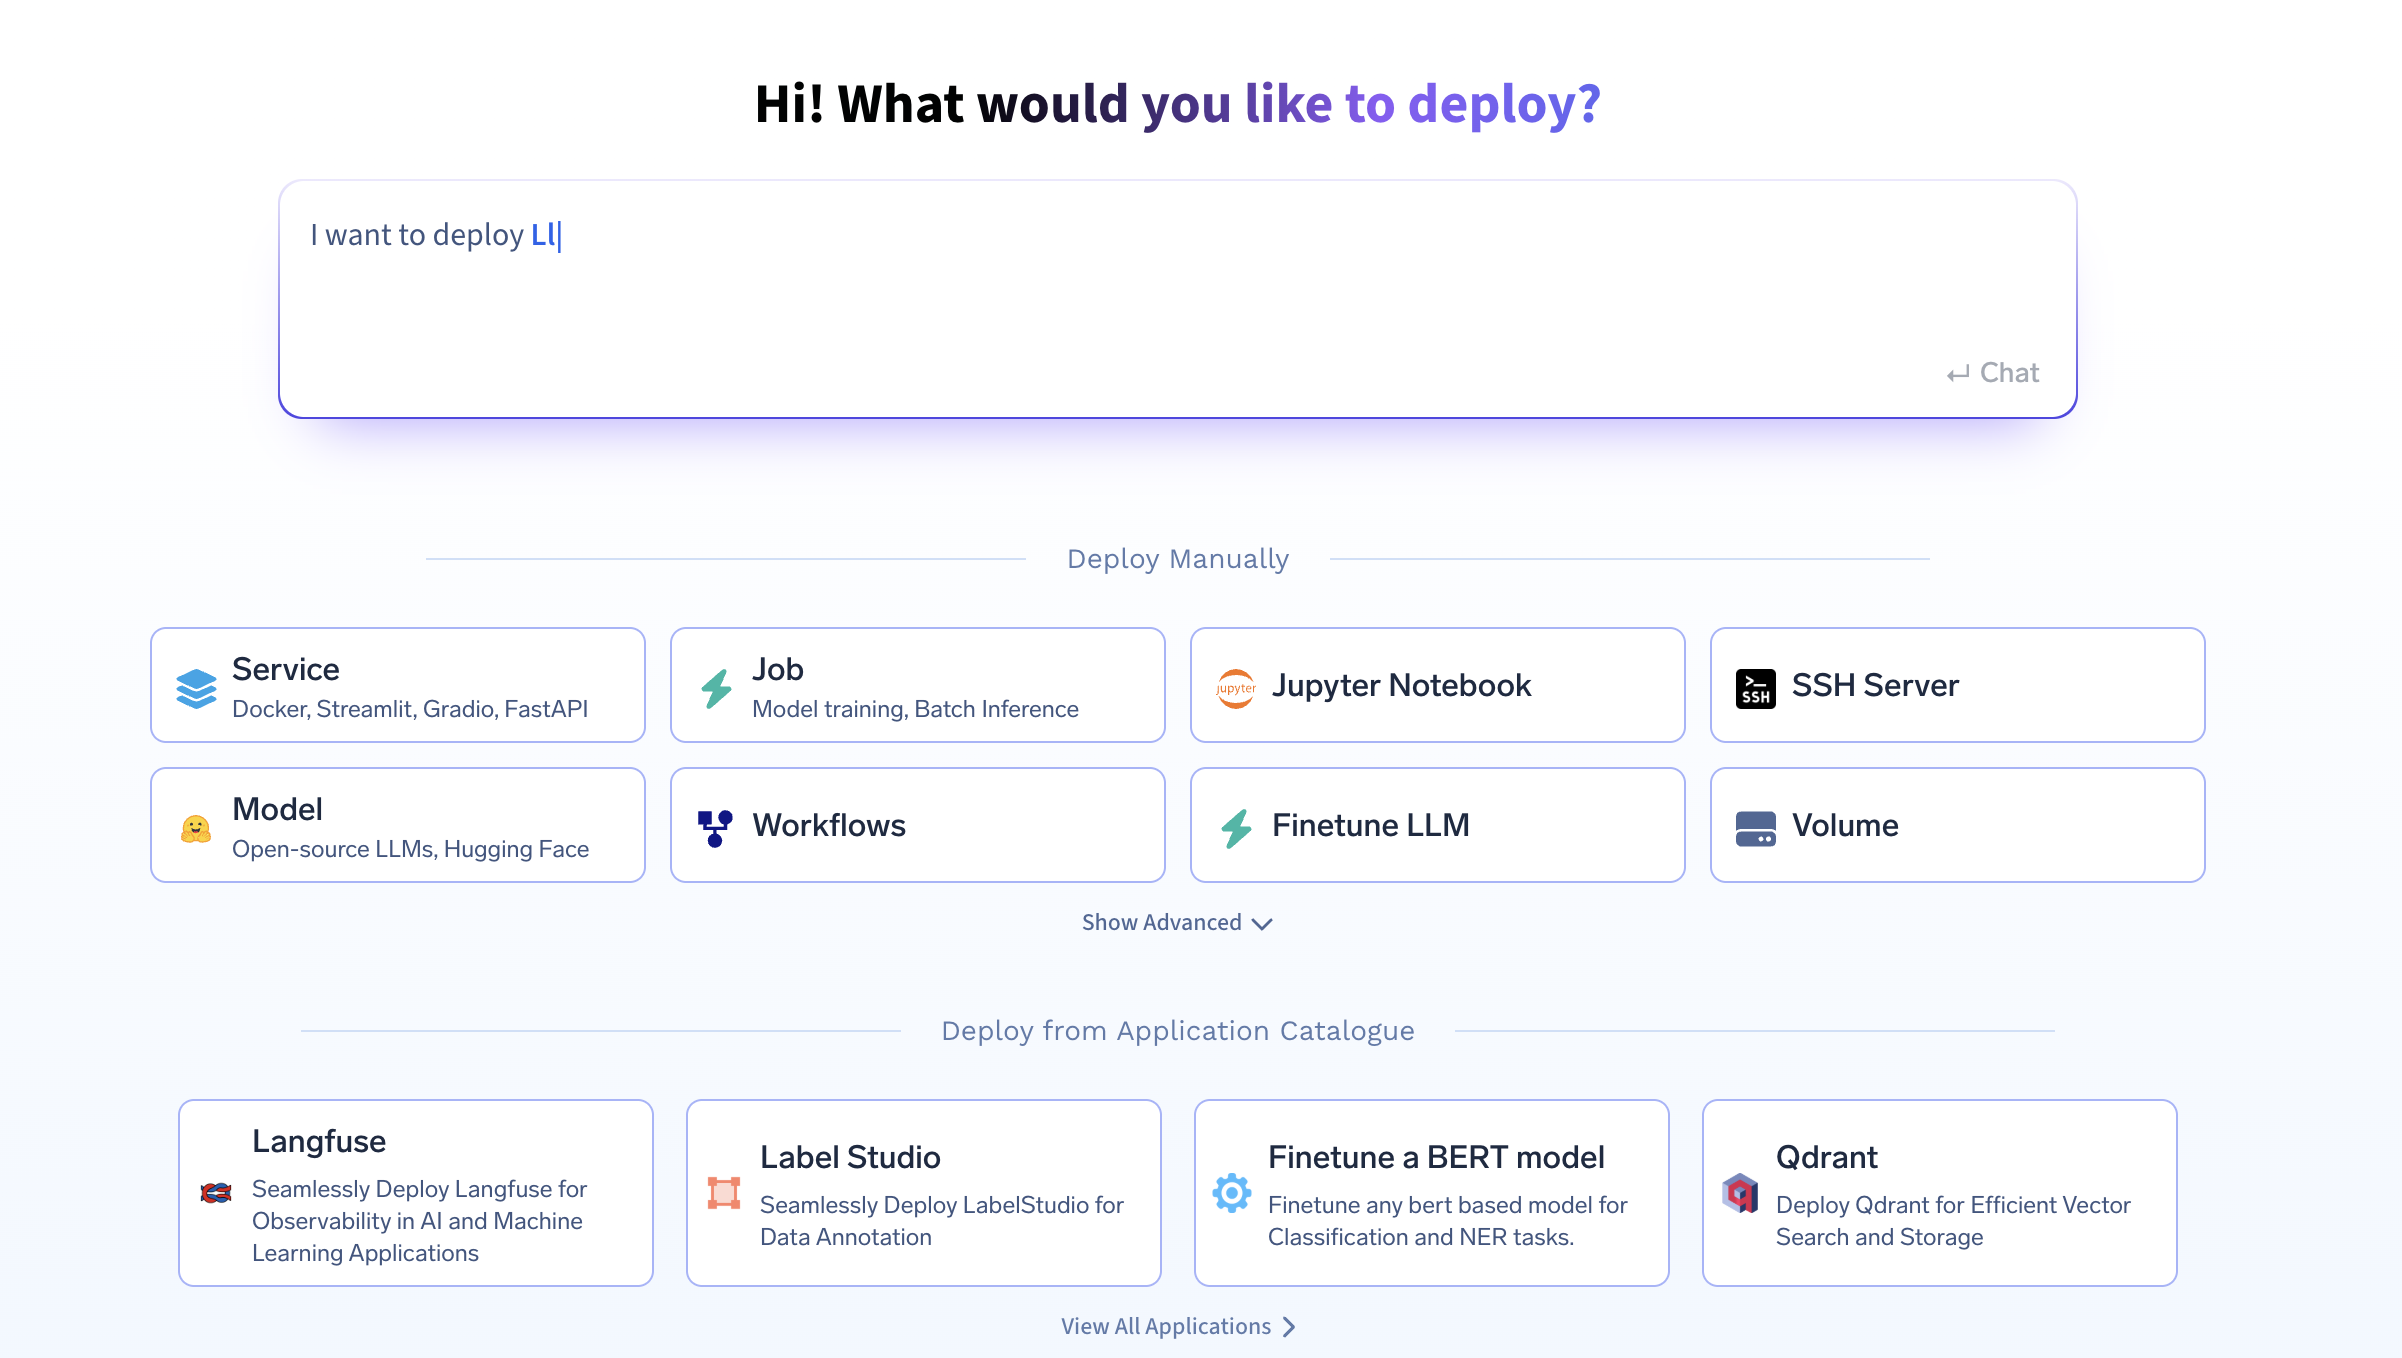
In this guide, we’ll show you how to deploy an Agno agent on TrueFoundry, a platform designed to simplify AI deployment with minimal DevOps or MLOps expertise. TrueFoundry automates infrastructure management, scaling, and monitoring, allowing you to focus on deriving insights rather than handling deployment complexities. With just a few clicks, you can transform natural language requests into SQL queries and dynamic charts, making data exploration seamless and intelligent. No manual querying required!
If you would like to try this out directly, please visit the TrueFoundry platform and navigate to Live Demos and agno-Streamlit: Live demo of our agent workflow
This project consists of several key components working together:
Query Agent
Visualization Agent: A second AI agent that
FastAPI Backend: RESTful API that
Streamlit Frontend: User interface that
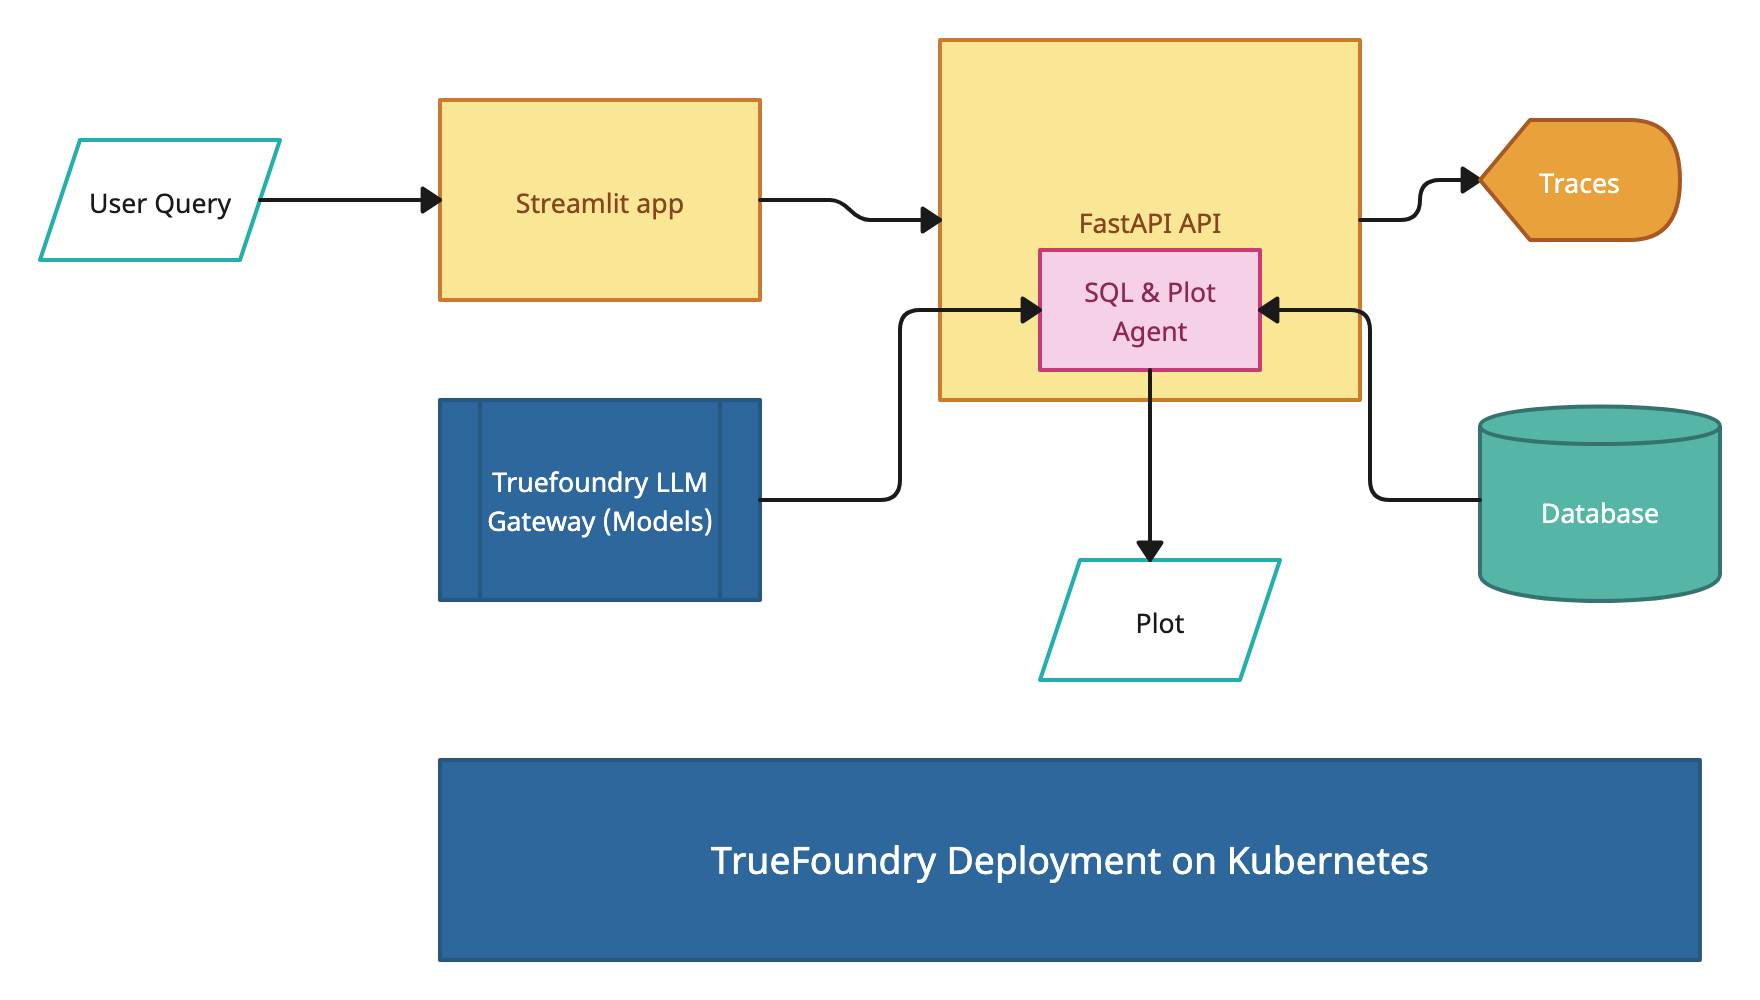
User submits a natural language query through Streamlit.
Clone the Repository
First, navigate to the TrueFoundry Getting Started Examples repository and clone it:
git clone <https://github.com/truefoundry/getting-started-examples.git>Navigate to the agno Plot Agent Directory:
cd getting-started-examples/plot_agent/agno_plot_agentEnvironment Setup
Create and activate a virtual environment:
python -m venv venv
source venv/bin/activate  # On Windows: venv\Scripts\activate
Install dependencies:
pip install uv
uv install
Configure Environment Variables
Create a .env file:
# Truefoundry LLMGateway Configuration if using Truefoundry LLM Gateway for calling models
LLM_GATEWAY_BASE_URL=your_llm_gateway_base_url_here
LLM_GATEWAY_API_KEY=your_llm_gateway_api_key_here

# OPENAI API Configuration if not using Truefoundry LLM Gateway
OPENAI_API_KEY=<your_openai_api_key_here>

CLICKHOUSE_HOST=your_clickhouse_host
CLICKHOUSE_PORT=443
CLICKHOUSE_USER=your_user
CLICKHOUSE_PASSWORD=your_password
CLICKHOUSE_DATABASE=default
agno_VERBOSE=true
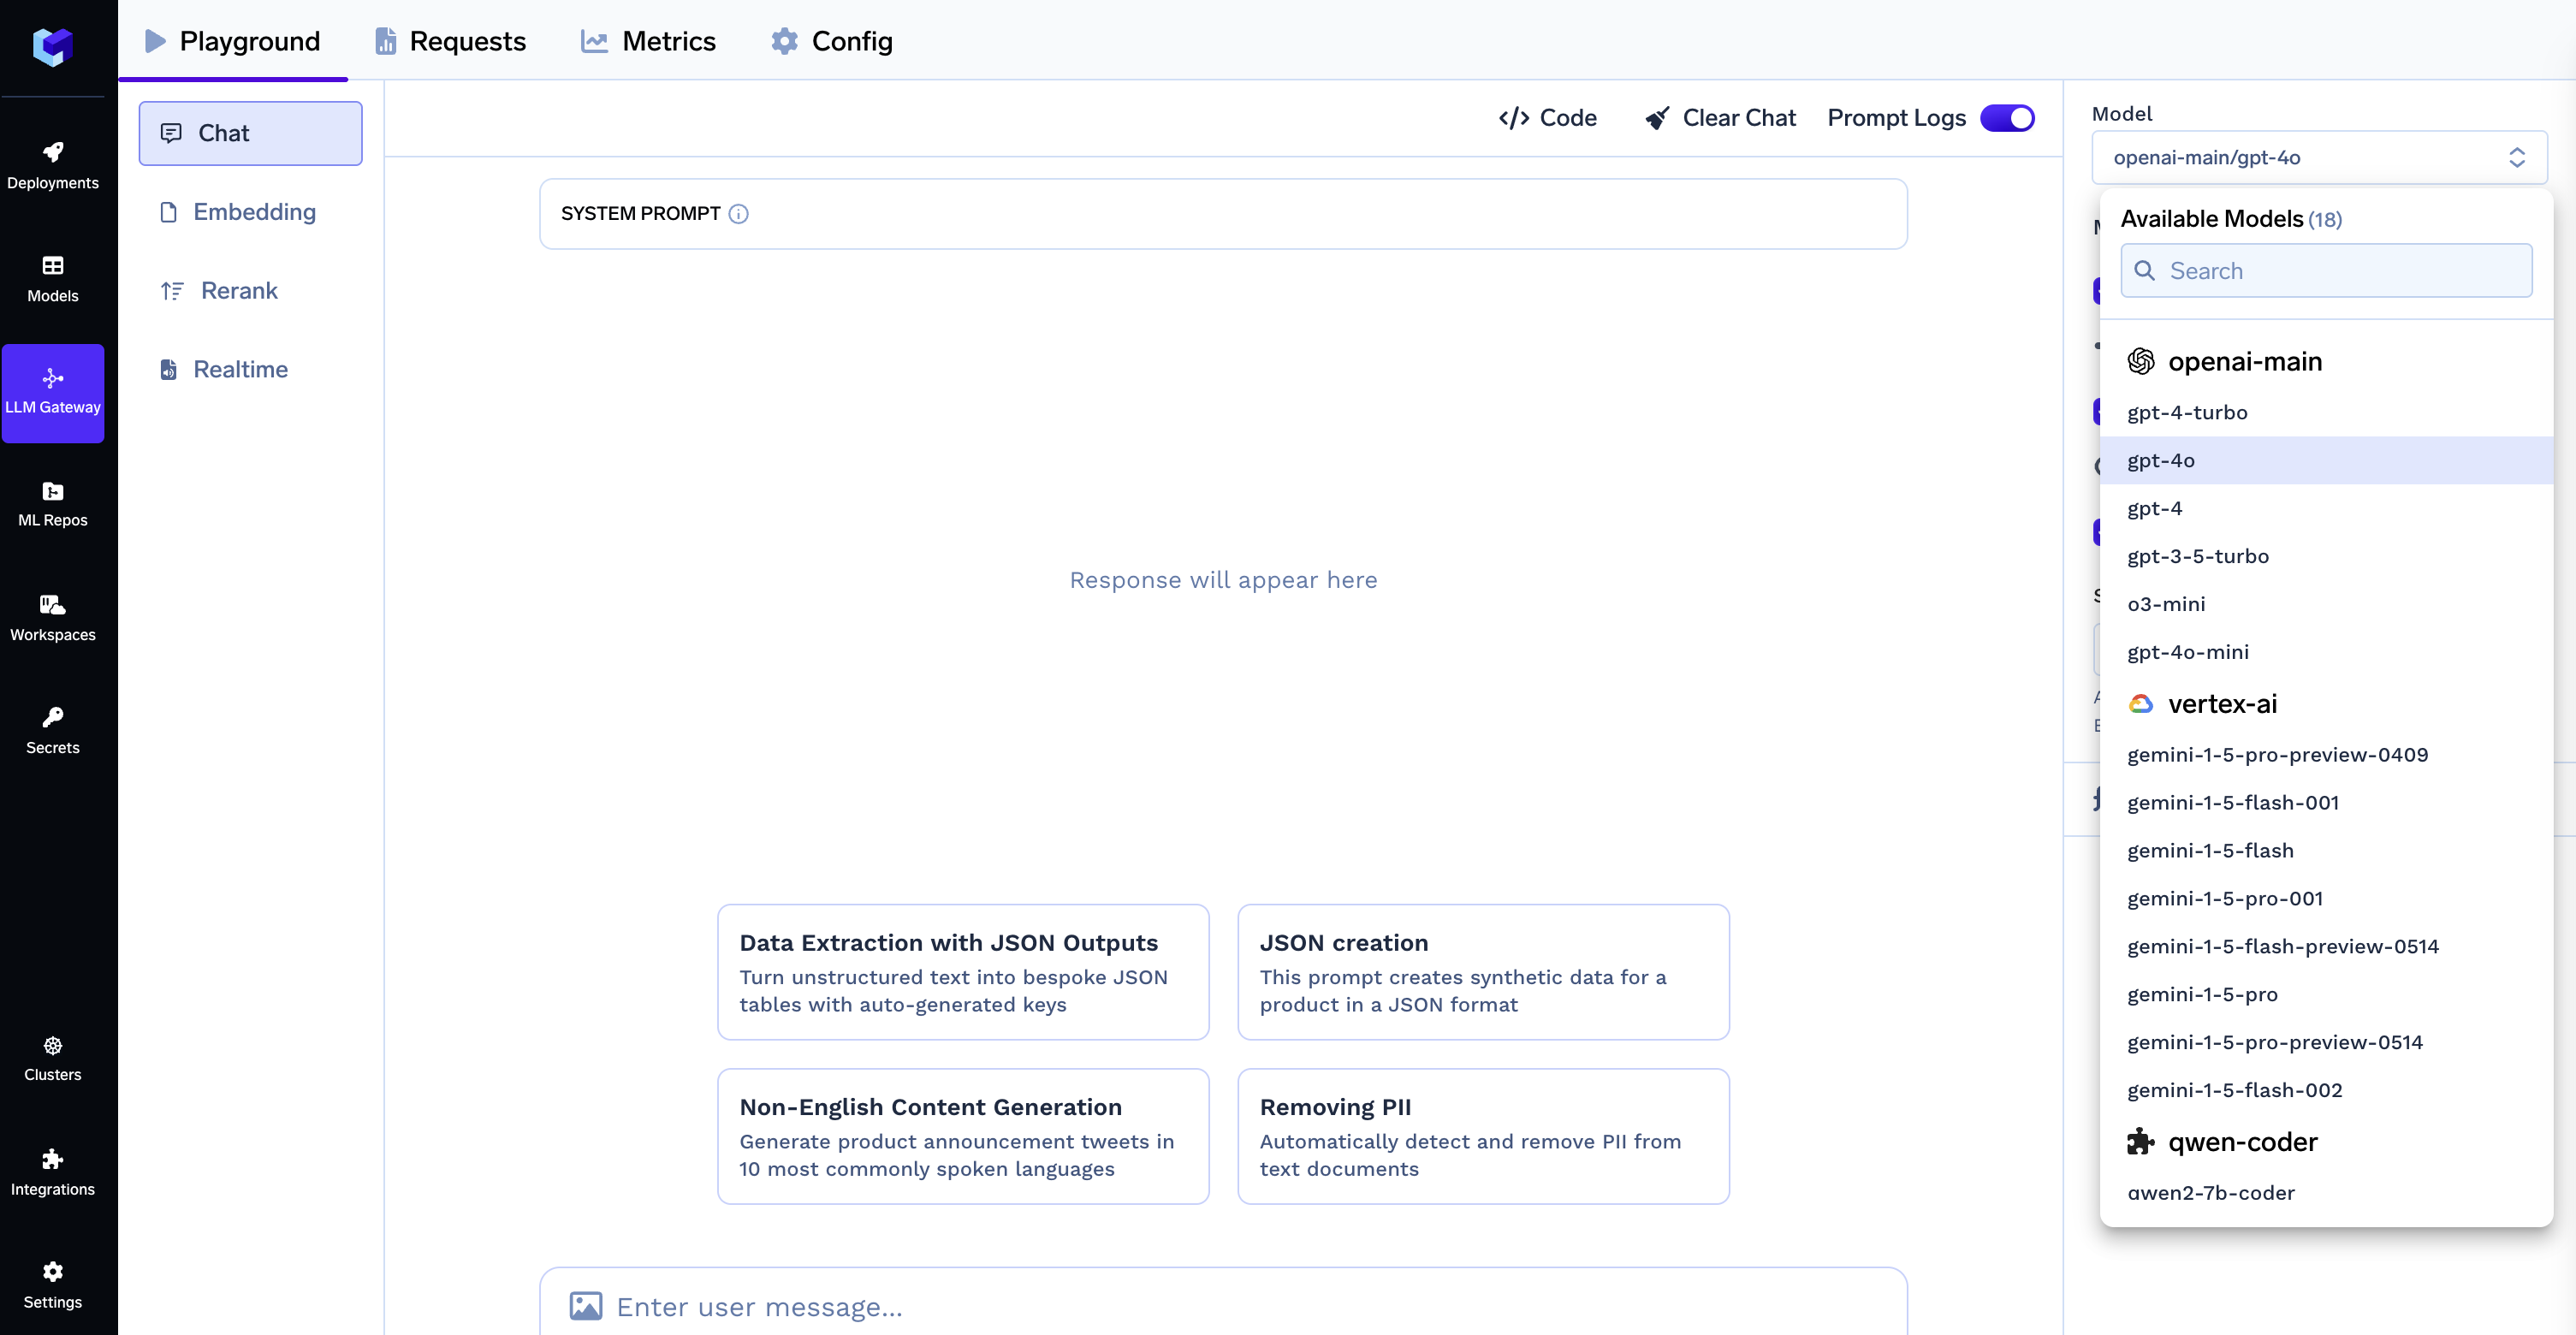
Note: When using the TrueFoundry LLM Gateway, the model ID format should be provider-name/model-name (e.g., openai-main/gpt-4o). Make sure your .env file contains the correct LLM Gateway credentials as shown in the Environment Configuration section.
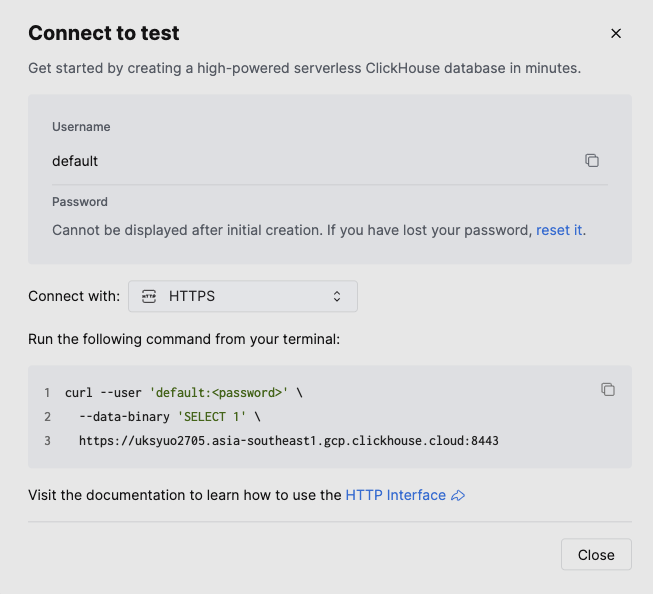
To get clickhouse credentials, create an account on clickhouse, sign in and create a service. After clicking the service you will see a connect button on the middle of left sidebar, which you can click to see the credentials as shown below. You can either create a database by uploading your files or use a predefined one.
from agno.agent import Agent
from agno.models.openai import OpenAIChat
from plot_tools import PlotTools
from query_tools import QueryTools
import os
# Query Agent for SQL generation - Using TrueFoundry LLM Gateway
sql_agent: Agent = Agent(
                        model=OpenAIChat(
                            id="openai-main/gpt-4o",  # Format: provider-name/model-name
                            api_key=os.getenv("LLM_GATEWAY_API_KEY"),
                            base_url=os.getenv("LLM_GATEWAY_BASE_URL")
                        ),
                        description="",
                        instructions=[],
                        tools=[ClickHouseTools()],
                        show_tool_calls=True,
                        markdown=True,
                        response_model=SQLQueryResult,
                        structured_outputs=True,
                        )
# Visualization Agent - Using TrueFoundry LLM Gateway
plot_agent: Agent = Agent(
                          model=OpenAIChat(
                              id="openai-main/gpt-4o",
                              api_key=os.getenv("LLM_GATEWAY_API_KEY"),
                              base_url=os.getenv("LLM_GATEWAY_BASE_URL")
                          ),
                          description="",
                          instructions=[],
                          tools=[PlotTools()],
                          markdown=True,
                          response_model=VisualizationRequest,
                          structured_outputs=True,
)Start agno Workflow
agno runStart FastAPI Backend:
python api.pyStart Streamlit UI (new terminal):
streamlit run app.py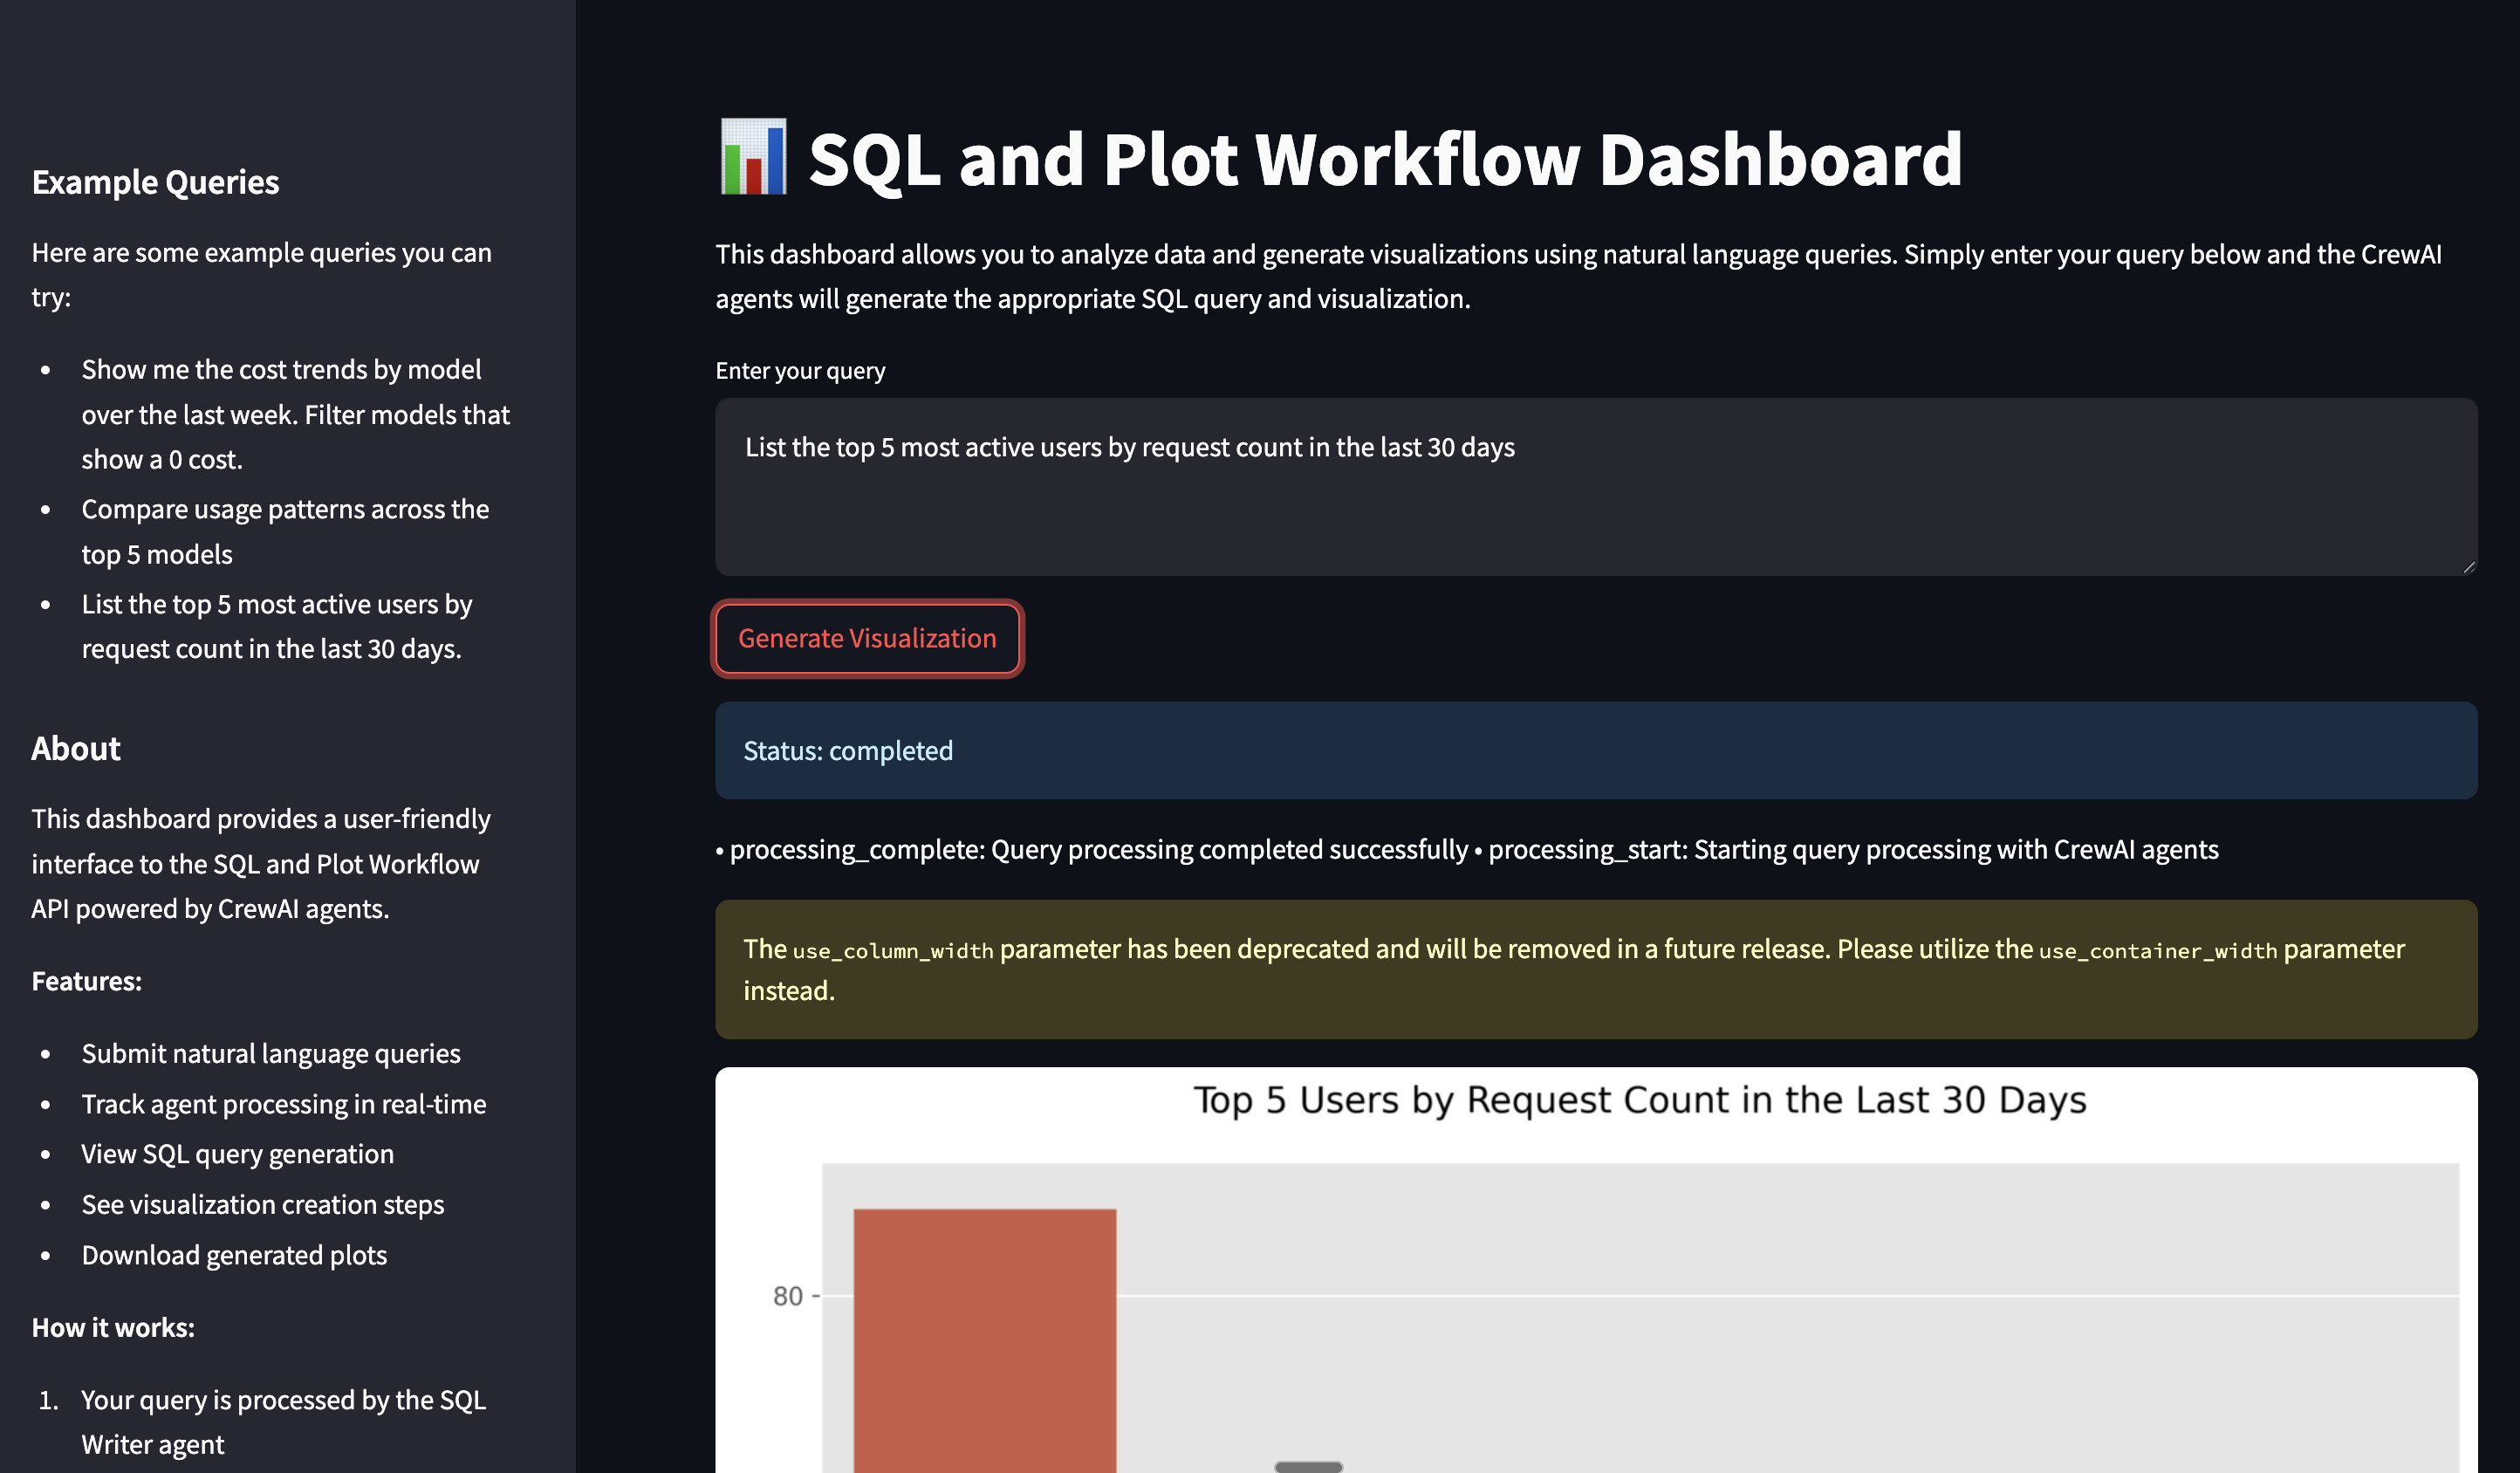
Prerequisites
Install TrueFoundry CLI:
pip install -U "truefoundry"Login to TrueFoundry:
tfy login --host "<https://app.truefoundry.com>"
deploy.py and edit the env section:env={
"OPENAI_API_KEY": "your_openai_api_key",
"CLICKHOUSE_HOST": "your_clickhouse_host",
"CLICKHOUSE_PORT": "443",
"CLICKHOUSE_USER": "your_user",
"CLICKHOUSE_PASSWORD": "your_password",
"CLICKHOUSE_DATABASE": "default",
"AGNO_VERBOSE": "true"
},Send a test query:
curl -X POST \
  -H "Content-Type: application/json" \
  -d '{"query": "Show me the cost trends by model over the last week"}' \
  <https://agno-plot-agent-demo-8000.aws.demo.truefoundry.cloud/query>
Successful response example:
{
  "job_id": "1234-abcd-5678-efgh"
}
API Endpoints
curl -X POST <http://localhost:8000/query> -H "Content-Type: application/json" -d '{"query": "Your query here."}'curl -X GET <http://localhost:8000/status/{job_id}>curl -X GET <http://localhost:8000/plot/{job_id}> > plot.pngFrontend and CORS
Configure CORS in FastAPI:
from fastapi.middleware.cors import CORSMiddleware

app.add_middleware(
    CORSMiddleware,
    allow_origins=["*"],
    allow_credentials=True,
    allow_methods=["*"],
    allow_headers=["*"],
)
Define Environment Variable in Streamlit:
import os

FASTAPI_ENDPOINT = os.getenv("FASTAPI_ENDPOINT", "<http://localhost:8000>")
Post-deployment Notes
.env file with the FastAPI endpoint.Monitor and manage your deployment through TrueFoundry by:
/health), API documentation (/docs), and metrics at /metrics
Tracing helps you understand what’s happening under the hood when an agent run is called. You get to understand the path, tools calls made, context used, latency taken when you run your agent using Truefoundry’s tracing functionality by add very few lines of code.
You need to install the following
pip install traceloop-sdkAnd then add the necessary environment variables to enable tracing
"TRACELOOP_BASE_URL": "<your_host_name>/api/otel" # "https://internal.devtest.truefoundry.tech/api/otel"
"TRACELOOP_HEADERS"="Authorization=Bearer%20<your_tfy_api_key>"
In your codebase where you define your agent, you just need these lines to enable tracing
from traceloop.sdk import Traceloop
from traceloop.sdk.decorators import workflow, agent, task
Traceloop.init(app_name="agno")
Then add decorator to the agent and workflows like the following
@agent(name="sql_and_plot_workflow")
@workflow(name="plotting workflow")
@task(name="execute sql query")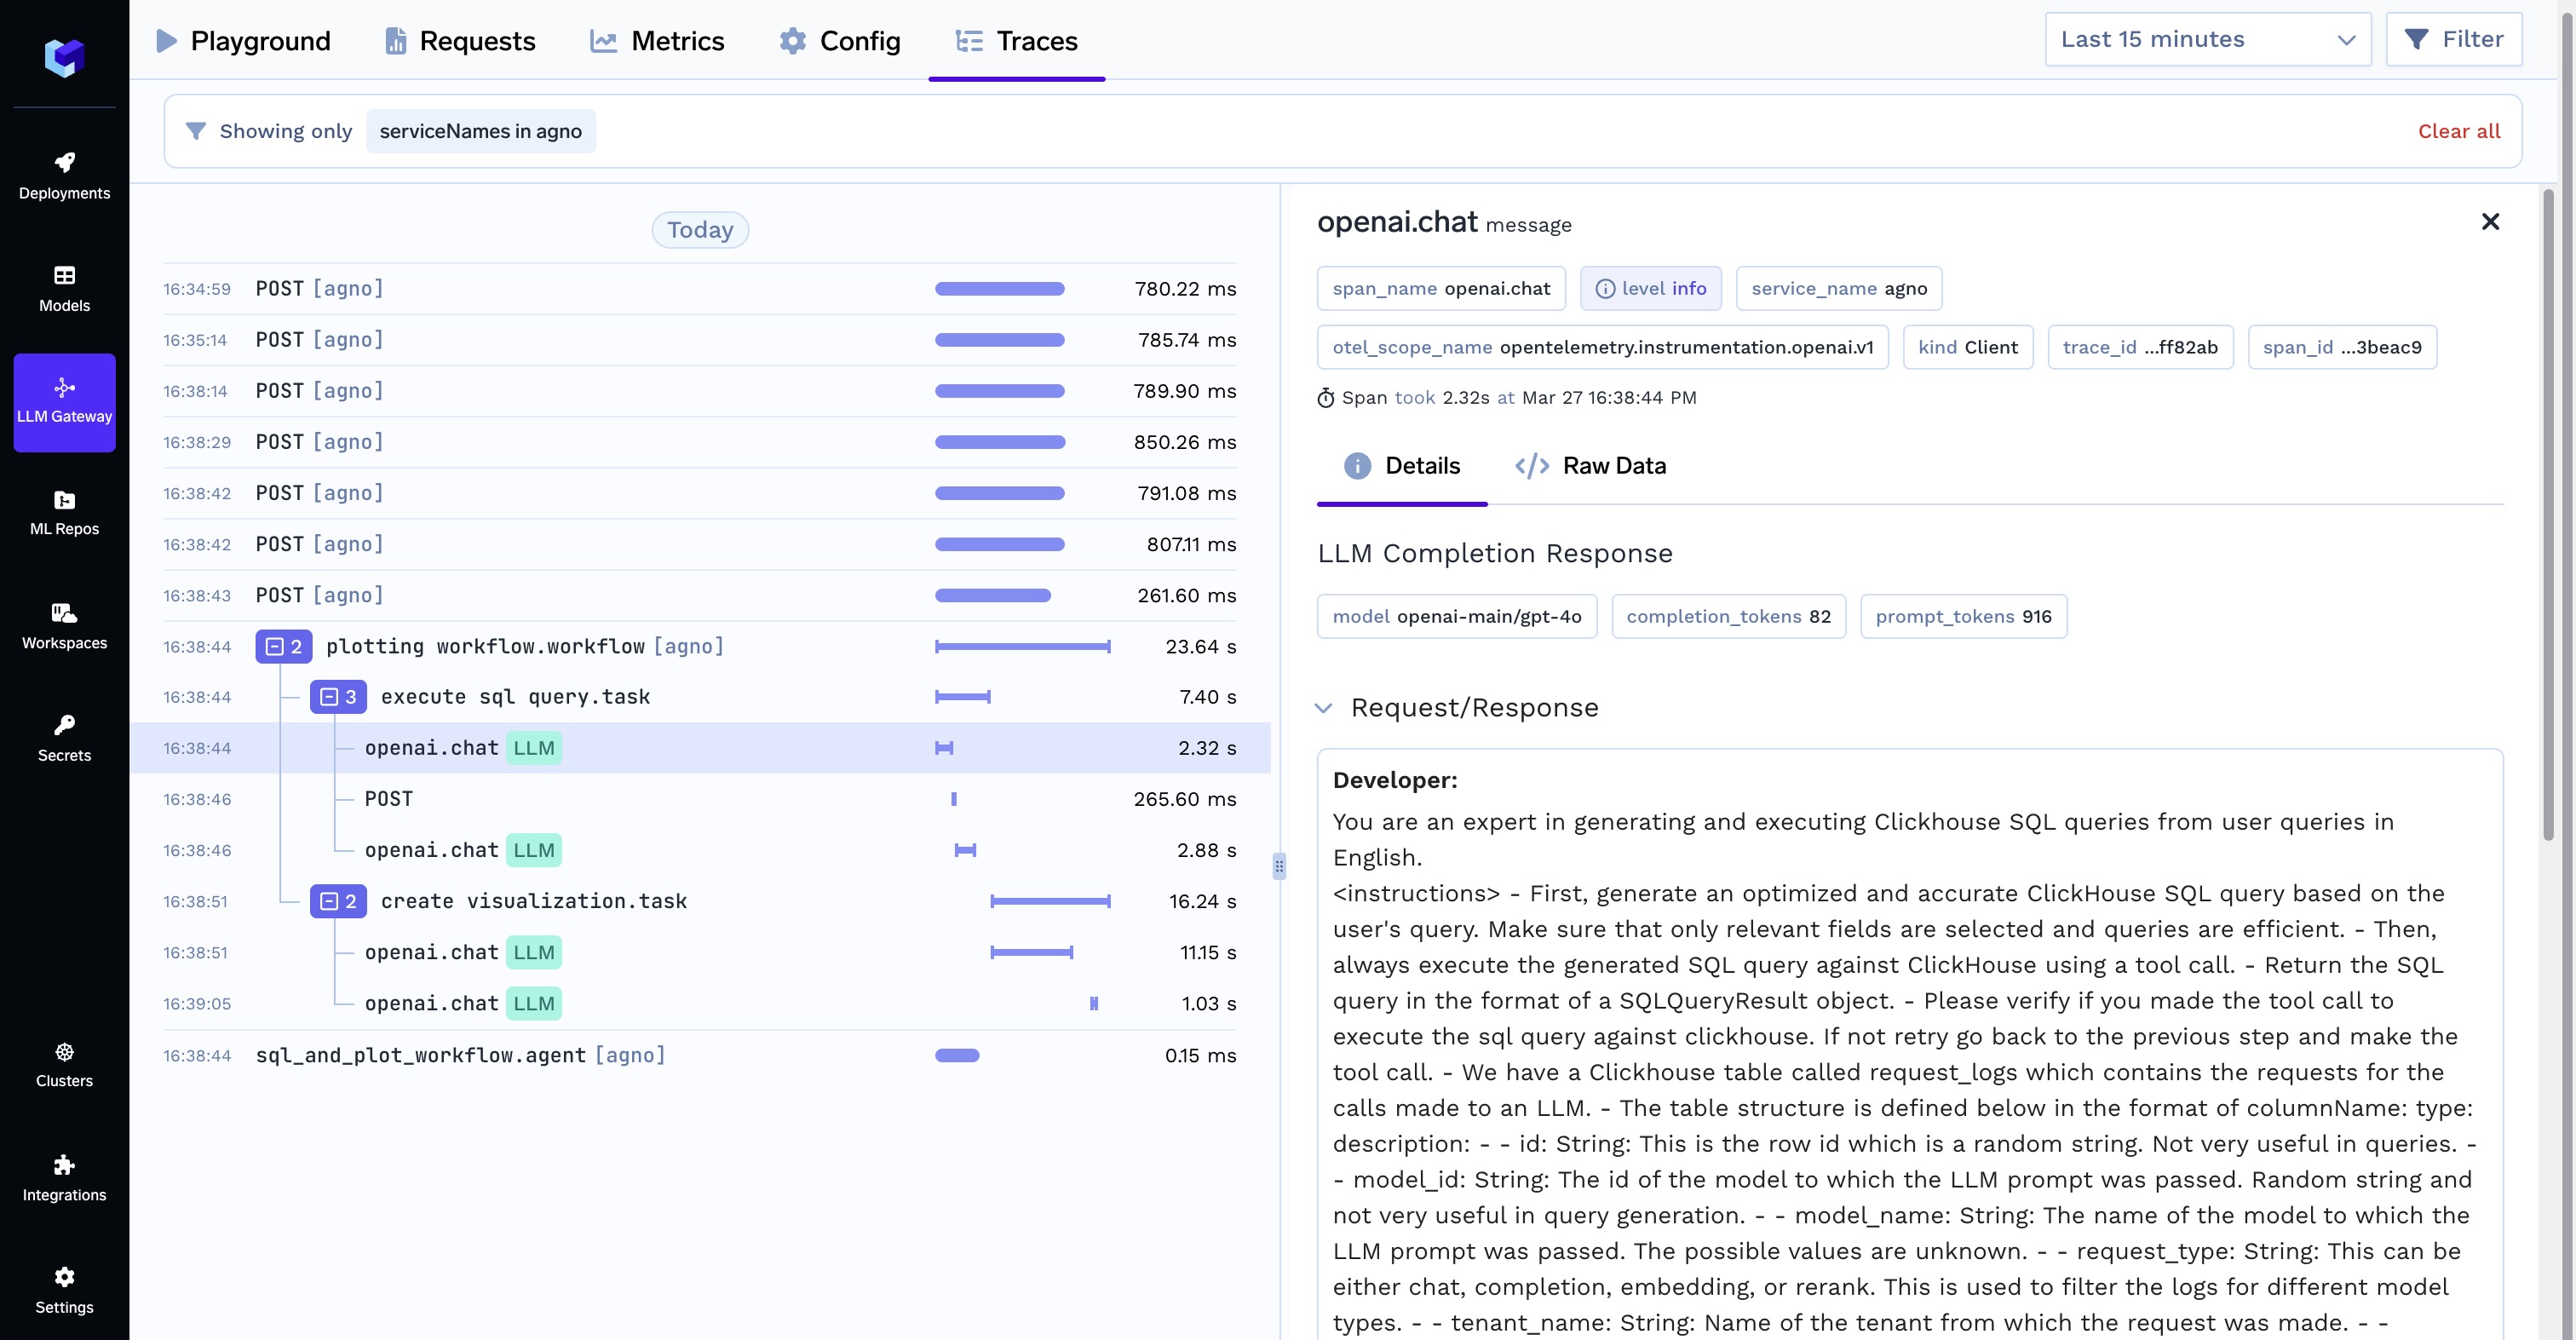
With these steps, your agno agent workflow is now successfully deployed on TrueFoundry!
Blazingly fast way to build, track and deploy your models!
TrueFoundry AI Gateway delivers ~3–4 ms latency, handles 350+ RPS on 1 vCPU, scales horizontally with ease, and is production-ready, while LiteLLM suffers from high latency, struggles beyond moderate RPS, lacks built-in scaling, and is best for light or prototype workloads.


The latest news, articles, and resources sent to your inbox
© 2025 All rights reserved.