

November 5, 2025
|
5 min read

Data version control (DVC) is a powerful tool for managing and versioning large datasets and models in machine learning projects.
DVC is an open-source tool that works with a wide range of storage options, including local disk, network file systems, Amazon S3, Google Cloud Storage, and many others. DVC can be used in conjunction with popular machine learning frameworks like TensorFlow, PyTorch, and scikit-learn.
In addition to tracking changes to data and models, DVC can also help users manage dependencies between different components of a machine learning project, such as code, data, and models. By keeping track of these dependencies, DVC makes it easier to reproduce machine learning experiments and to share projects with others.
Version control in Machine Learning is a harder task as compared to Software Engineering because of the following reasons:
DVC solves these problems by providing a simple and efficient way to version control both data and models in machine learning projects. DVC enables you to version control not just the code, but also the data and models, and track the relationships between them. With DVC, you can easily reproduce previous experiments, collaborate with team members, and automate workflows to streamline the development process.
To get started with DVC, you need to install and set it up on your local machine. In this section, we'll provide step-by-step instructions on how to do this, including how to configure DVC to work with different cloud storage services and how to create a new DVC project.
dvc init
This will create a new DVC project in your current directory.
dvc remote add -d <remote-name> <storage-url>
For example, if you want to add an Amazon S3 remote named "my-s3-remote", you can run the following command:
dvc remote add -d my-s3-remote s3://my-bucket-name
This will add a new remote to your DVC project that is configured to work with Amazon S3.
dvc add <path-to-data-file>
This will add the data file to your DVC project and create a corresponding DVC file that tracks changes to the data.
dvc push
This will push any changes you have made to your data or models to the remote storage.
DVC provides a number of useful commands for managing and versioning machine learning projects. Here is a list of some of the most commonly used DVC commands:
dvc init: Initializes a new DVC project in the current directory.dvc add <path-to-file>: Adds a file to DVC and creates a corresponding DVC file to track changes to the file.dvc run: Runs a command or script with DVC tracking enabled, so that any inputs and outputs are tracked by DVC.dvc repro: Reproduces a DVC-tracked command or script, ensuring that all dependencies are up-to-date.dvc push: Pushes all data files and model files to remote storage, such as AWS S3 or Google Cloud Storage.dvc pull: Pulls all data files and model files from remote storage to the local machine.dvc status: Shows the status of tracked files, including whether they have been modified, added, or deleted.dvc log: Shows a list of all versions of a file, along with their corresponding commit messages and other metadata.One of the most significant benefits of using DVC is its ability to reproduce machine learning experiments. With DVC, you can define and track the dependencies between your code, data, and models, and use the dvc repro command to reproduce previous experiments.
Example Workflow:
Sure, here's an example workflow for a sklearn iris dataset using a .yaml file:
dvc init.data directory in your project folder to store the dataset, and download the sklearn iris dataset into this directory.dvc add data/iris.csv..yaml file to define the pipeline. For example, iris.yaml. This file will contain the commands for preprocessing, training, and evaluating the model..yaml file using the DVC commands. For example:stages:
preprocess:
cmd: python preprocess.py data/iris.csv data/preprocessed.csv
deps:
- data/iris.csv
outs:
- data/preprocessed.csv
train:
cmd: python train.py data/preprocessed.csv models/model.pkl
deps:
- data/preprocessed.csv
outs:
- models/model.pkl
evaluate:
cmd: python evaluate.py models/model.pkl data/iris.csv
deps:
- models/model.pkl
- data/iris.csv
dvc repro iris.yaml.By defining your pipeline in a .yaml file and using the dvc repro command, you can easily reproduce your experiments, track the versions of your data and models, and collaborate with team members on your machine learning project.
Here is an example workflow:
dvc remote add -d s3remote s3://your-s3-bucket-name/path/to/models
dvc pull -r s3remote path/to/models/model.pkl
scp path/to/models/model.pkl user@target-remote-server:/path/to/models/
# Load the model
import pickle
with open('/path/to/models/model.pkl', 'rb') as f:
    model = pickle.load(f)

# Make predictions
X_test = [[5.1, 3.5, 1.4, 0.2], [7.7, 3.0, 6.1, 2.3], [6.0, 3.0, 4.8, 1.8]]
y_pred = model.predict(X_test)
print(y_pred)
This workflow assumes that you have set up the necessary credentials and endpoint information for the S3 server, and that you have access to both the local and target remote servers. You can modify the workflow based on your specific needs and setup.
TrueFoundry integrates seamlessly with DVC Model Registry to allow you to deploy models logged in DVC to your Kubernetes Cluster using TrueFoundry.
📌
Aside from using DVC for Model management and Experimentation tracking, you can also use Truefoundry's Experimentation Tracking MLFoundy.
Step 1 - Install and setup:
# Install DVC and S3 support
pip install dvc dvc-s3

# Initialize Git in the local directory
git init

# Initilize DVC in the local directory
dvc init

# Set DVC remote storage as your bucket
dvc remote add s3://<your_bucket_name>
Note: You will have to configure your s3 cli for this to work
import dvc
x
pip install -U "servicefoundry"
sfy login
Step 2 - Train and log the model:
We will train our ML model and save it as a joblib file
Then we will add the model and the evaluation metrics using **`dvc add`**
Then we will push our joblib file to dvc via **`dvc push`**
from sklearn.datasets import load_iris
from sklearn.model_selection import train_test_split
from sklearn.linear_model import LogisticRegression
from sklearn.metrics import classification_report
import joblib
import os

# Load and preprocess the data
X, y = load_iris(as_frame=True, return_X_y=True)
X = X.rename(columns={
        "sepal length (cm)": "sepal_length",
        "sepal width (cm)": "sepal_width",
        "petal length (cm)": "petal_length",
        "petal width (cm)": "petal_width",
})

X_train, X_test, y_train, y_test = train_test_split(
    X, y, test_size=0.2, random_state=42, stratify=y
)

# Initialize the model
clf = LogisticRegression(solver="liblinear")

# Fit the model
clf.fit(X_train, y_train)

# Evaluate the model
preds = clf.predict(X_test)

# Save the model using joblib and DVC
joblib.dump(clf, "model.joblib")
os.system("dvc add model.joblib")

# Log the evaluation metrics
report = classification_report(y_test, preds, output_dict=True)
with open("classification_report.txt", "w") as f:
    f.write(str(report))

# Push the model and evaluation metrics to the remote storage
os.system("dvc push")
Step 3 - Create an inference application and dependecy file:
We will have to create two files to deploy on truefoundry, a app.py file that contains our application code, and a requirements.txt file that contains our dependencies.
.
├── app.py
├── deploy.py
└── requirements.txt
import os
import joblib
import pandas as pd
from fastapi import FastAPI
# Retrieve the model from S3 using DVC
os.system("dvc pull model.joblib.dvc")
# Load the model
model = joblib.load("model.joblib")
# Load the model
app = FastAPI()
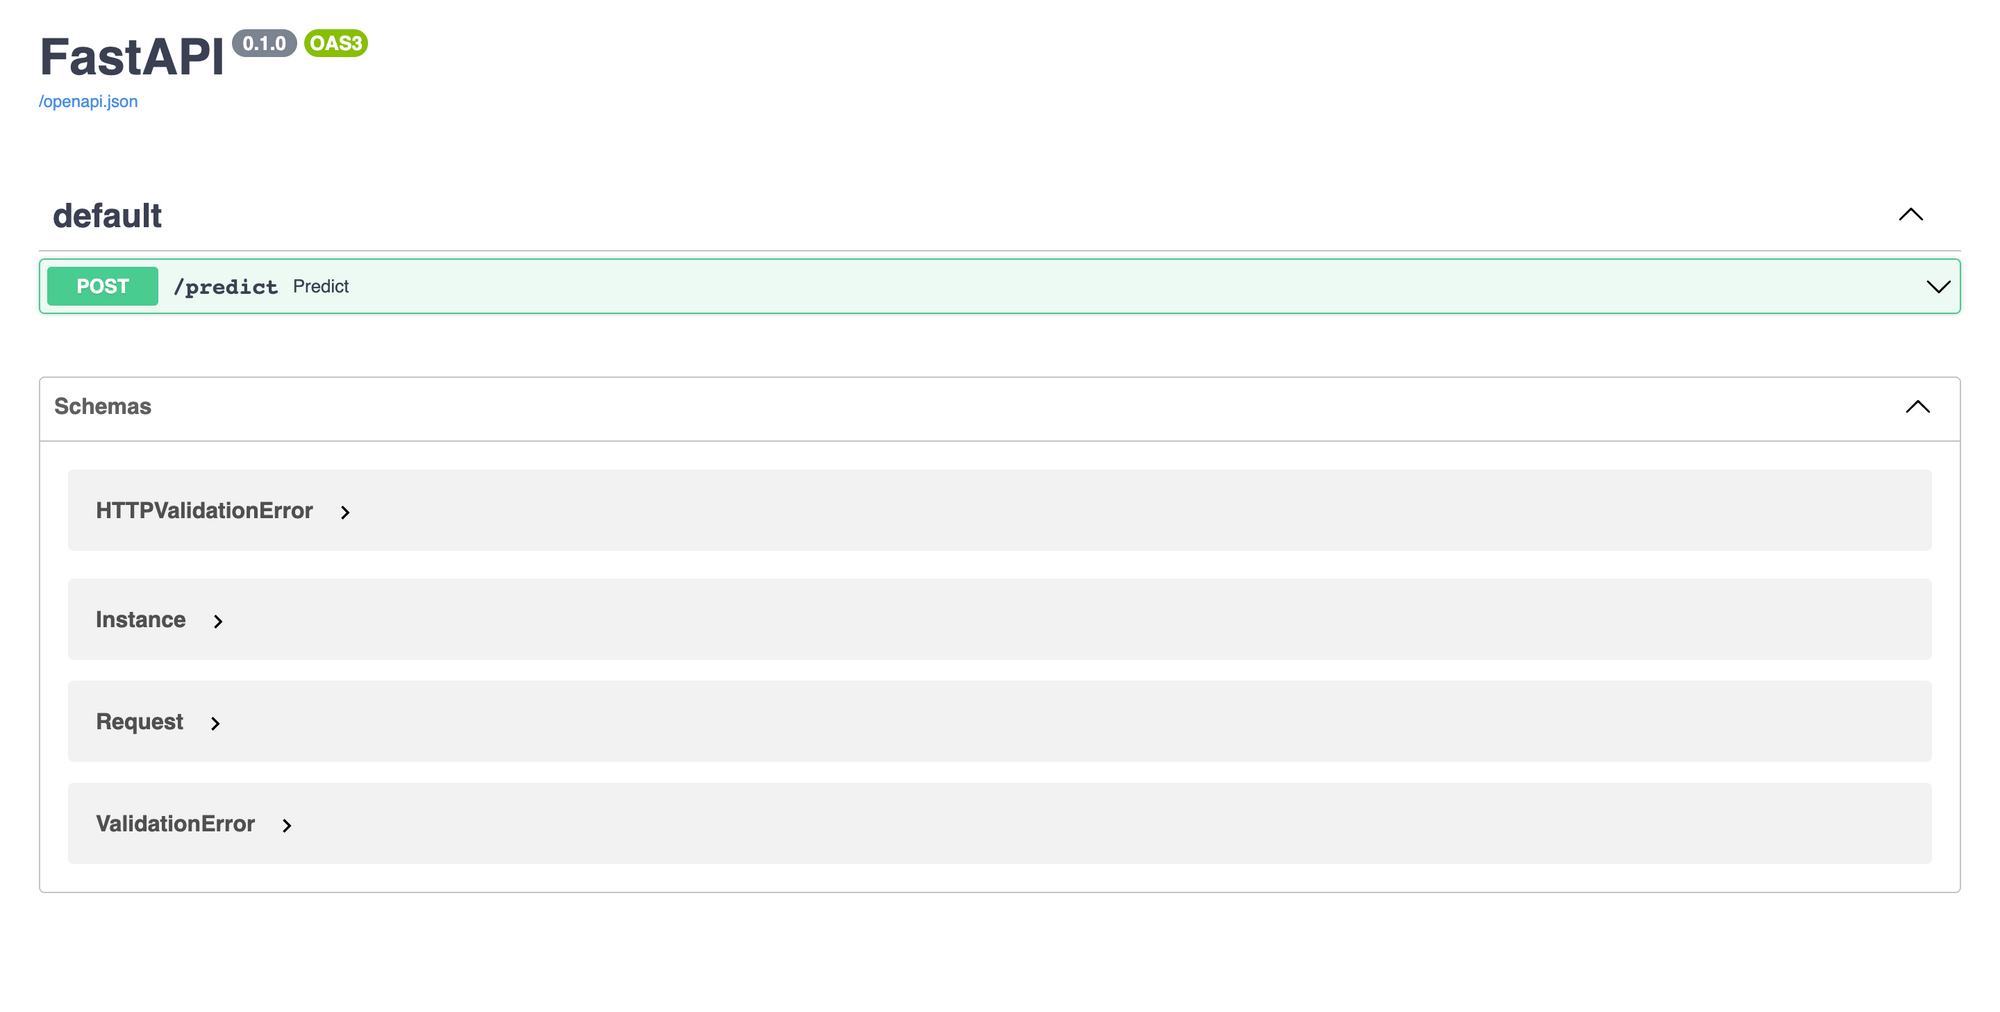
@app.post("/predict")
def predict(
sepal_length: float, sepal_width: float, petal_length: float, petal_width: float
):
data = dict(
sepal_length=sepal_length,
sepal_width=sepal_width,
petal_length=petal_length,
petal_width=petal_width,
)
prediction = int(model.predict(pd.DataFrame([data]))[0])
return {"prediction": prediction}
fastapi
pandas
joblib
dvc
Step 4 - Use the truefoundry's python sdk and configure the deployment
import argparse
import logging
from servicefoundry import Build, PythonBuild, Service, Resources, Port

# Setup the logger
logging.basicConfig(level=logging.INFO)

# Setup the argument parser
parser = argparse.ArgumentParser()
parser.add_argument("--workspace_fqn", required=True, type=str)
args = parser.parse_args()

service = Service(
    name="fastapi",
    image=Build(
        build_spec=PythonBuild(
            command="uvicorn app:app --port 8000 --host 0.0.0.0",
            requirements_path="requirements.txt",
        )
    ),
    ports=[
        Port(
            port=8000,
            host="ml-deploy-aditya-ws-8000.demo.truefoundry.com",
        )
    ],
    resources=Resources(
        cpu_request=0.25,
        cpu_limit=0.5,
        memory_request=200,
        memory_limit=400,
        ephemeral_storage_request=200,
        ephemeral_storage_limit=400,
    ),
)
service.deploy(workspace_fqn=args.workspace_fqn)
Step 5 - Deploy your Service via Truefoundry
Run the following command and pass in your
python deploy.py --workspace_fqn your_workspace_fqn
And voila!!! In the logs you can find your deployed service's dashboard. And then on top right corner you will find your deployed applications endpoint.
TrueFoundry is a ML Deployment PaaS over Kubernetes to speed up developer workflows while allowing them full flexibility in testing and deploying models while ensuring full security and control for the Infra team. Through our platform, we enable Machine learning Teams to deploy and monitor models in 15 minutes with 100% reliability, scalability, and the ability to roll back in seconds - allowing them to save cost and release Models to production faster, enabling real business value realisation.
Blazingly fast way to build, track and deploy your models!
TrueFoundry AI Gateway delivers ~3–4 ms latency, handles 350+ RPS on 1 vCPU, scales horizontally with ease, and is production-ready, while LiteLLM suffers from high latency, struggles beyond moderate RPS, lacks built-in scaling, and is best for light or prototype workloads.


The latest news, articles, and resources sent to your inbox
© 2025 All rights reserved.