Configure SAML v2 for Azure
This documentation will guide you in configuring SAML v2 IdP for Azure. In this case, TrueFoundry will act as Service Provider (SP) to Azure (IdP).Create an Application in Azure
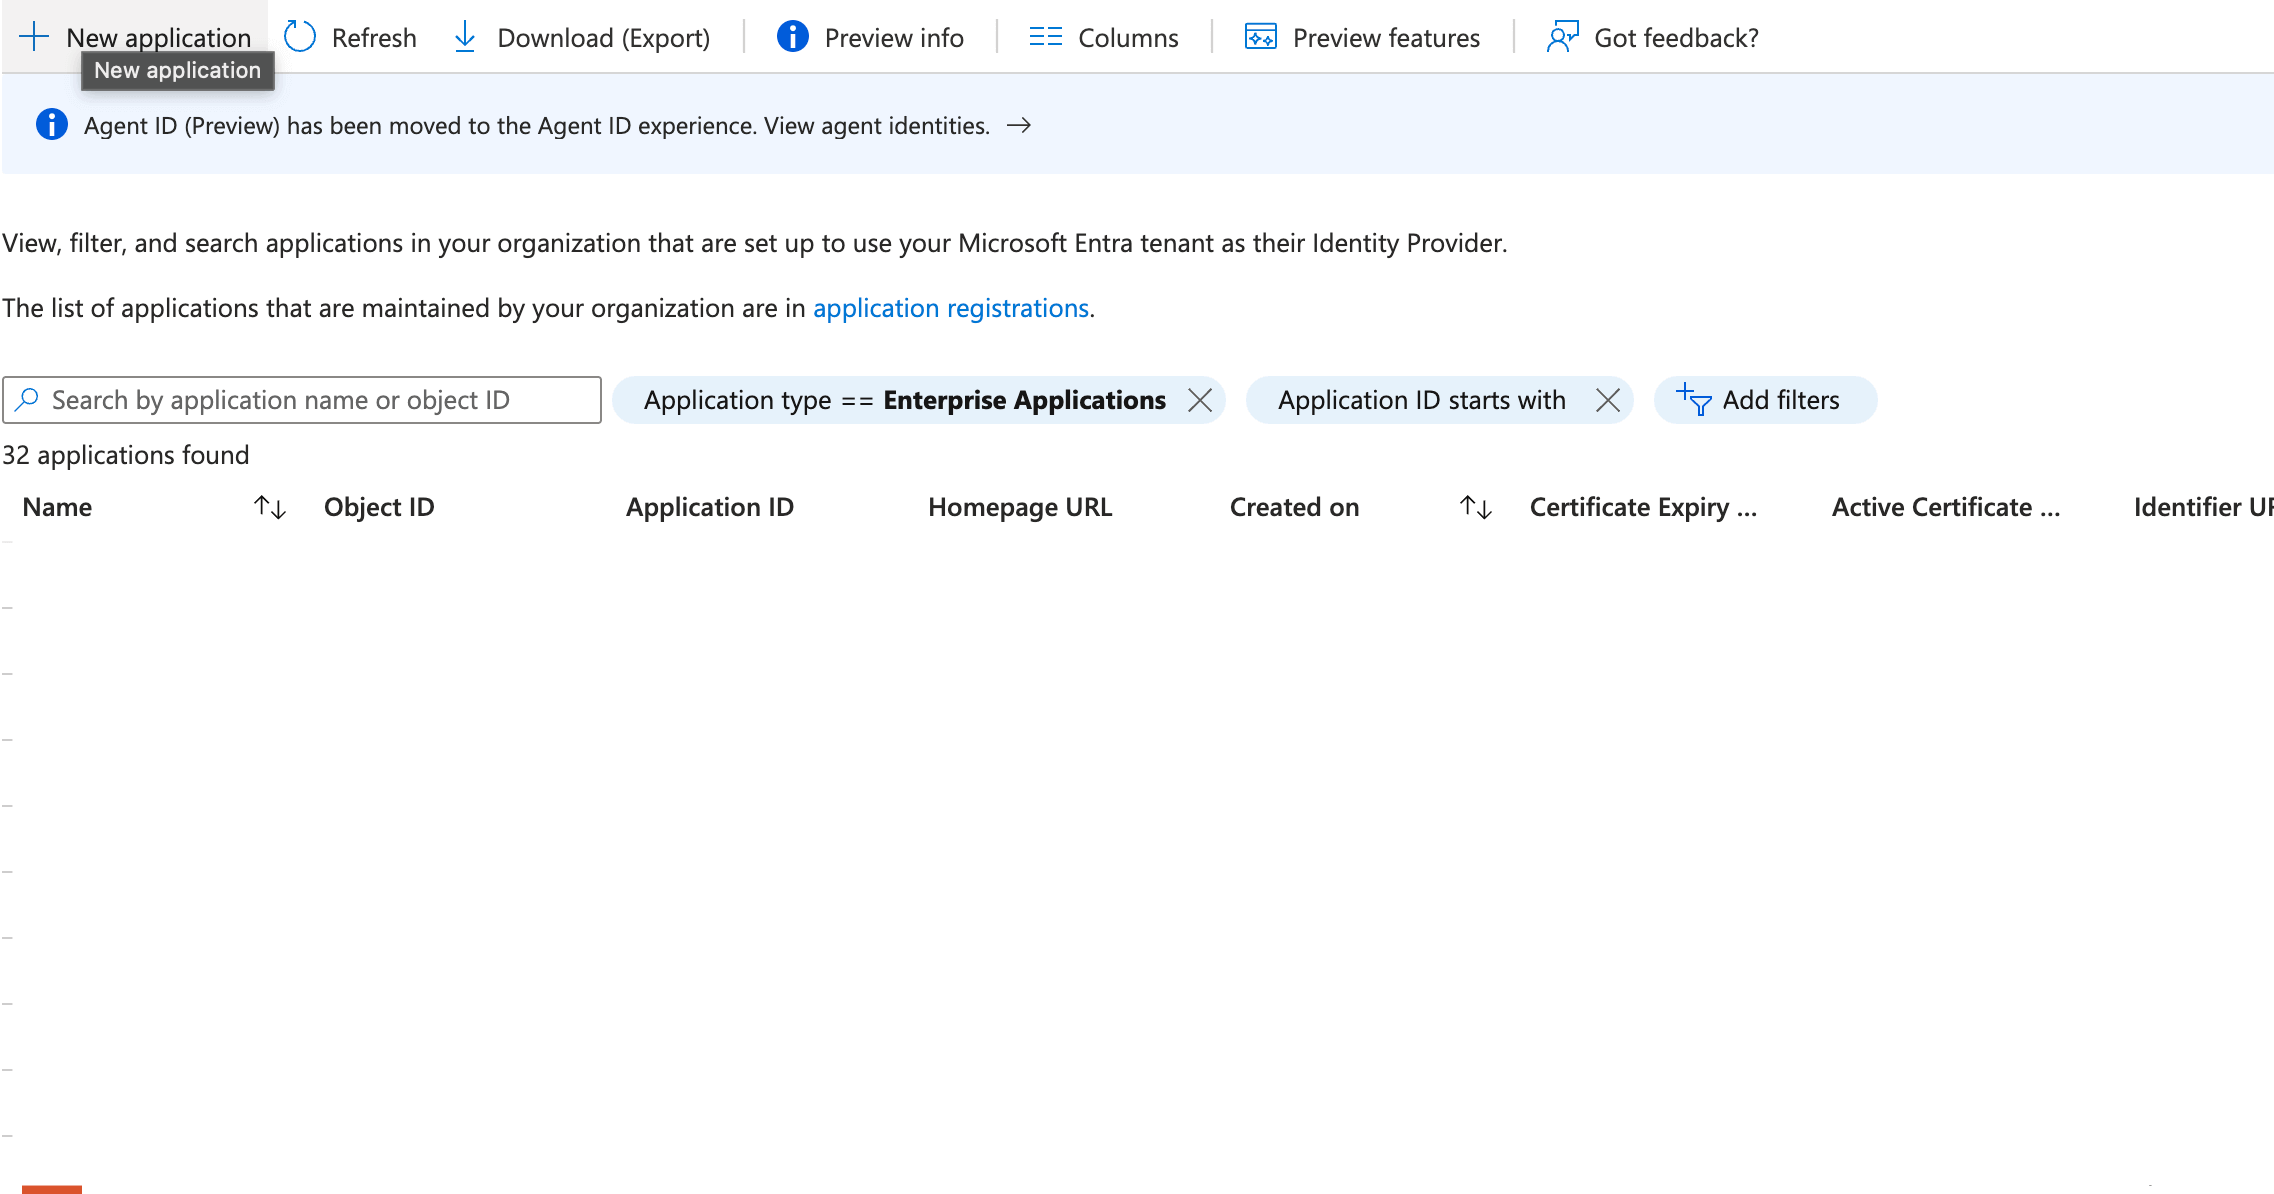
- Log in into your Azure Portal navigate to
Enterprise applications. - At the top of the screen click on
New Application.
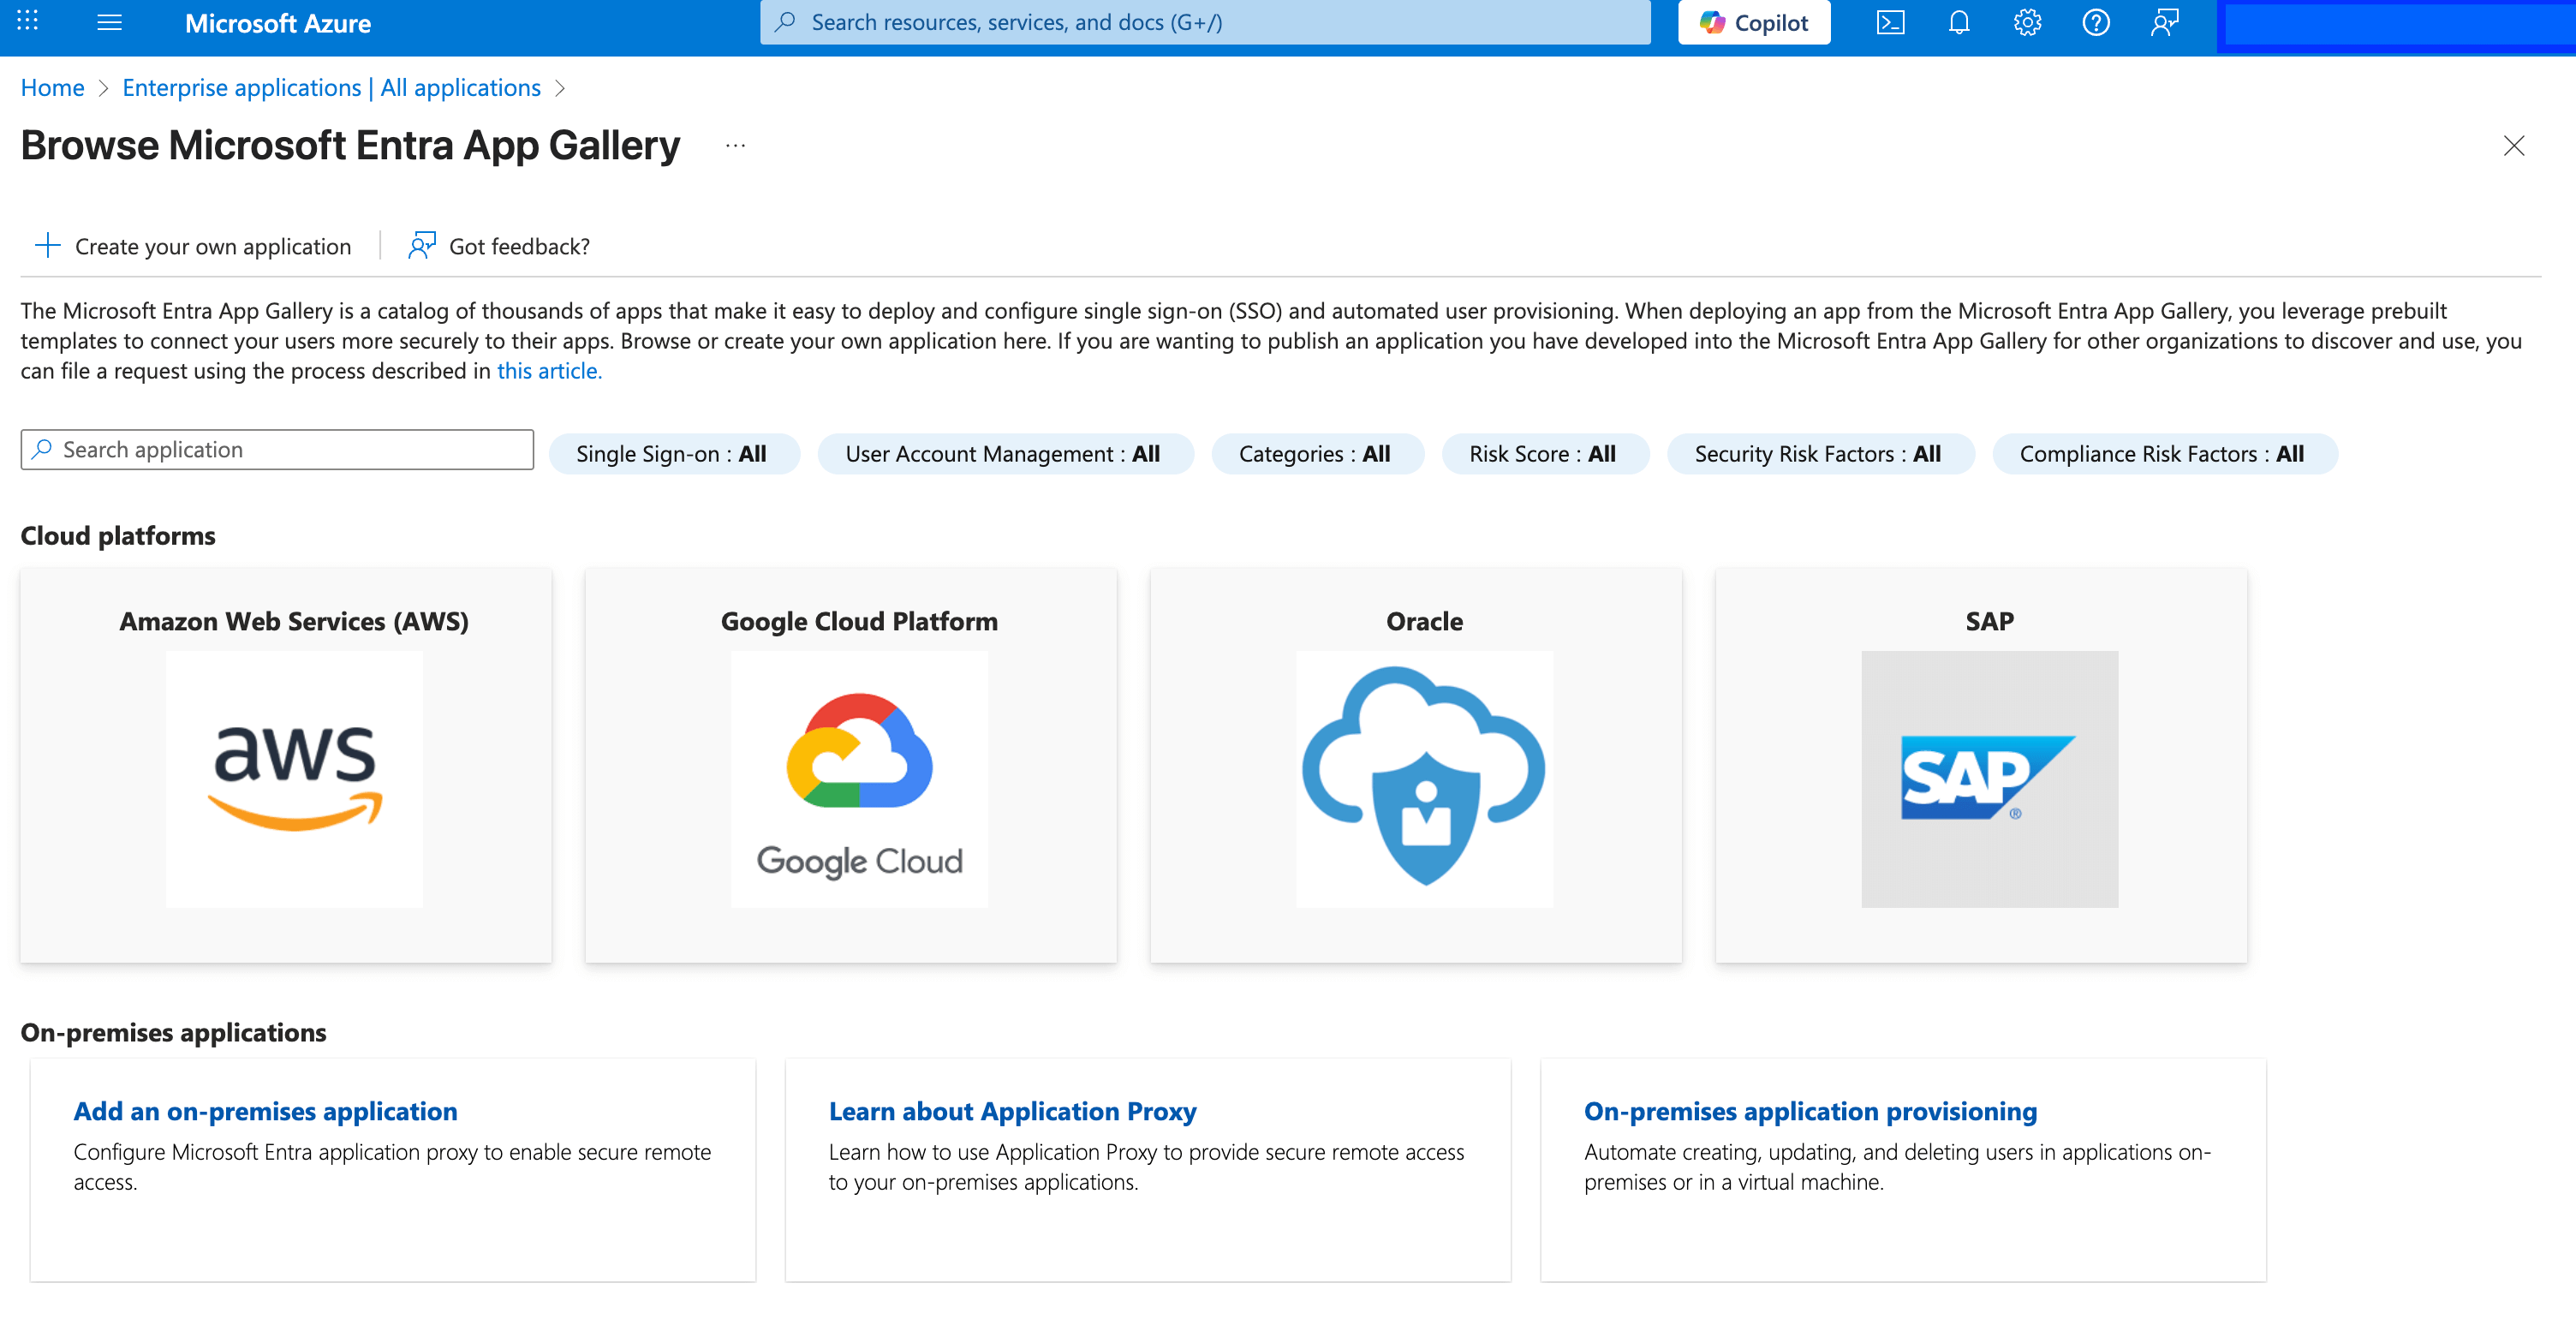
- At
Browse Microsoft Entra App Gallerypage click onCreate your own application
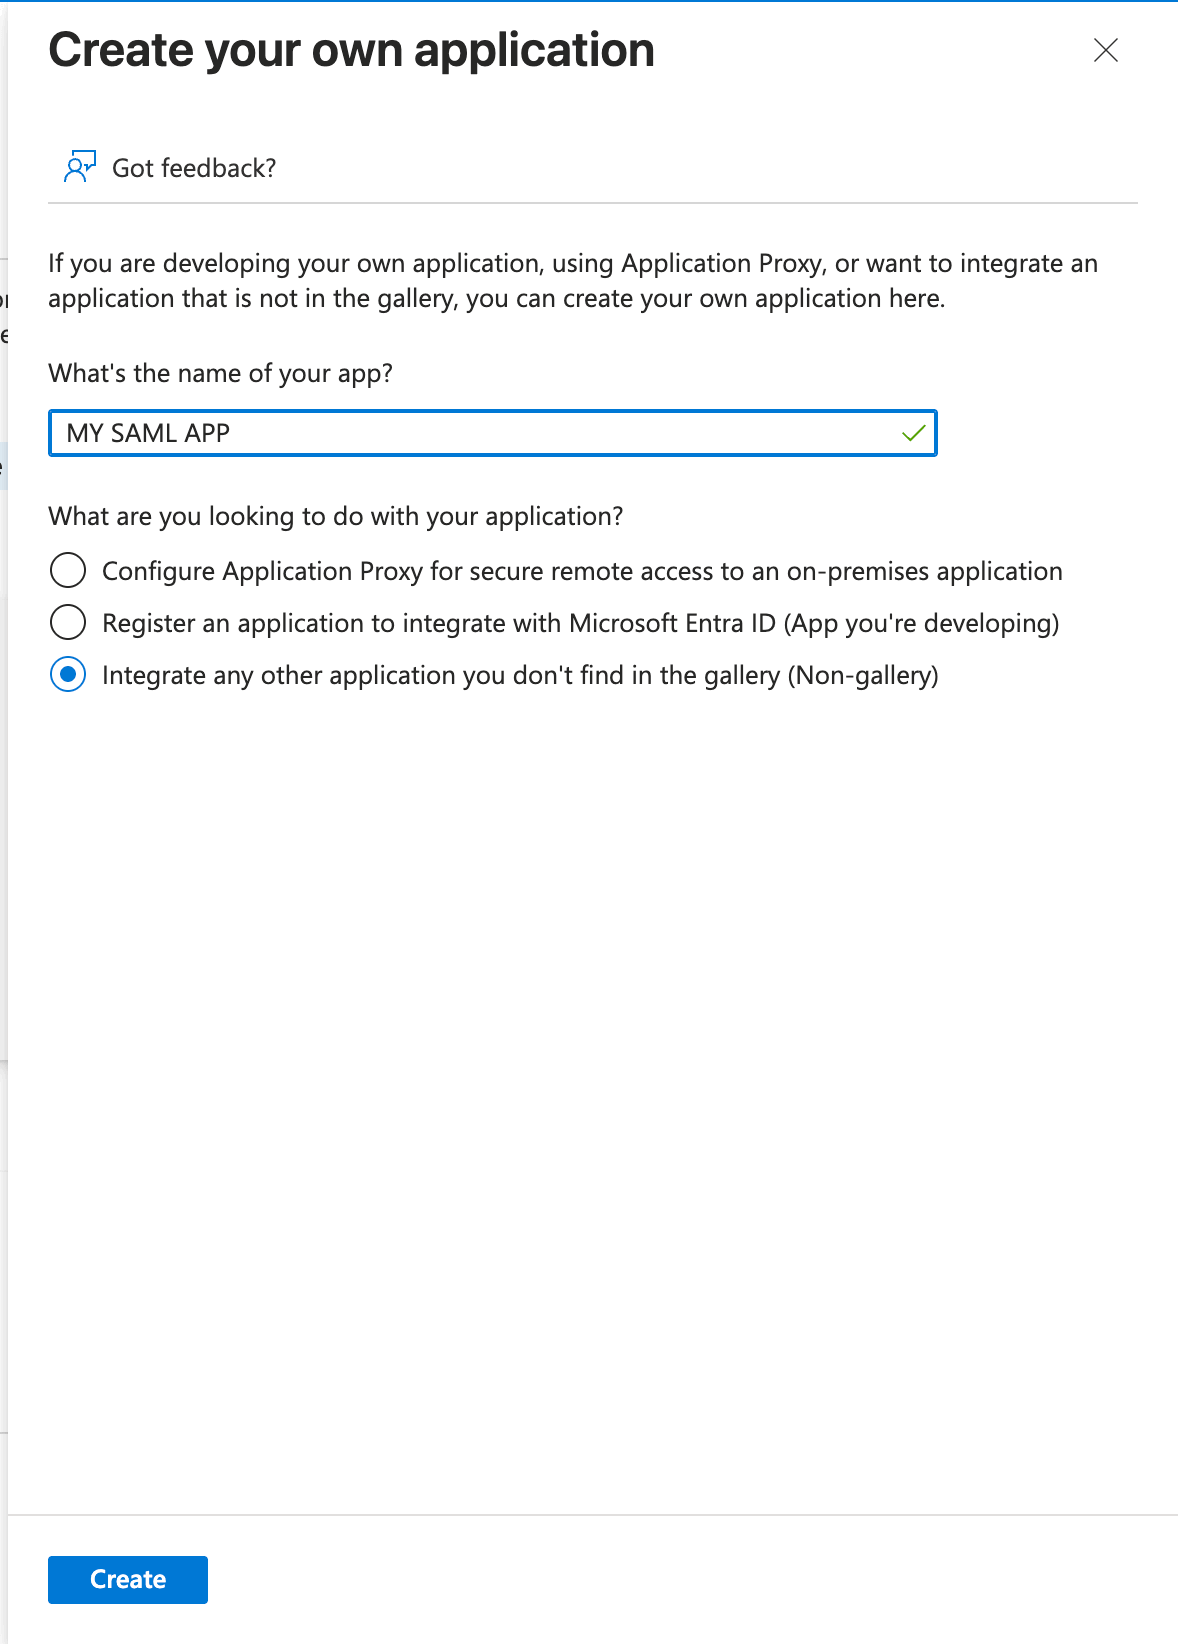
- Enter Application name and create application
In
What are you looking to do with your application?chooseIntegrate any other application you don't find in the gallery (Non-gallery)
Configure Your Azure Application
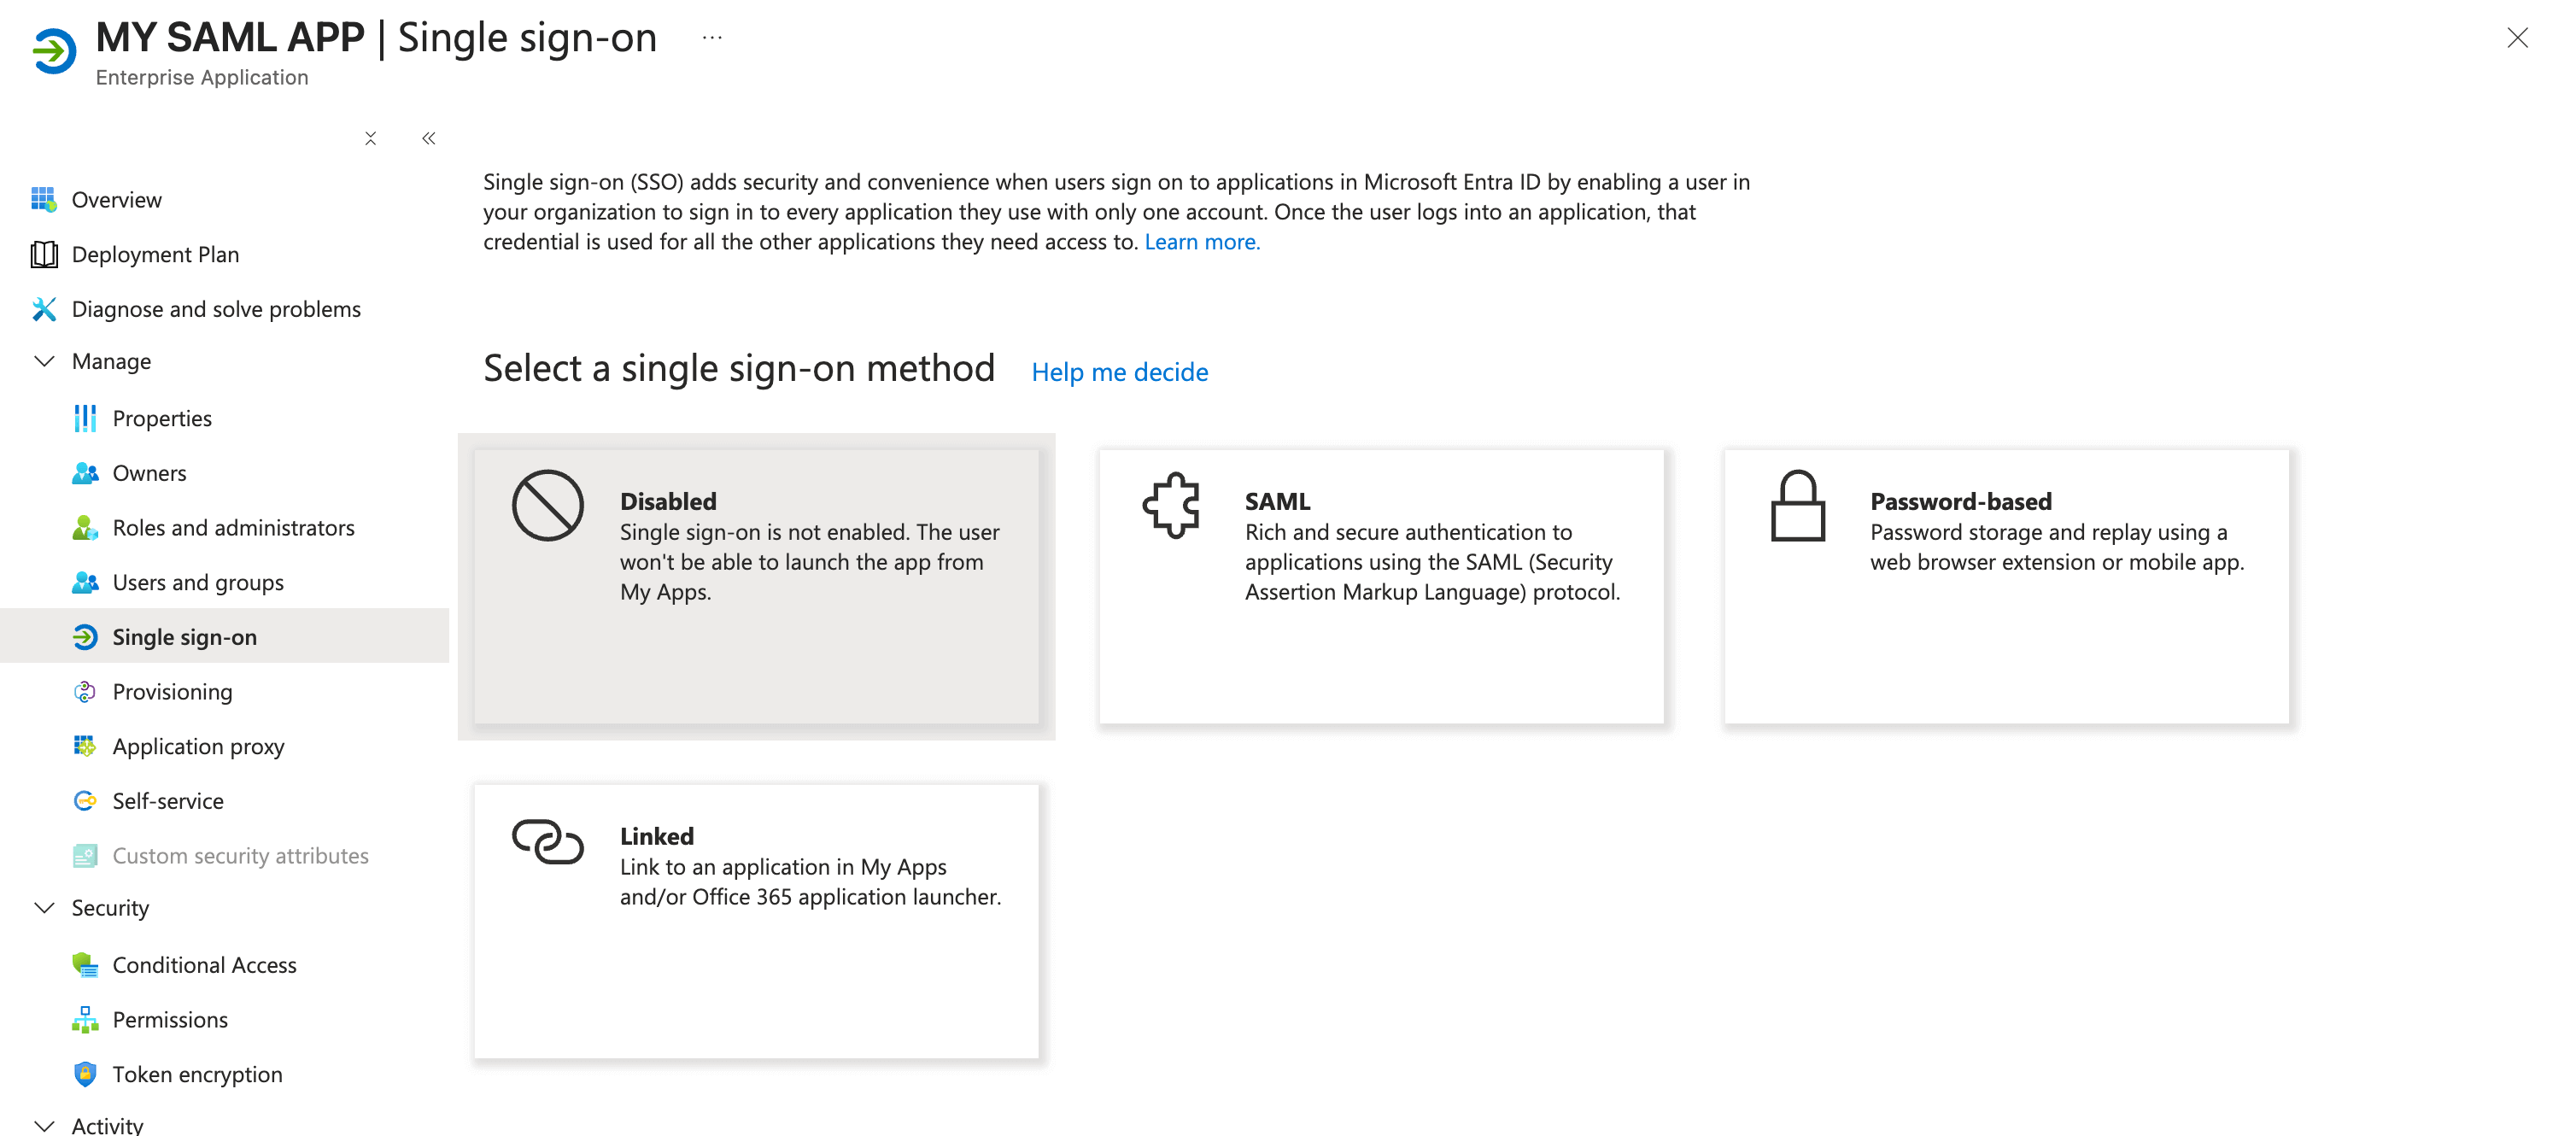
- In application go to
Single Sign onand choose SAML
- Edit
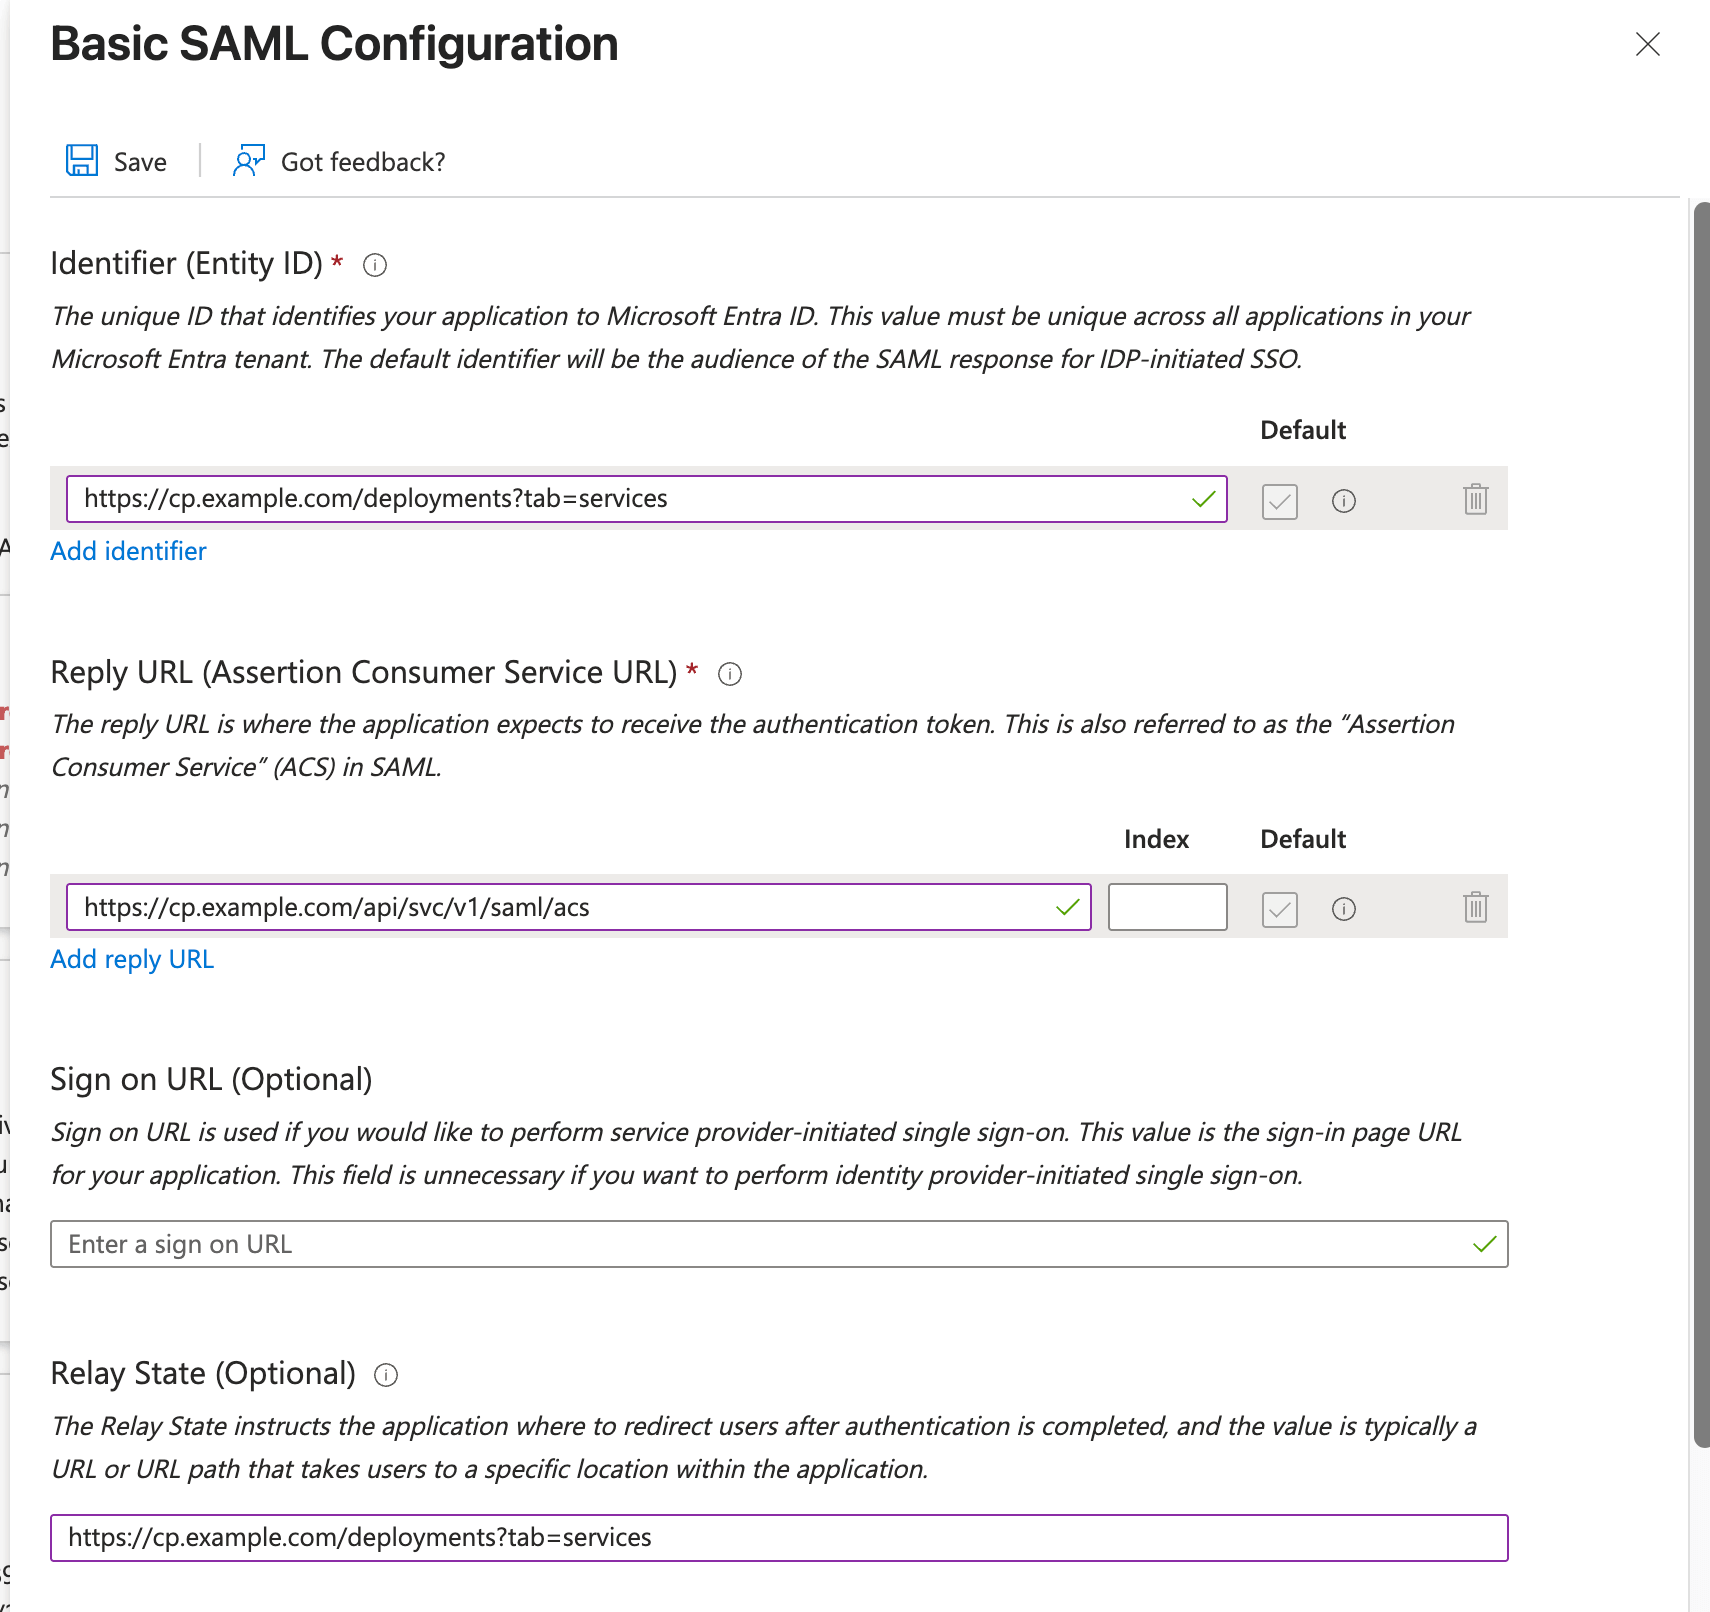
Basic SAML Configuration
- Identifier (Entity ID): This is unique ID that identifies your application to Microsoft Entra ID. This is generally control plane URL.
- Reply URL (Assertion Consumer Service URL): This is ACS endpoint which can be obtained from truefoundry.
- Relay State: This is endpoint where user will be redirected after being authenticated. This is generally control plane URL.
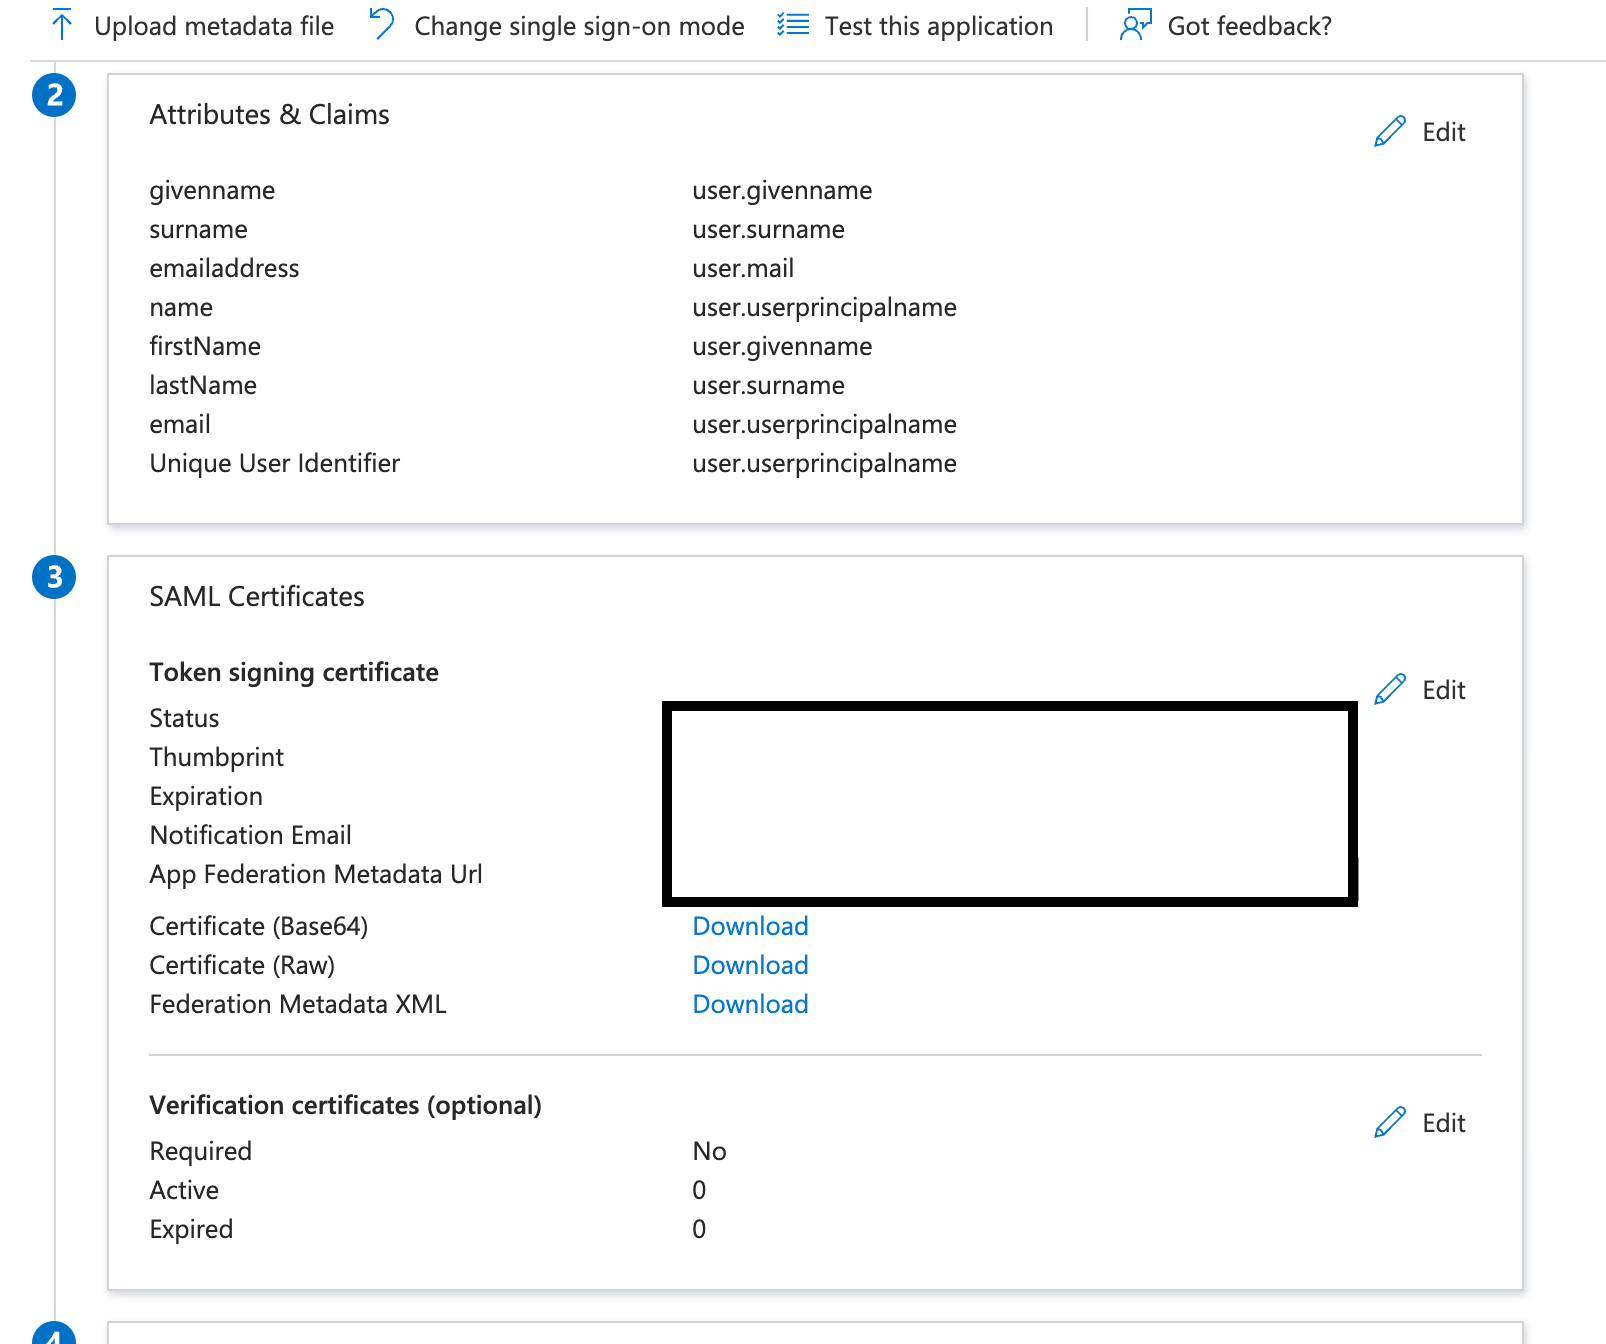
- Attributes & Claims:
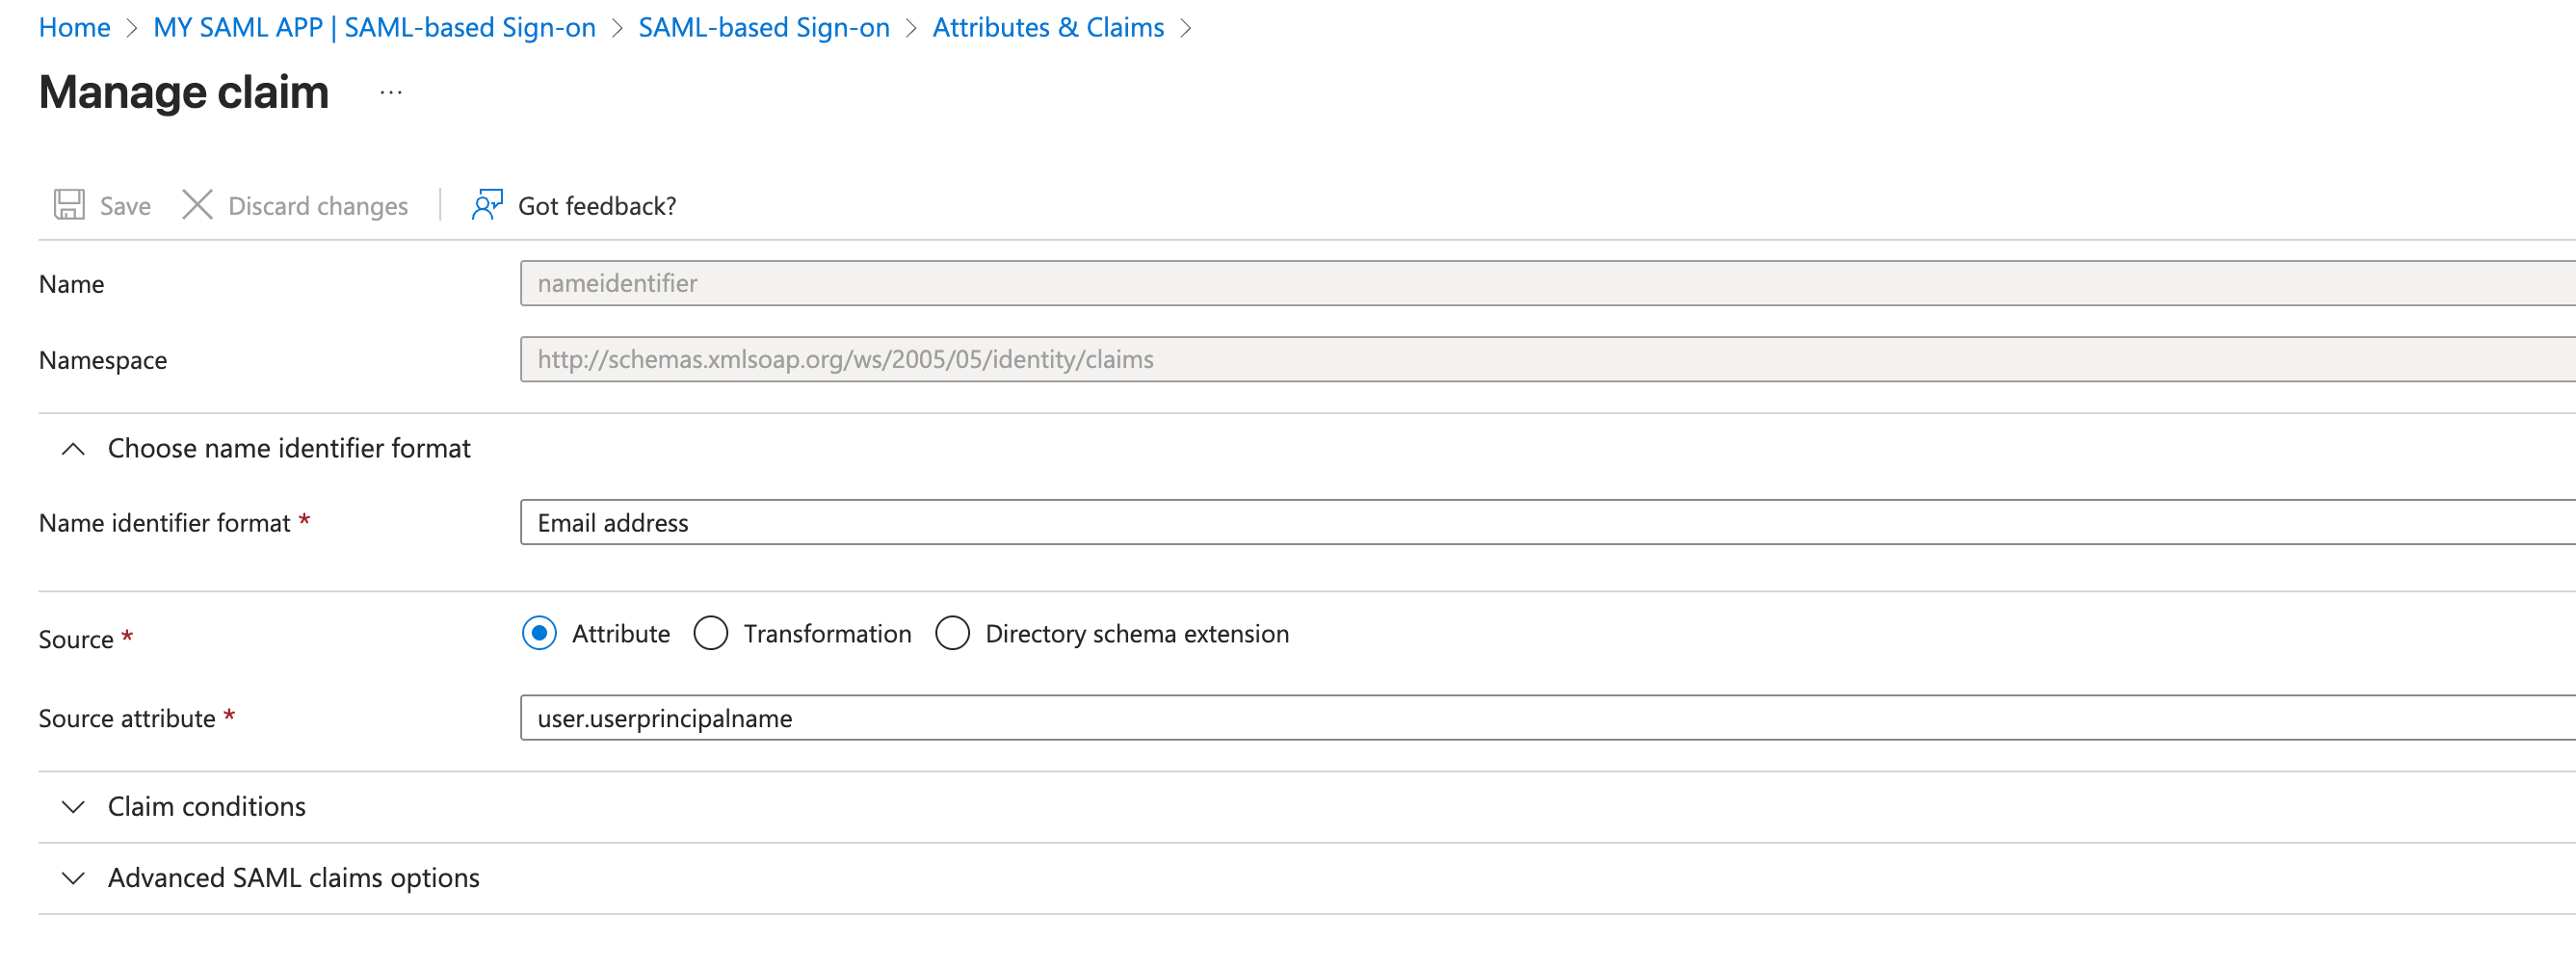
- Add Required Claim
click and on Claim name
Unique User Identifierset Name identifier format asEmail addressand Source attribute asuser.userprincipalname
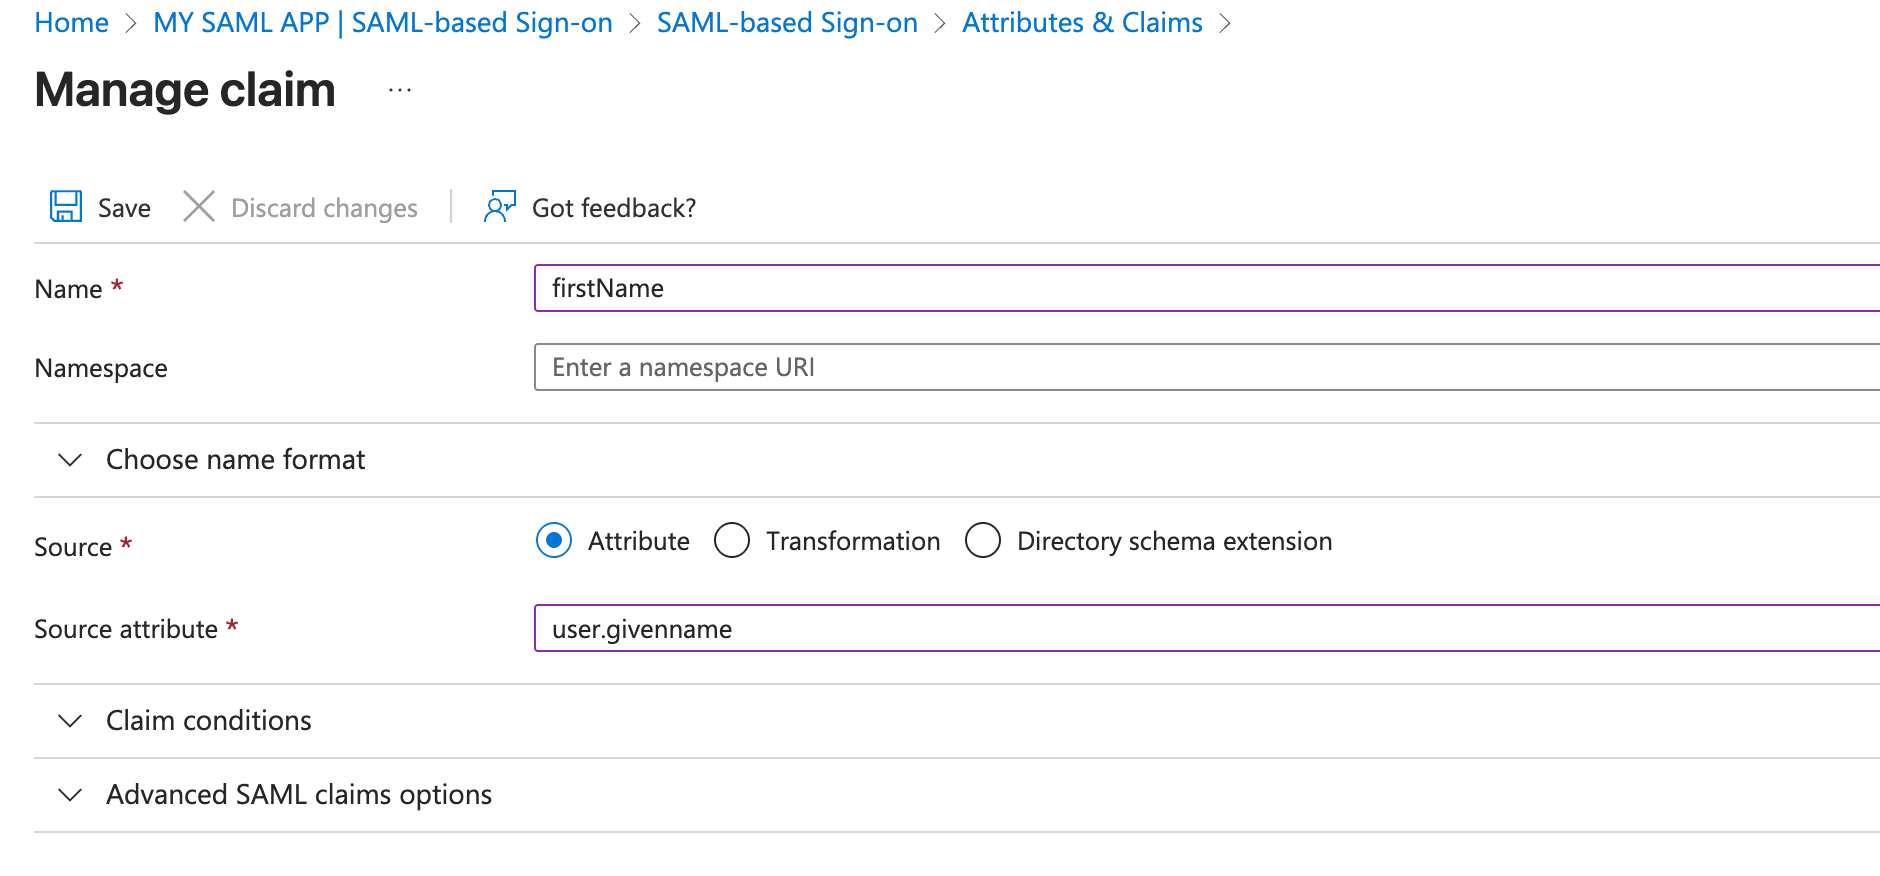
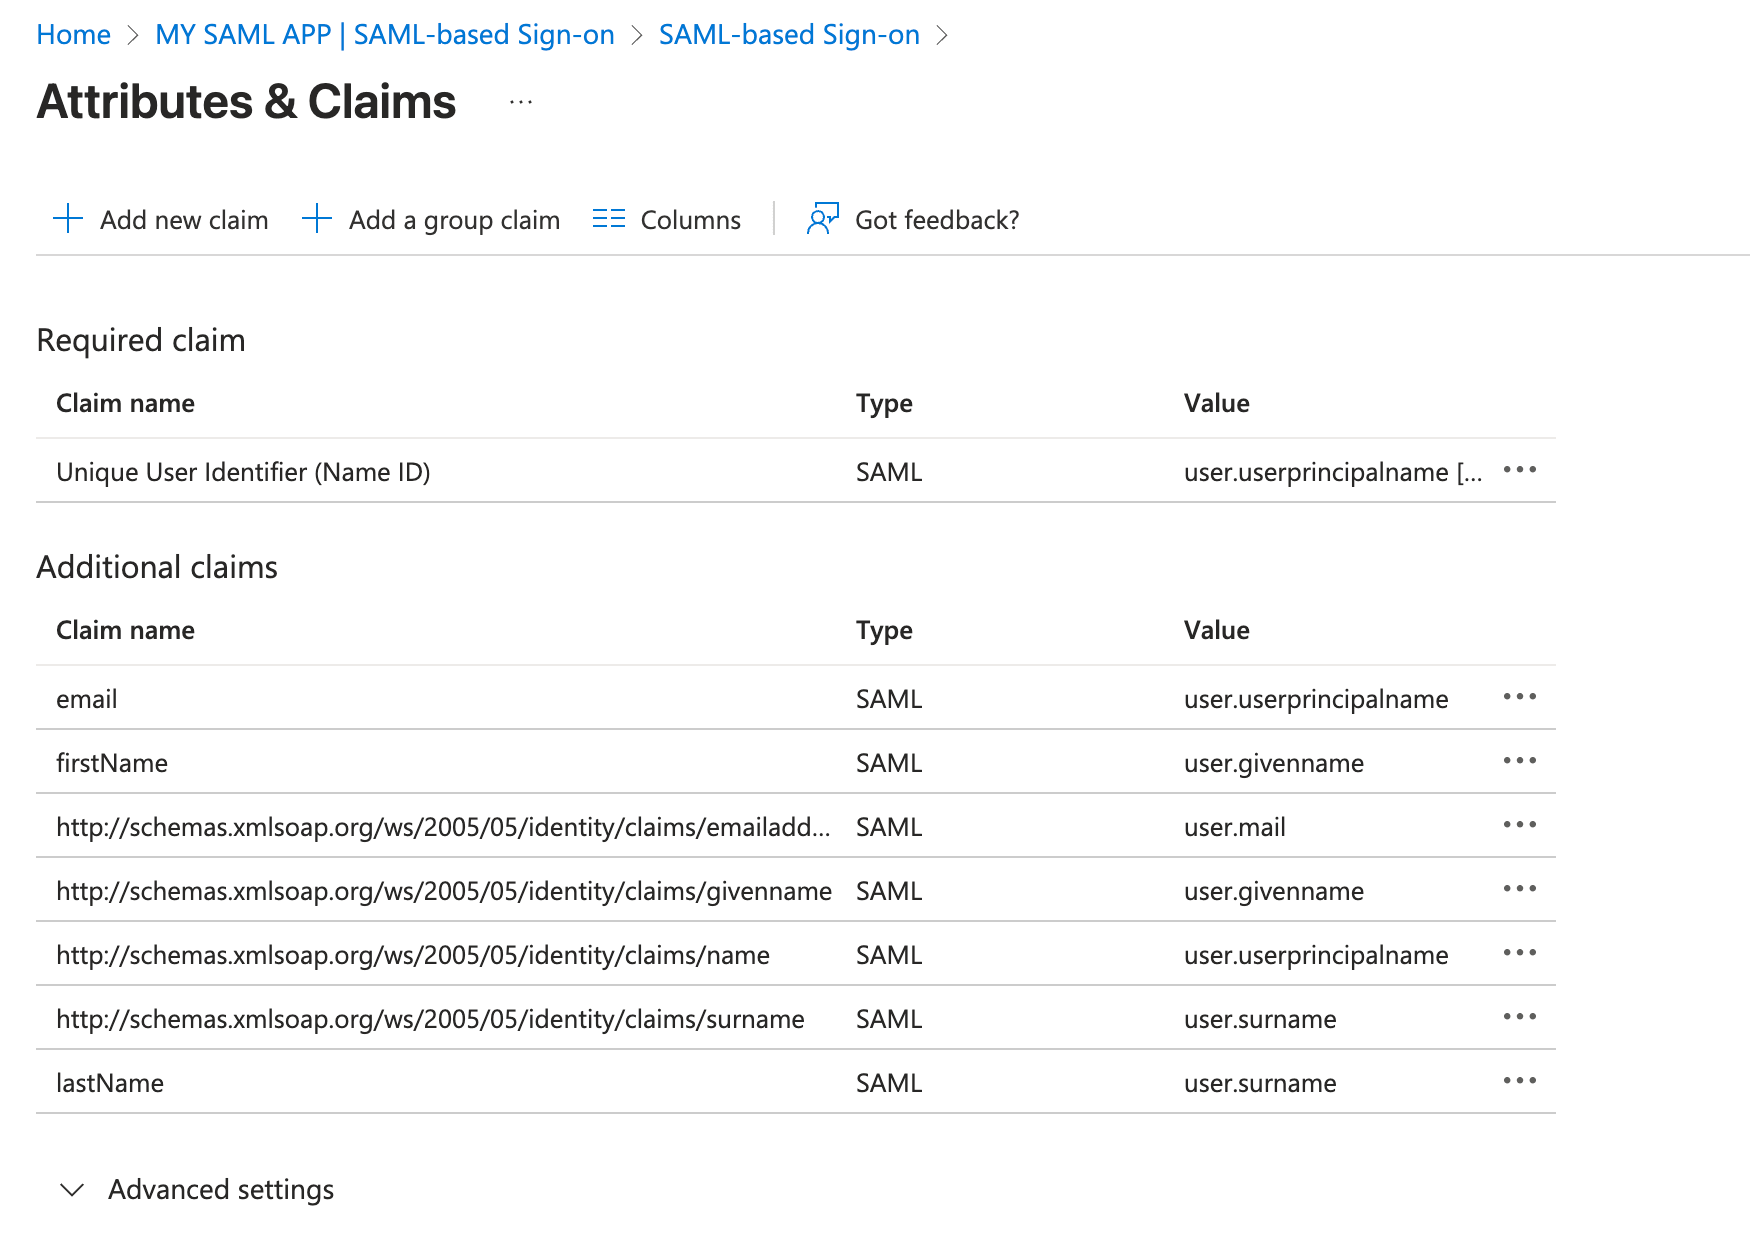
- Add Additional Claims
Please do not make changes to already predefined Additional Claims.
Click on Add new claim at top left and add three new claims
firstName,lastNameandemailone by one. Addition of firstName is illustrated in the below picture
Integrate with TrueFoundry
To integrate Azure application with TrueFoundry, Add the following configuration to env Variables- OAUTH_PROVIDER_TYPE :
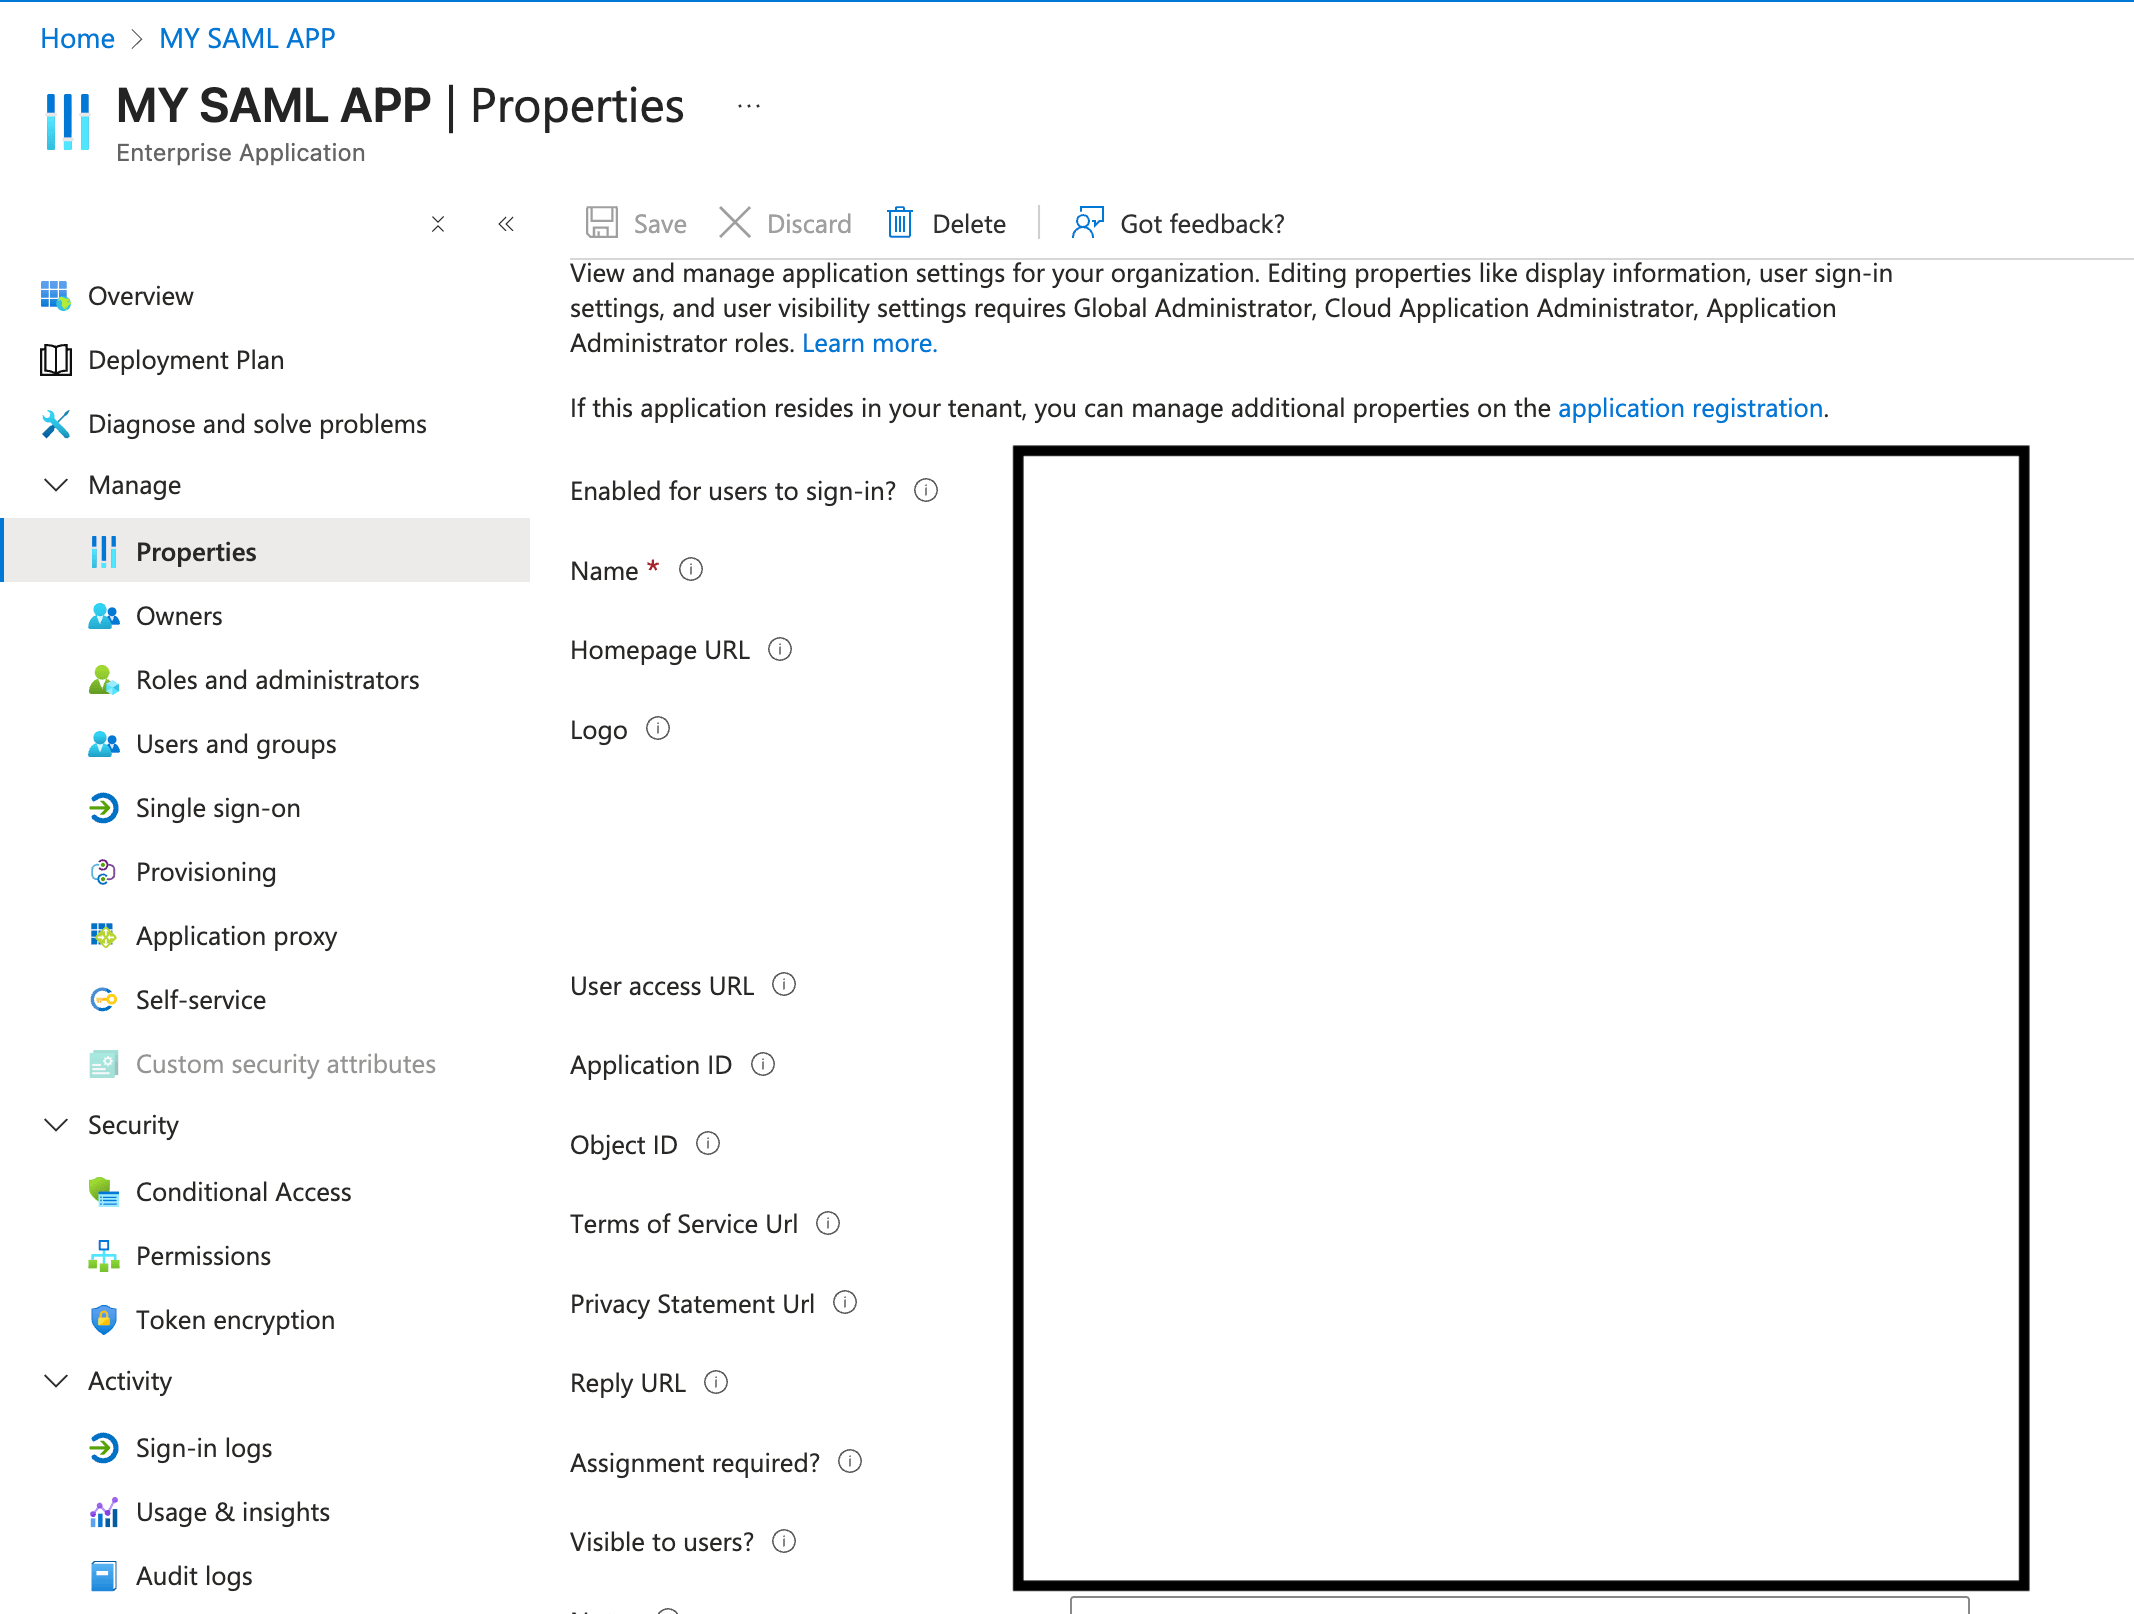
EXTERNAL_SAML - EXTERNAL_SAML_IDP_ENDPOINT: This is
User access URLwhich can be obtained from application by navigating to properties tab.
- EXTERNAL_SAML_CERTIFICATE: Encode the the Certificate that we download earlier by Base64 Encoder and set it here.
- EXTERNAL_SAML_ACCESS_TOKEN_EXPIRY_SECONDS: This is duration of access token that will be asigned to user, so keep it as required.