Prompts are stored inside Repositories. Access to create, view, edit, or use a prompt is governed by the access control on its parent Repository, so you do not need to configure separate permissions for each prompt. See Repositories for the shared repository concept, storage backing, and access control.
Creating a Prompt
Open the Prompt Registry
Go to Prompts in the left navigation and click + Create Prompt in the top right.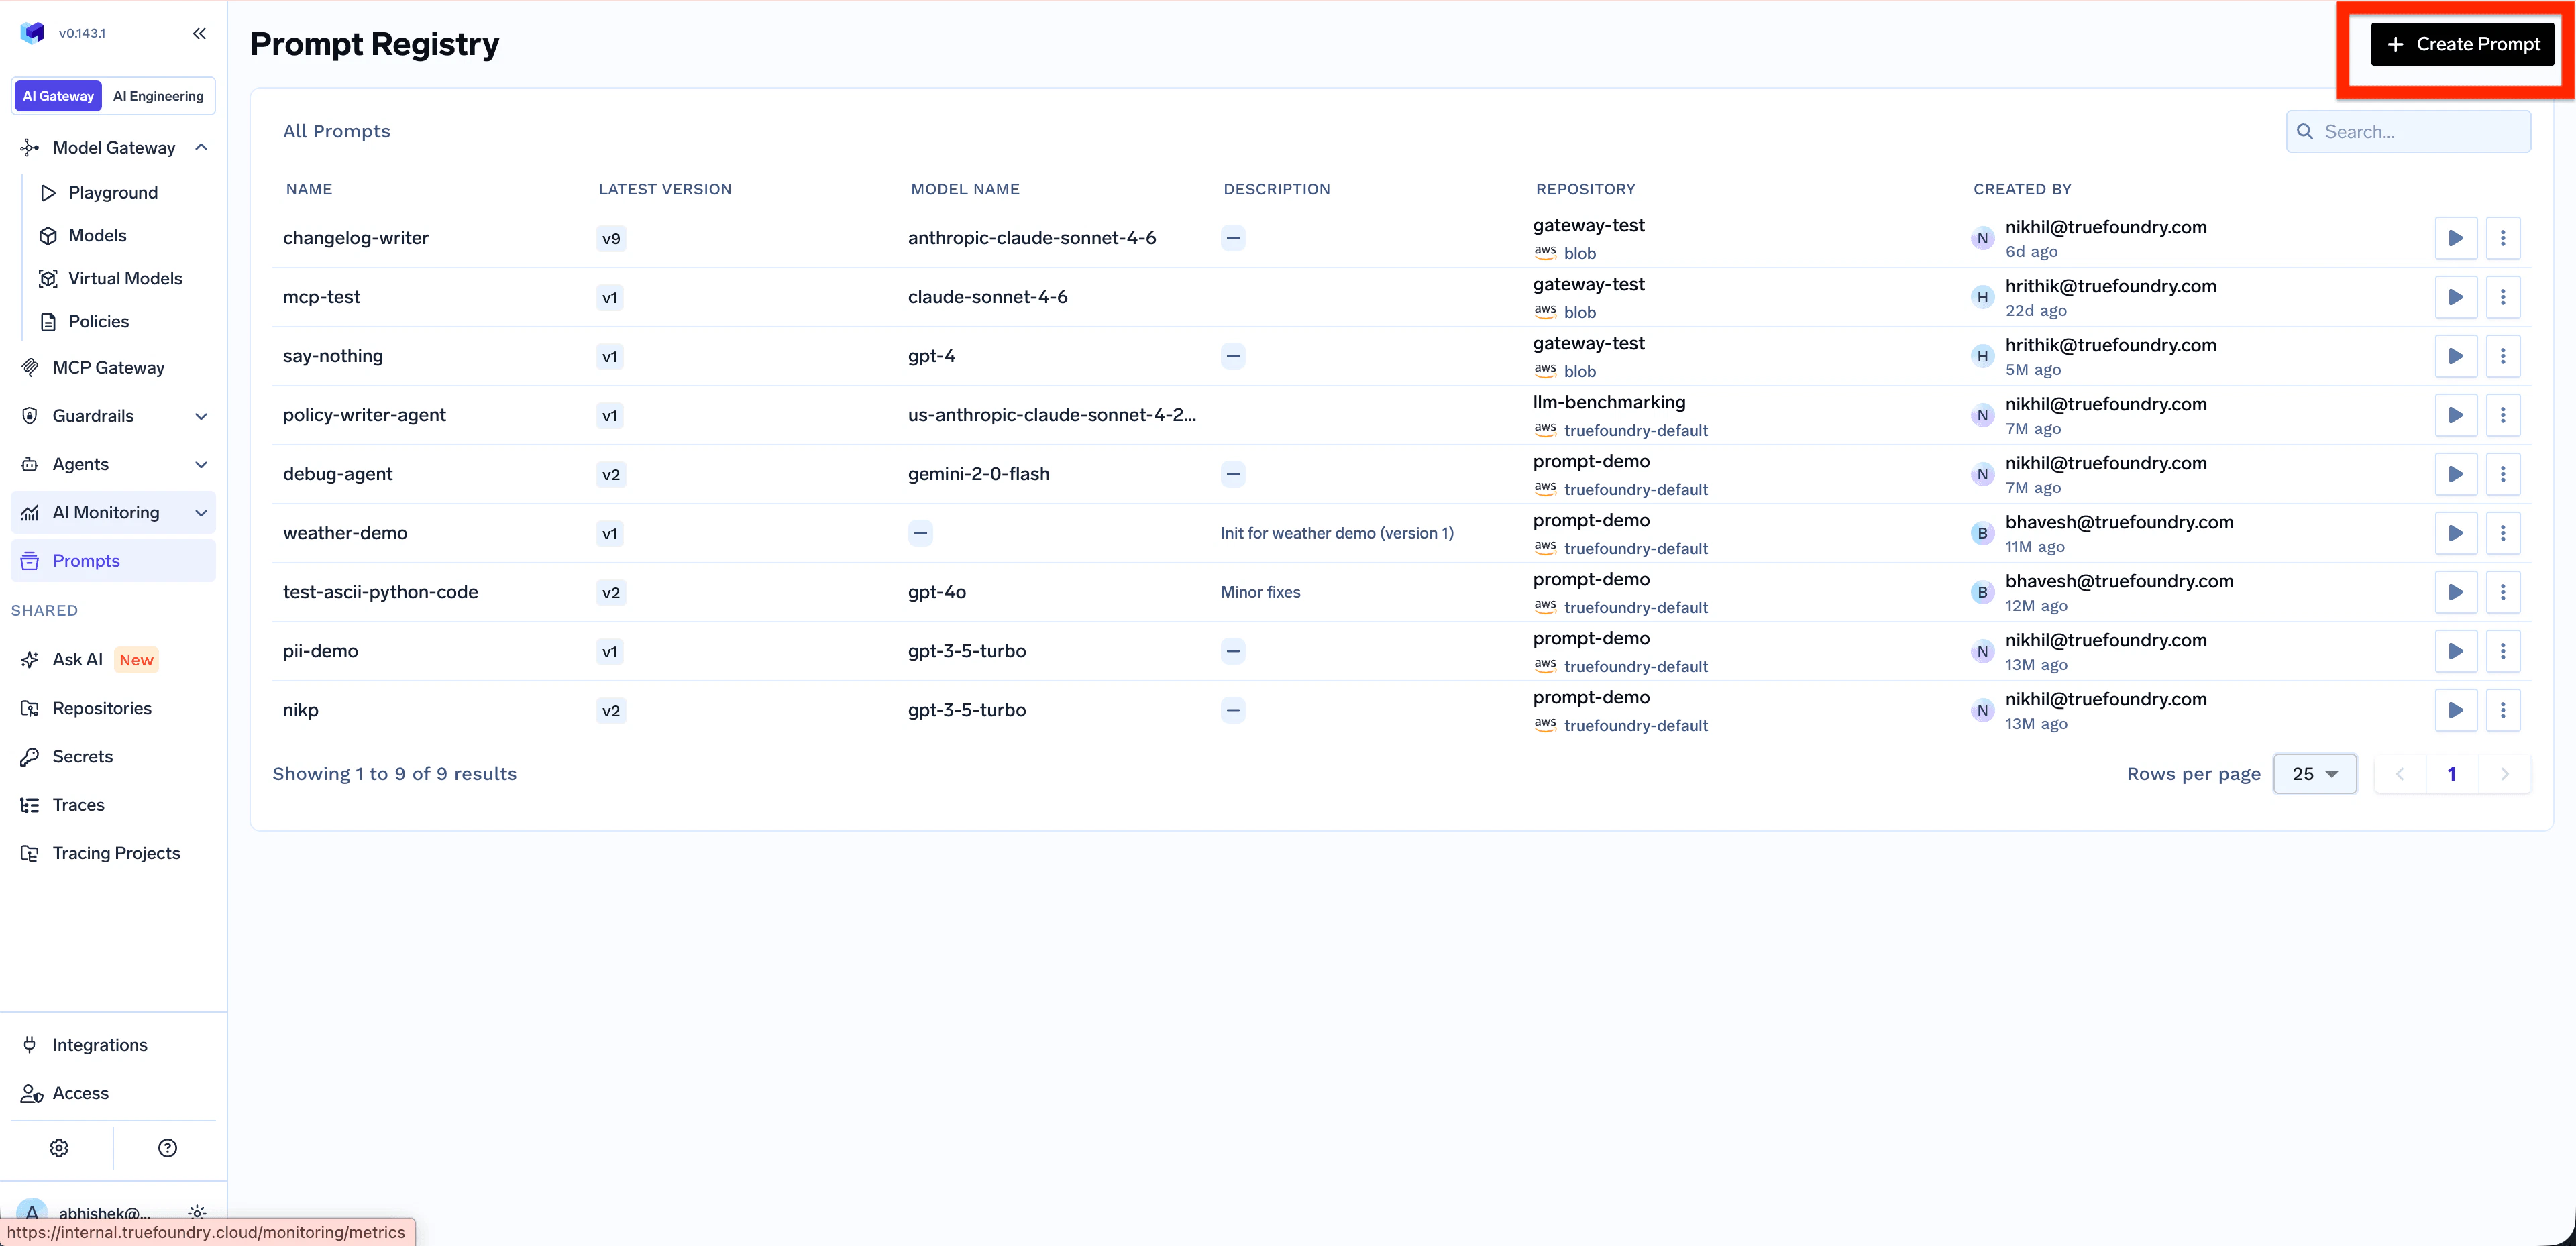
Configure the Prompt
The New Prompt screen opens with a chat-style editor. Configure your prompt by: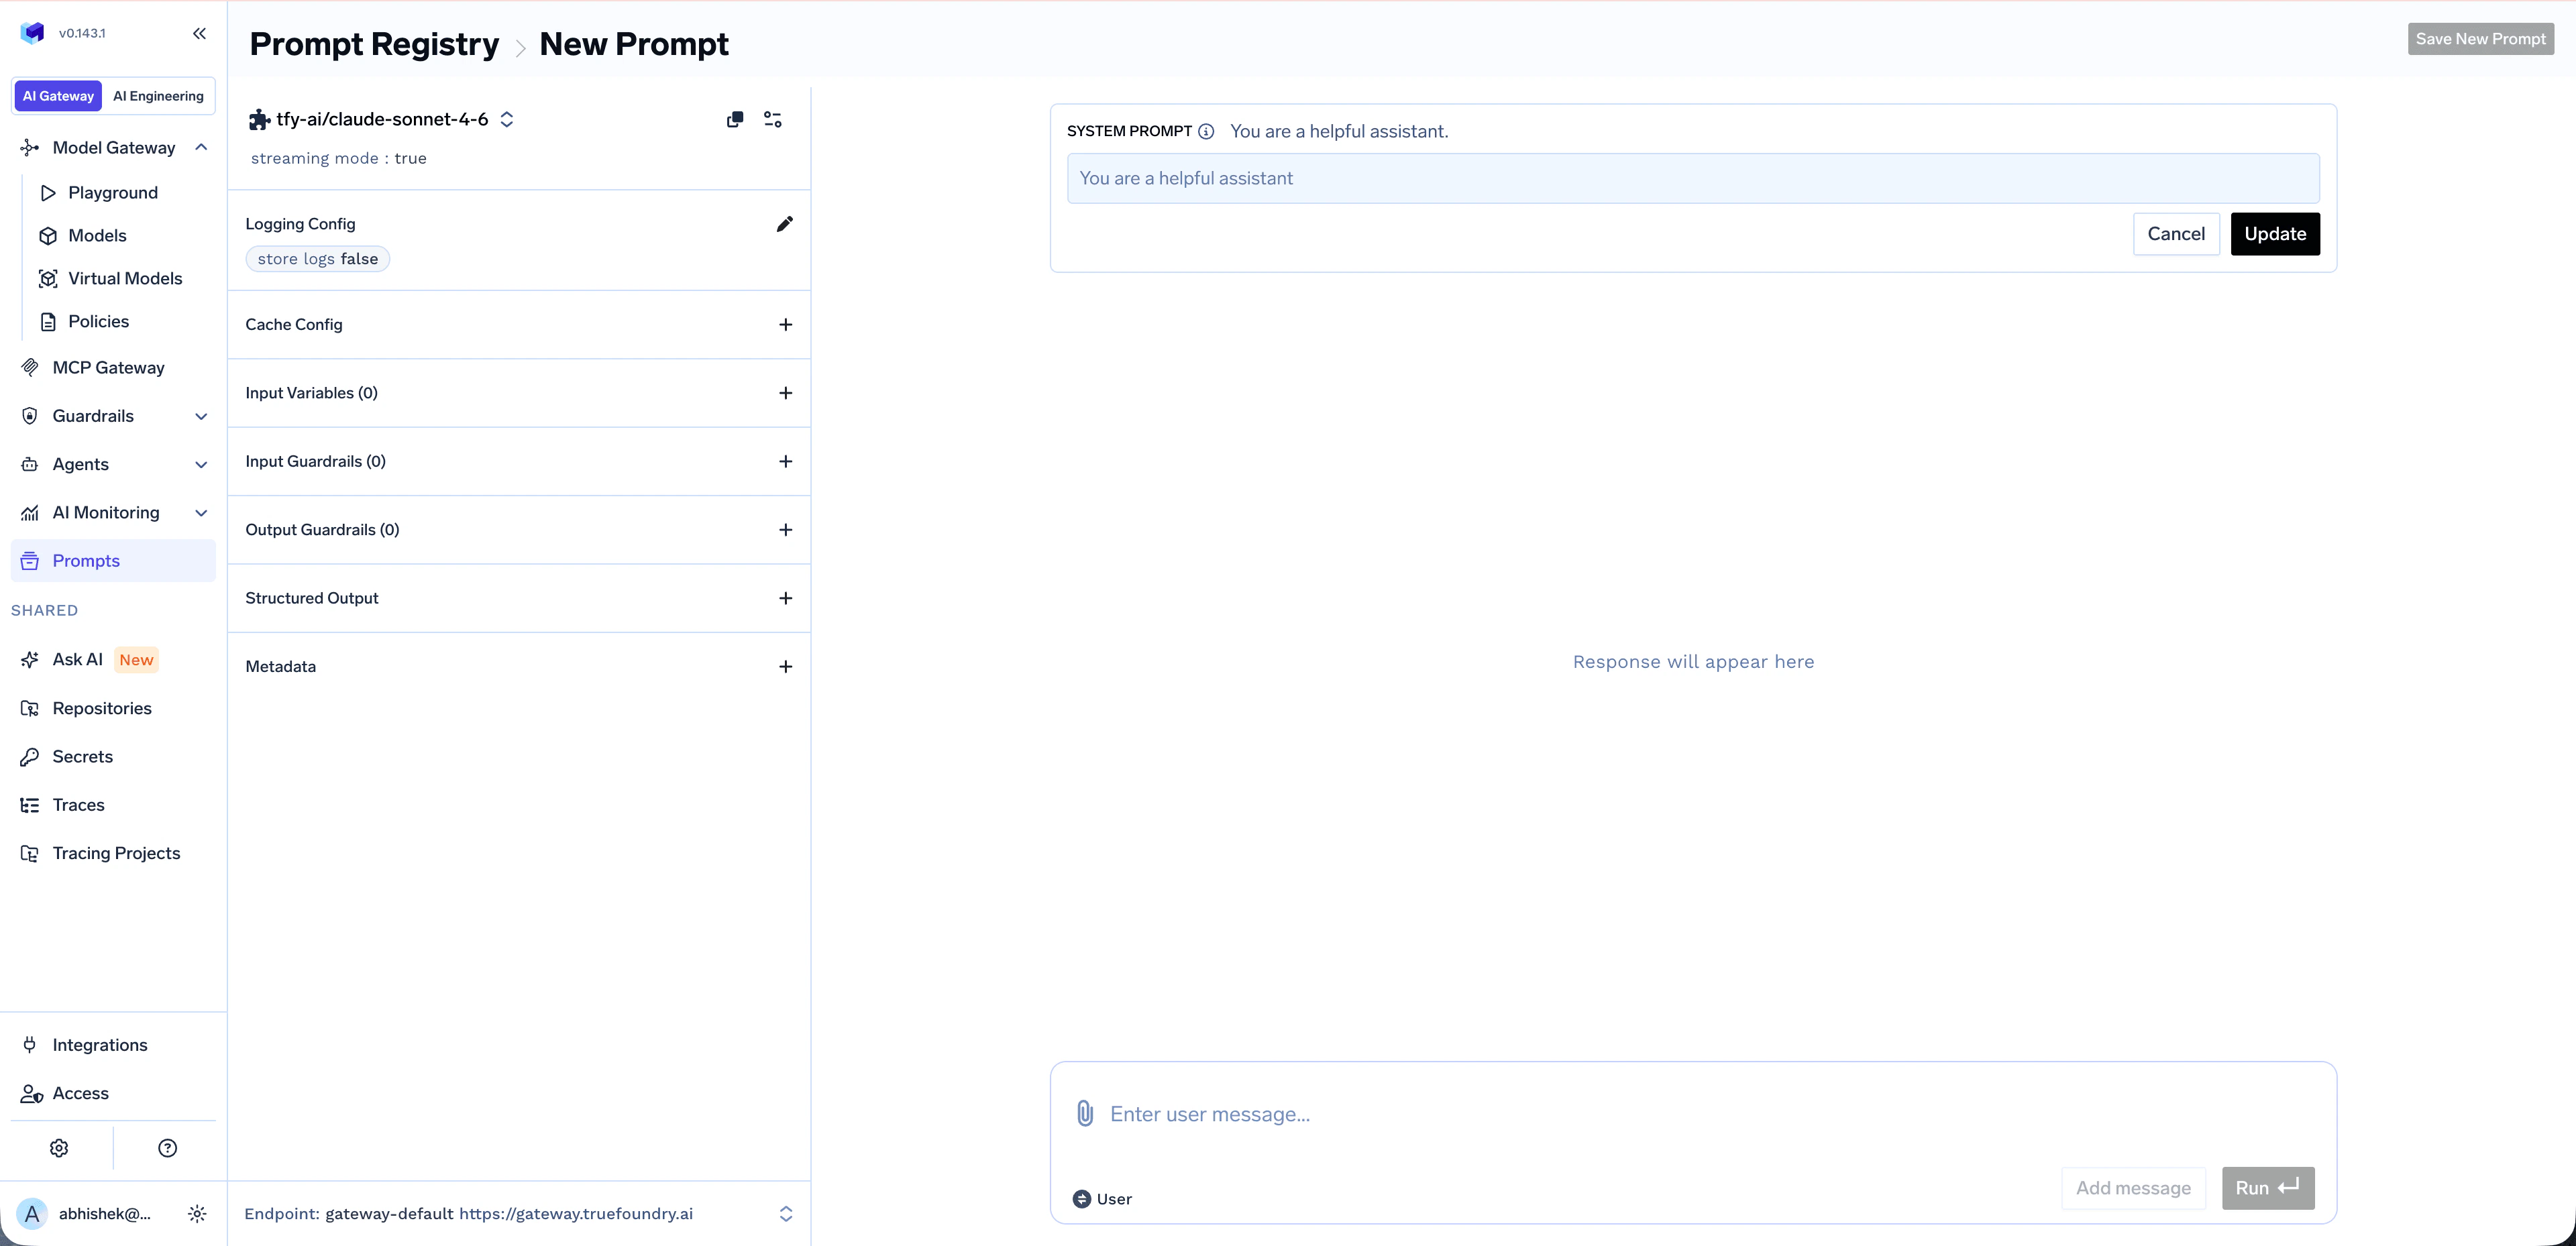
- Choosing a model from the model selector (supports virtual models for load balancing and fallback)
- Editing the System prompt to define the AI’s role and behavior
- Adding a User message to provide the input or query
- (Optional) Configuring Logging Config, Cache Config, Input/Output Guardrails, Structured Output, and Metadata from the left panel
Add Input Variables (Optional)
Make prompts reusable by referencing template variables with the 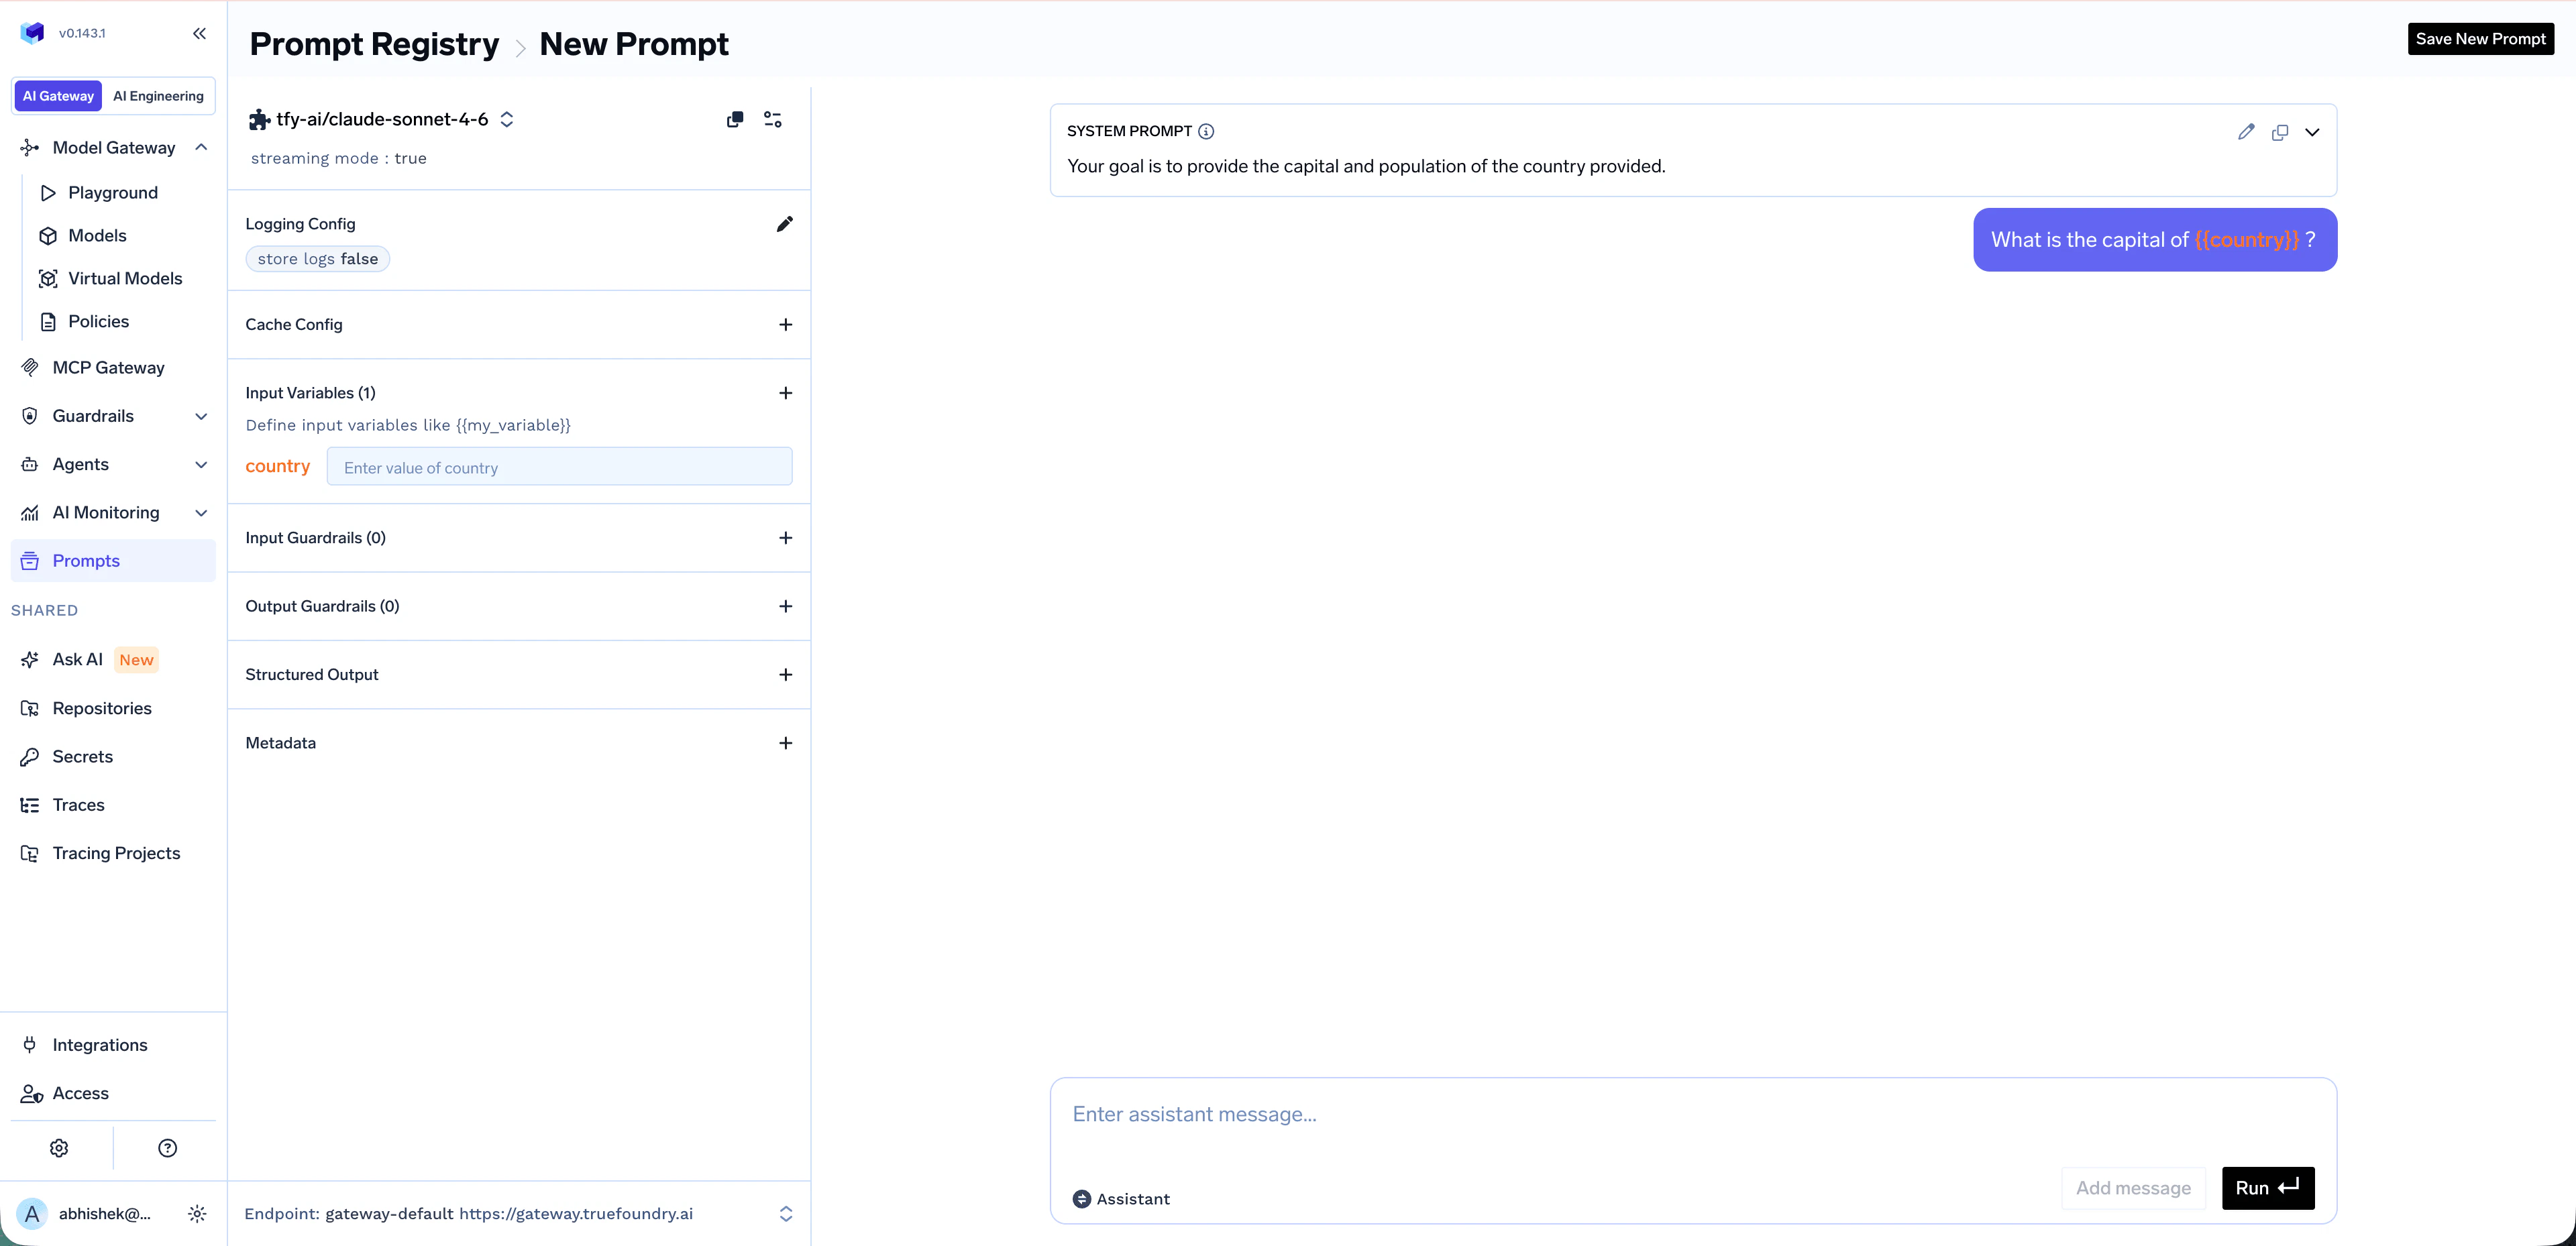
{{variable_name}} syntax inside your messages. Variables are auto-detected and appear under Input Variables in the left panel, where you can preview them with sample values before saving.Save the Prompt
When you’re happy with the prompt, click Save New Prompt in the top right. A side panel opens — fill in: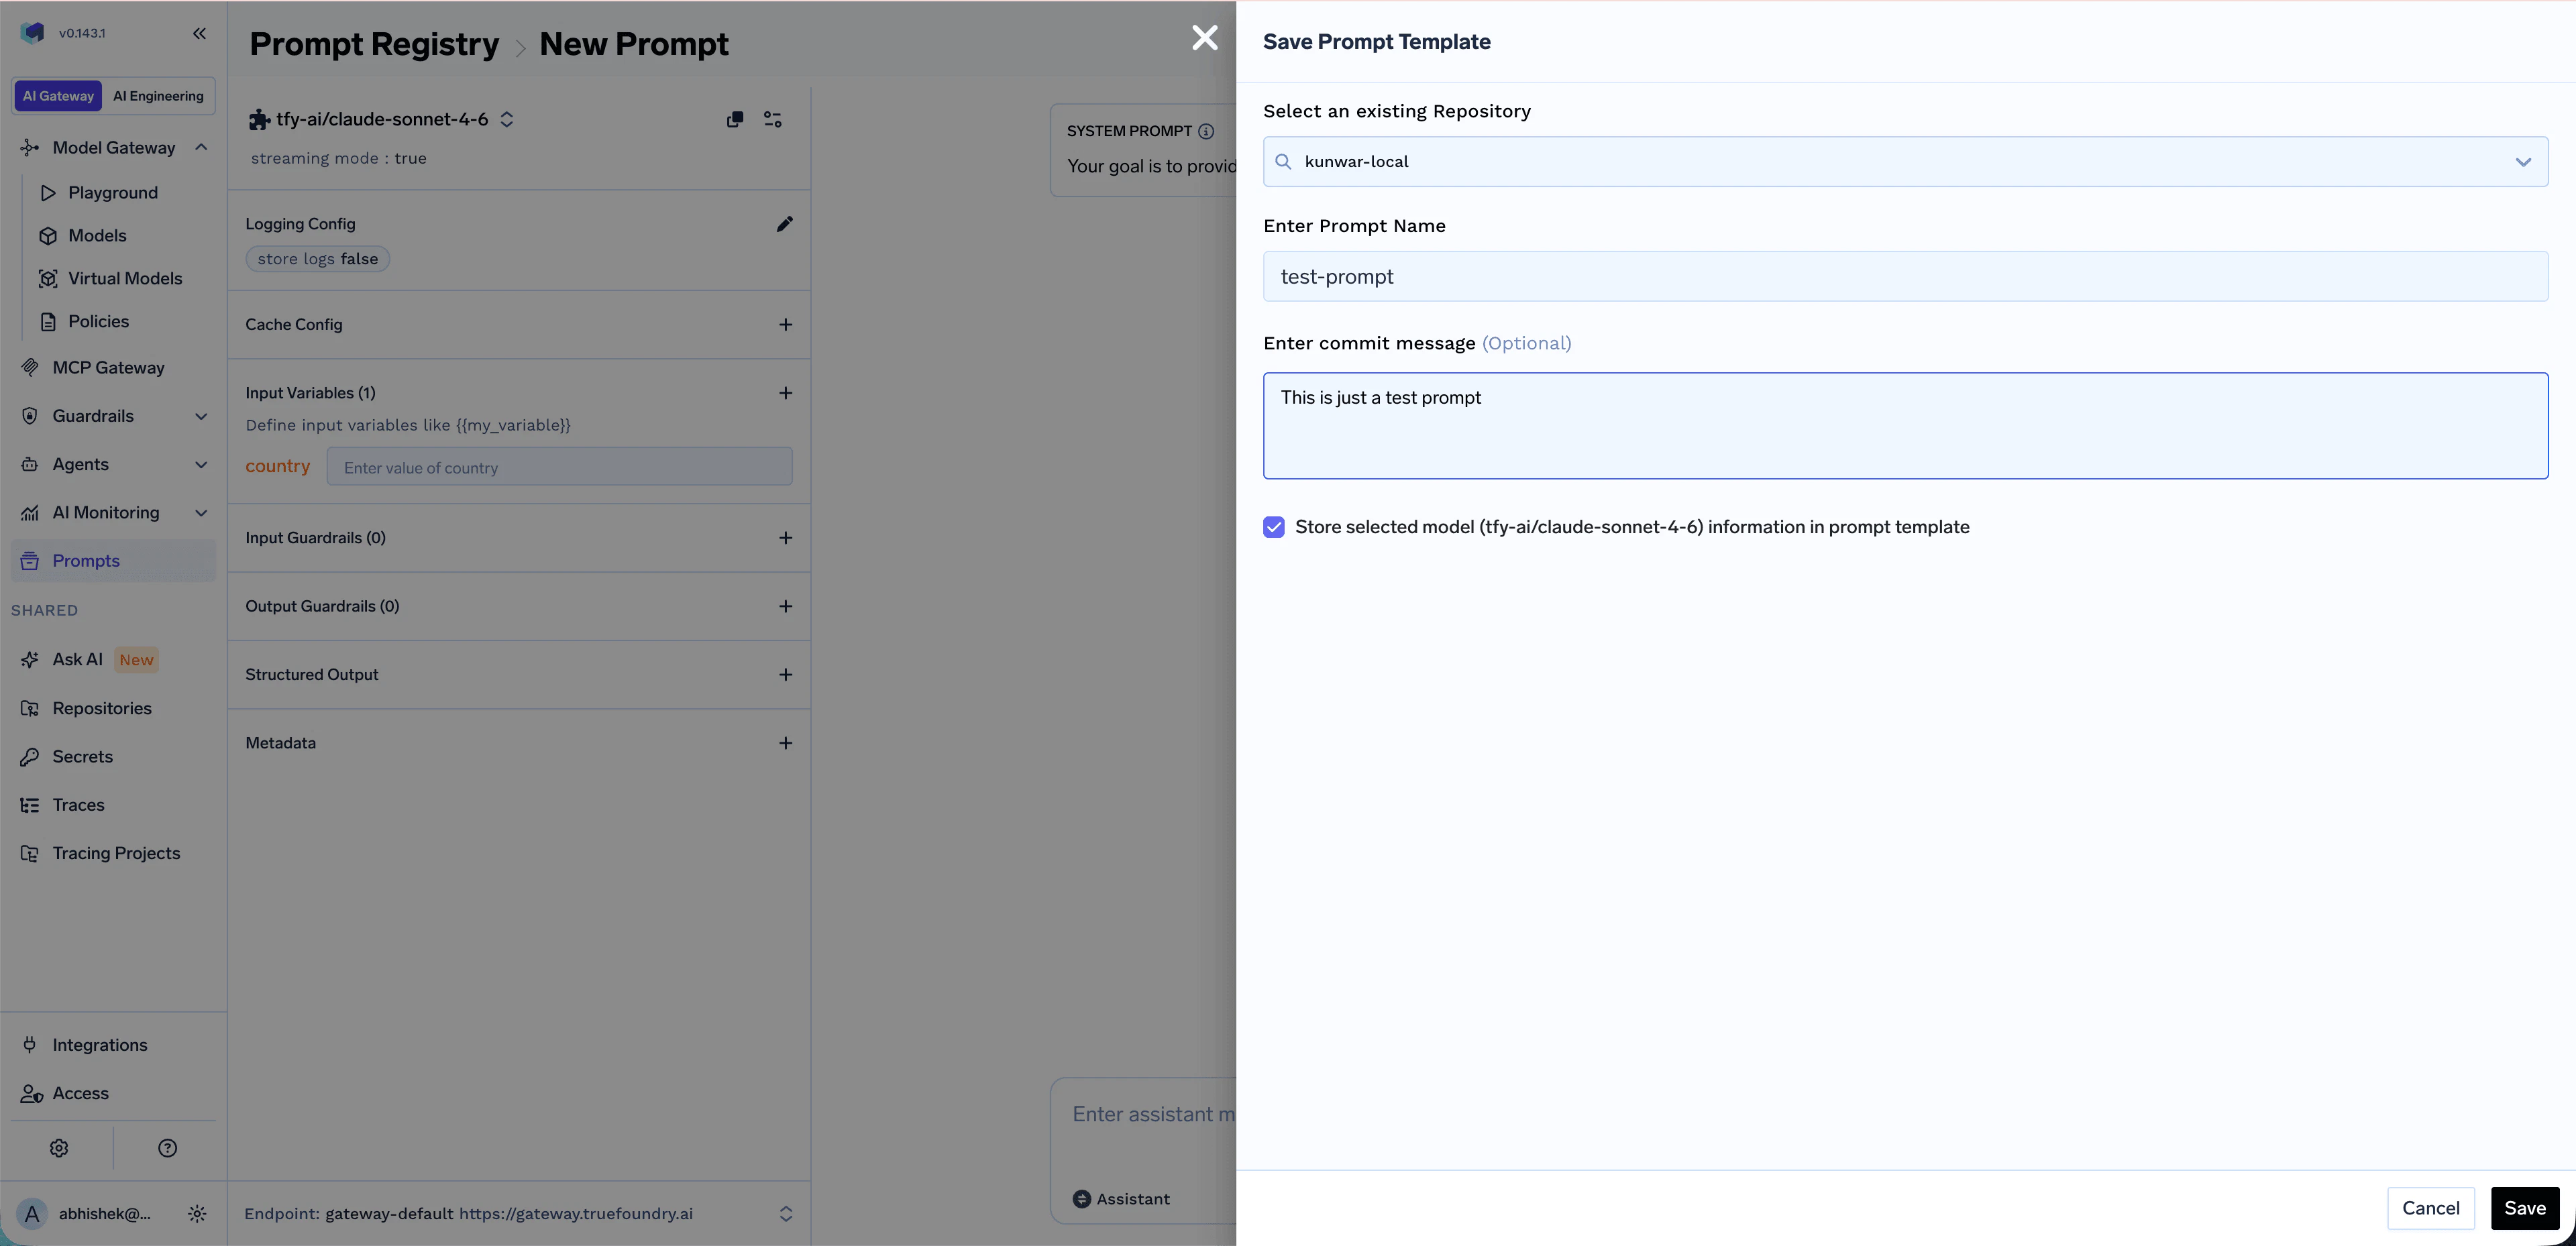
- Repository — Select an existing repository where the prompt will be saved. Repository access controls who can view, edit, and use the prompt. See Repositories.
- Prompt Name — Give your prompt a descriptive name
- Commit message (optional) — Brief description of the change
- Store selected model in prompt template — Keep this enabled if you want the prompt to remember its chosen model
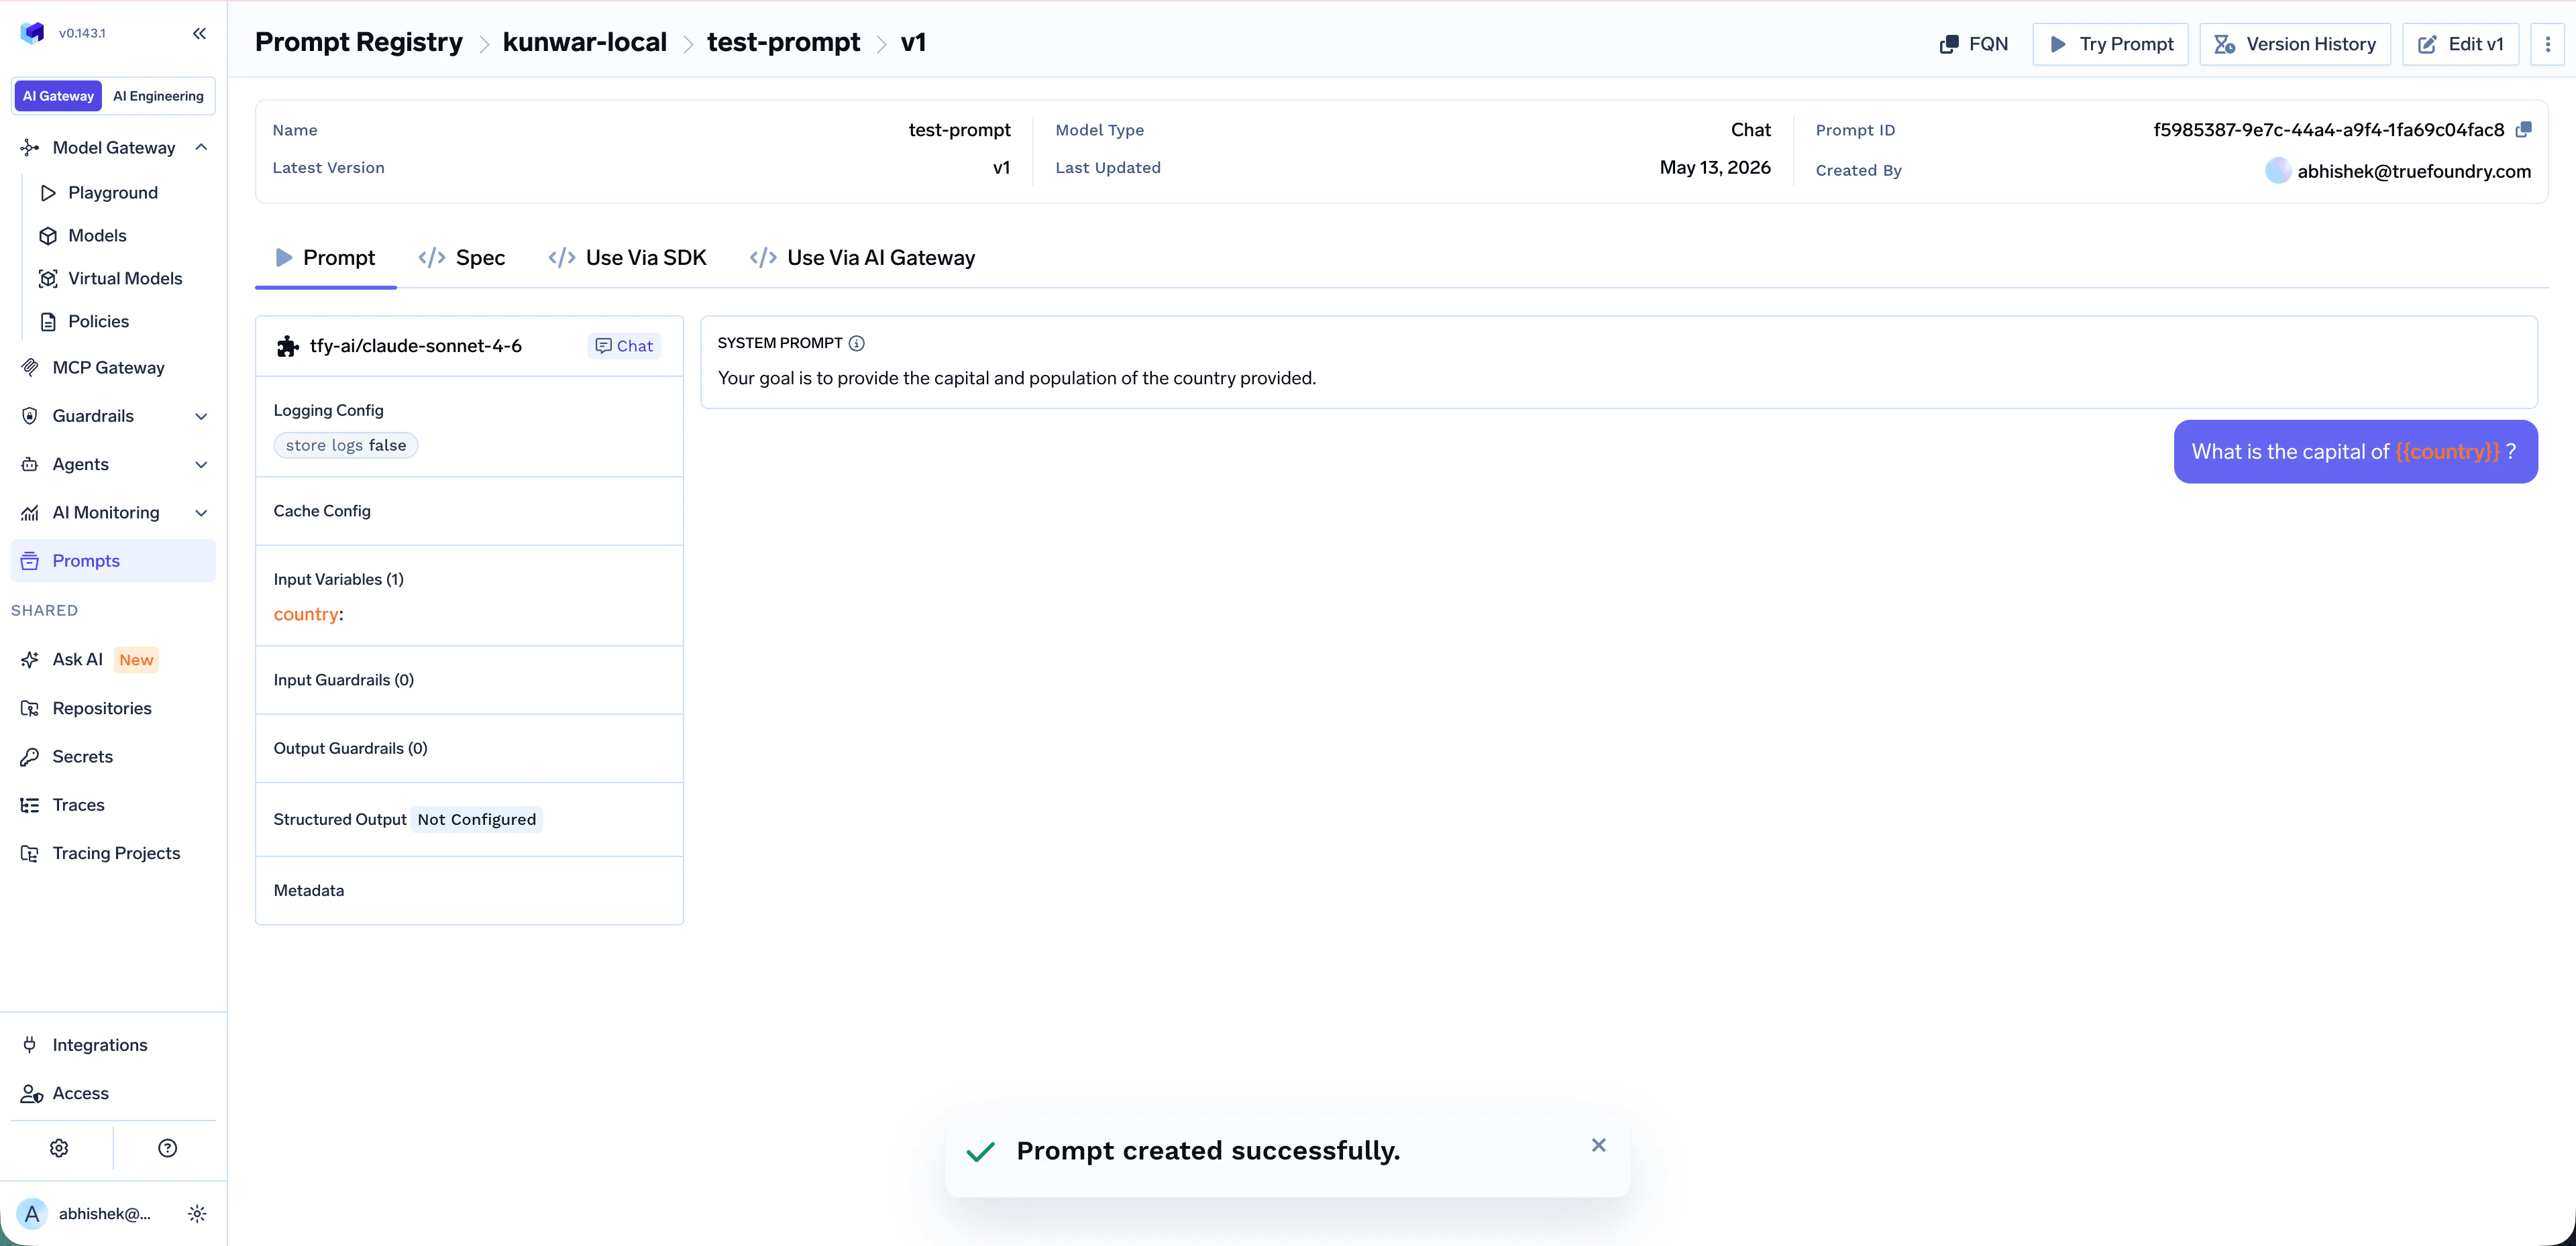
Viewing Your Prompt
Once saved, you land on the prompt detail page atPrompt Registry > {repository} > {prompt-name} > v{version}. From here you can:
- Prompt / Spec — View the prompt content and its full configuration
- Try Prompt — Open the prompt in a runnable view to test it interactively
- Edit v<N> — Make changes; saving produces a new version
- Version History — Browse and diff previous versions
- FQN — Copy the prompt-version FQN (needed when calling the prompt from code)
- Use Via SDK / Use Via AI Gateway — Get ready-made code snippets for using the prompt in production
Advanced Configuration
Each prompt template can be configured with the same controls as a regular Gateway request:Input Variables — dynamic content
Input Variables — dynamic content
Reference variables in system or user messages using
{{variable_name}} syntax. Pass values at runtime via prompt_variables (Gateway) or as variables to render_prompt (SDK). See Using the Prompt below.Guardrails — input and output policies
Guardrails — input and output policies
Attach Input Guardrails and Output Guardrails to enforce safety, PII redaction, content moderation, or custom checks on every run of the saved prompt. Learn more: Guardrails Overview.
Virtual Models — load balancing and fallback
Virtual Models — load balancing and fallback
Bind the prompt to a Virtual Model to get load balancing, fallback, and retries across multiple gateway targets when running the saved prompt.
Structured Output — JSON schema
Structured Output — JSON schema
Force the model to respond in a specific JSON schema. Useful when downstream code needs to parse the response programmatically.
Versioning
TrueFoundry automatically creates a new version every time you edit and save a prompt. Versioning lets you:- Roll forward and roll back across versions
- Compare exact changes between any two versions
- Pin specific versions to specific apps or environments
Edit and Create a New Version
Edit and Create a New Version
Open any prompt and click Edit v<N> to make changes. Saving the edited prompt produces a new version (e.g.
v2).Browse Version History
Browse Version History
Click Version History on the prompt detail page to see all versions of the prompt with their commit messages and authors.
Compare Versions (Diff Mode)
Compare Versions (Diff Mode)
Inside Version History, switch to the Version Difference tab to see exactly what changed between two versions in a GitHub-style diff view.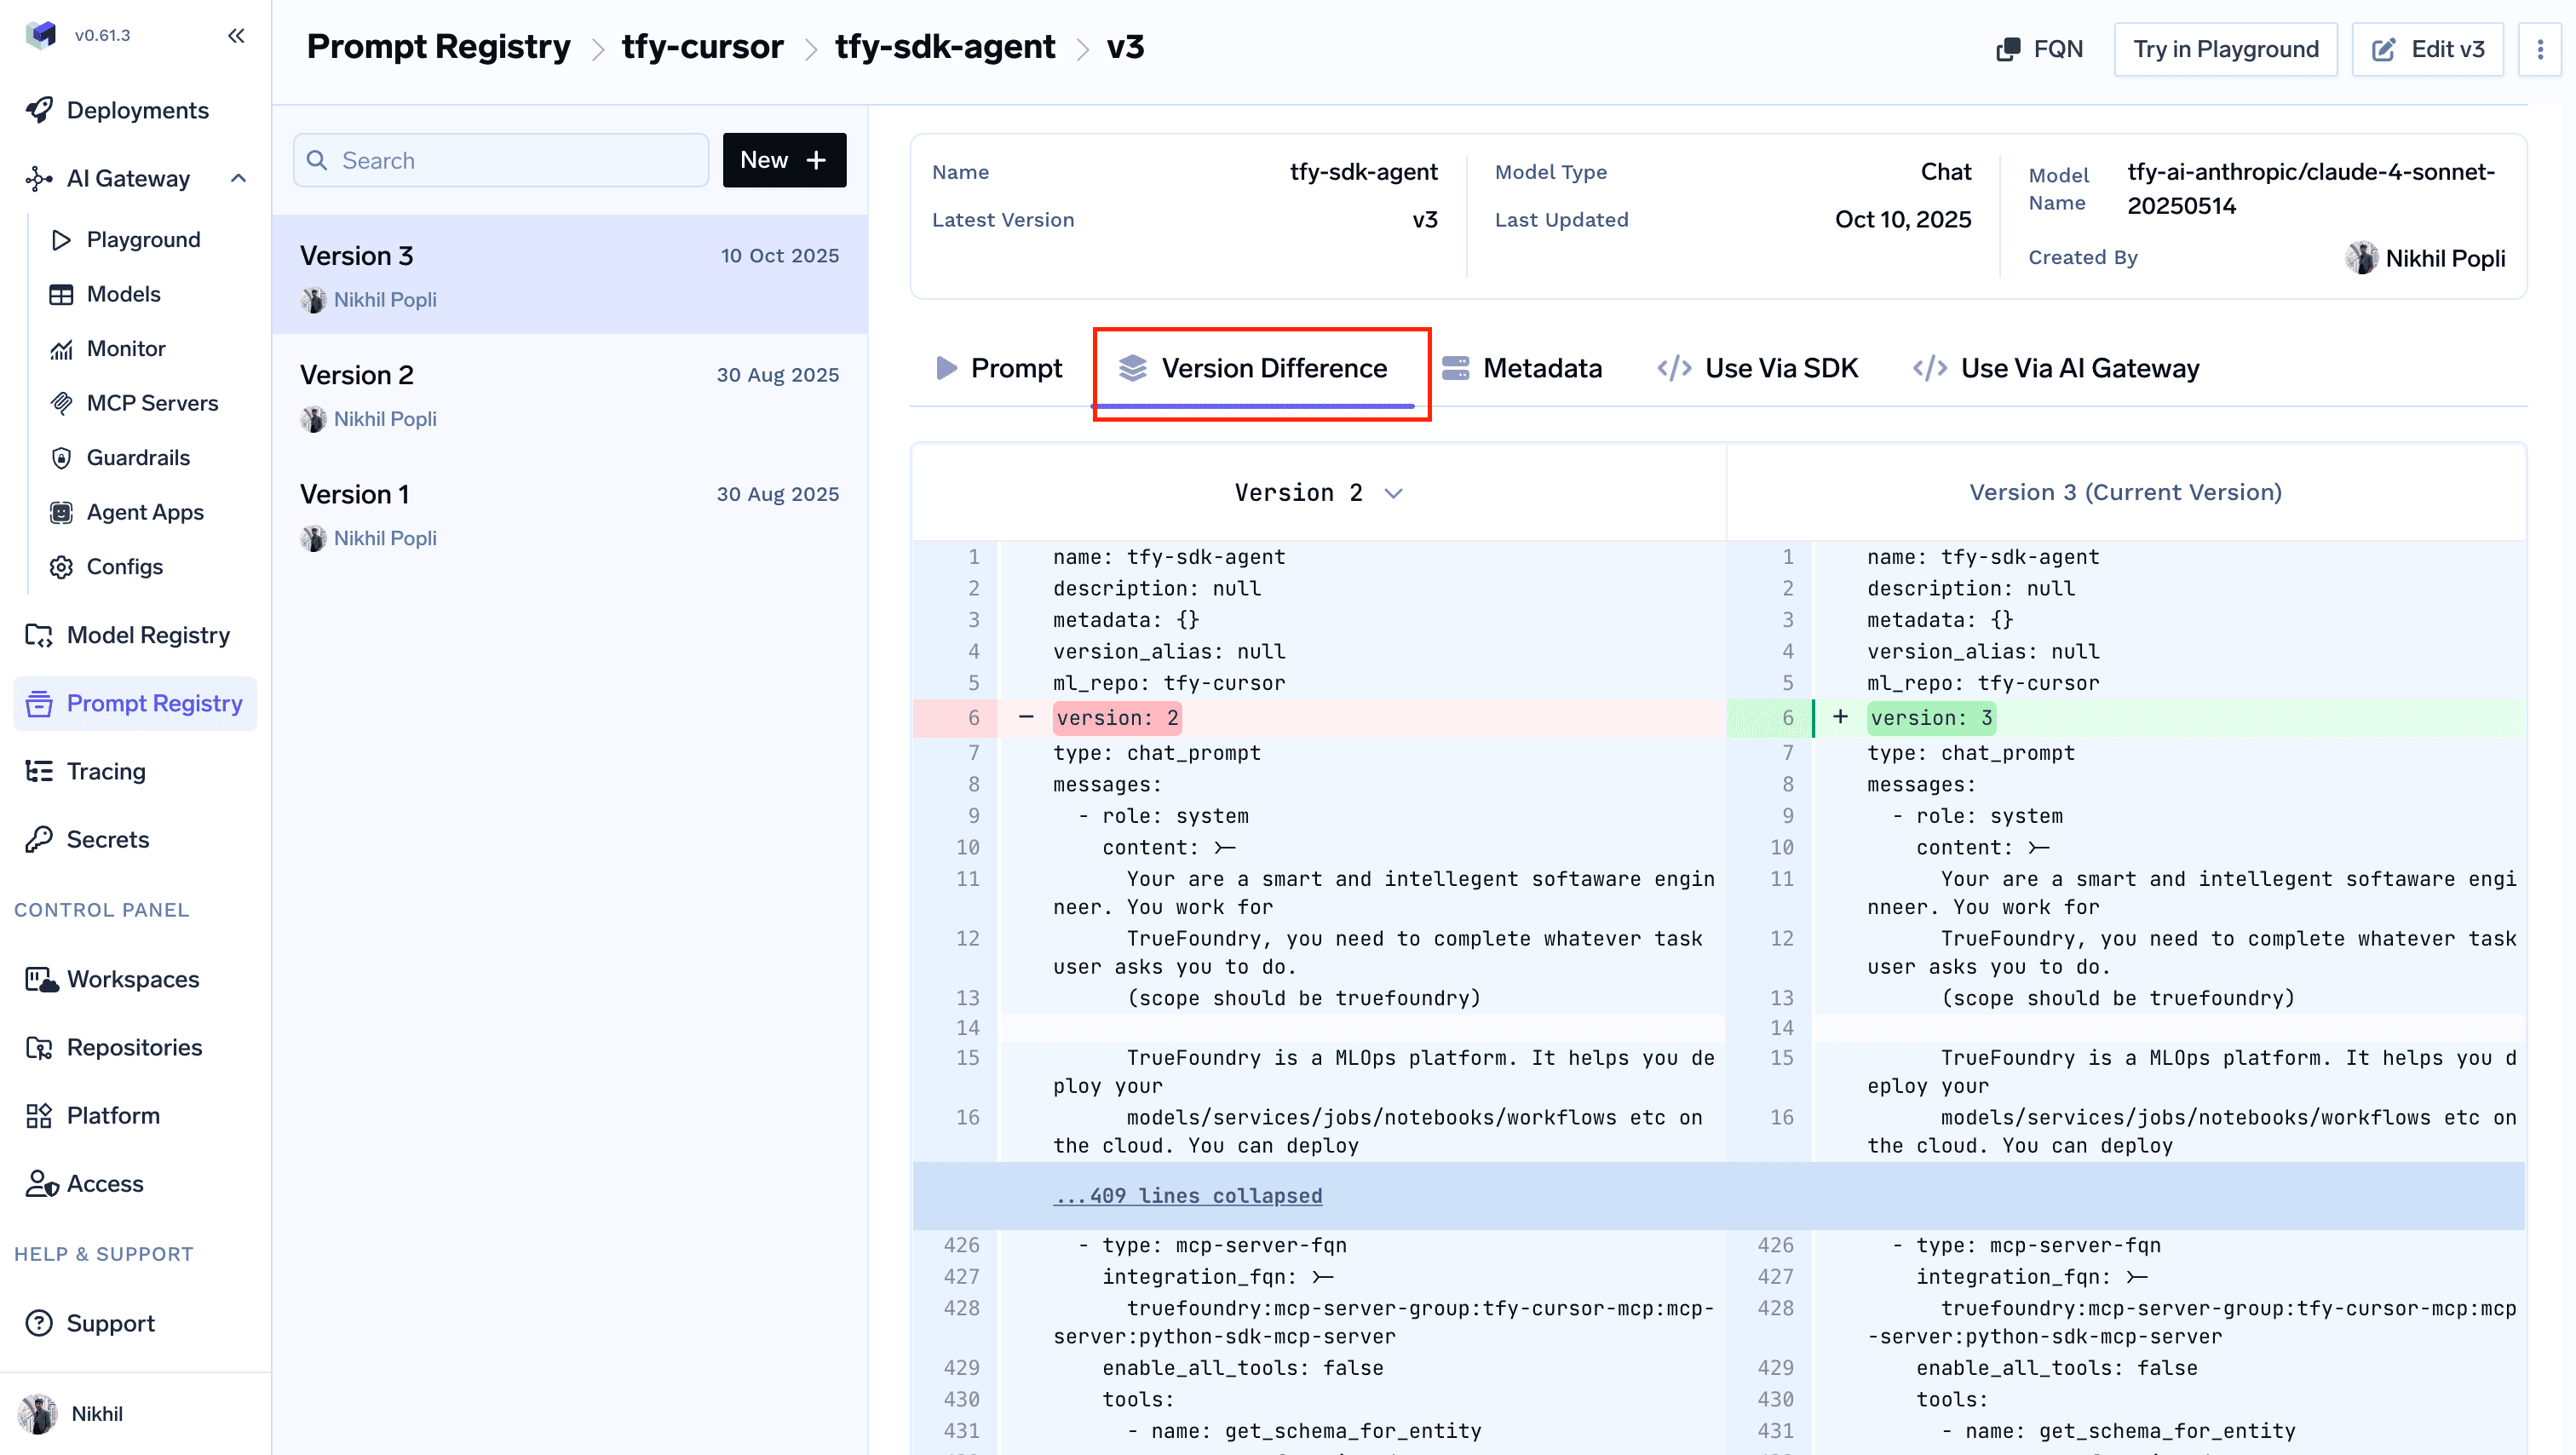
Using the Prompt
There are two ways to consume a saved prompt from your application:| Method | When to use |
|---|---|
| Use Via AI Gateway (server-side rendering) | The Gateway renders the prompt and runs it — simplest setup, no extra dependencies. |
| Use Via SDK (client-side rendering) | Fetch the template and render it locally — full control over message construction. |
- Use Via AI Gateway (server-side rendering)
- Use Via SDK (client-side rendering)
Pass the prompt version FQN in the request body. The Gateway renders the prompt and executes the call.ParametersOpen the Use Via AI Gateway tab on the prompt detail page to get a ready-to-paste snippet in your preferred client library (OpenAI, LangChain, Node.js, Curl, REST, and more).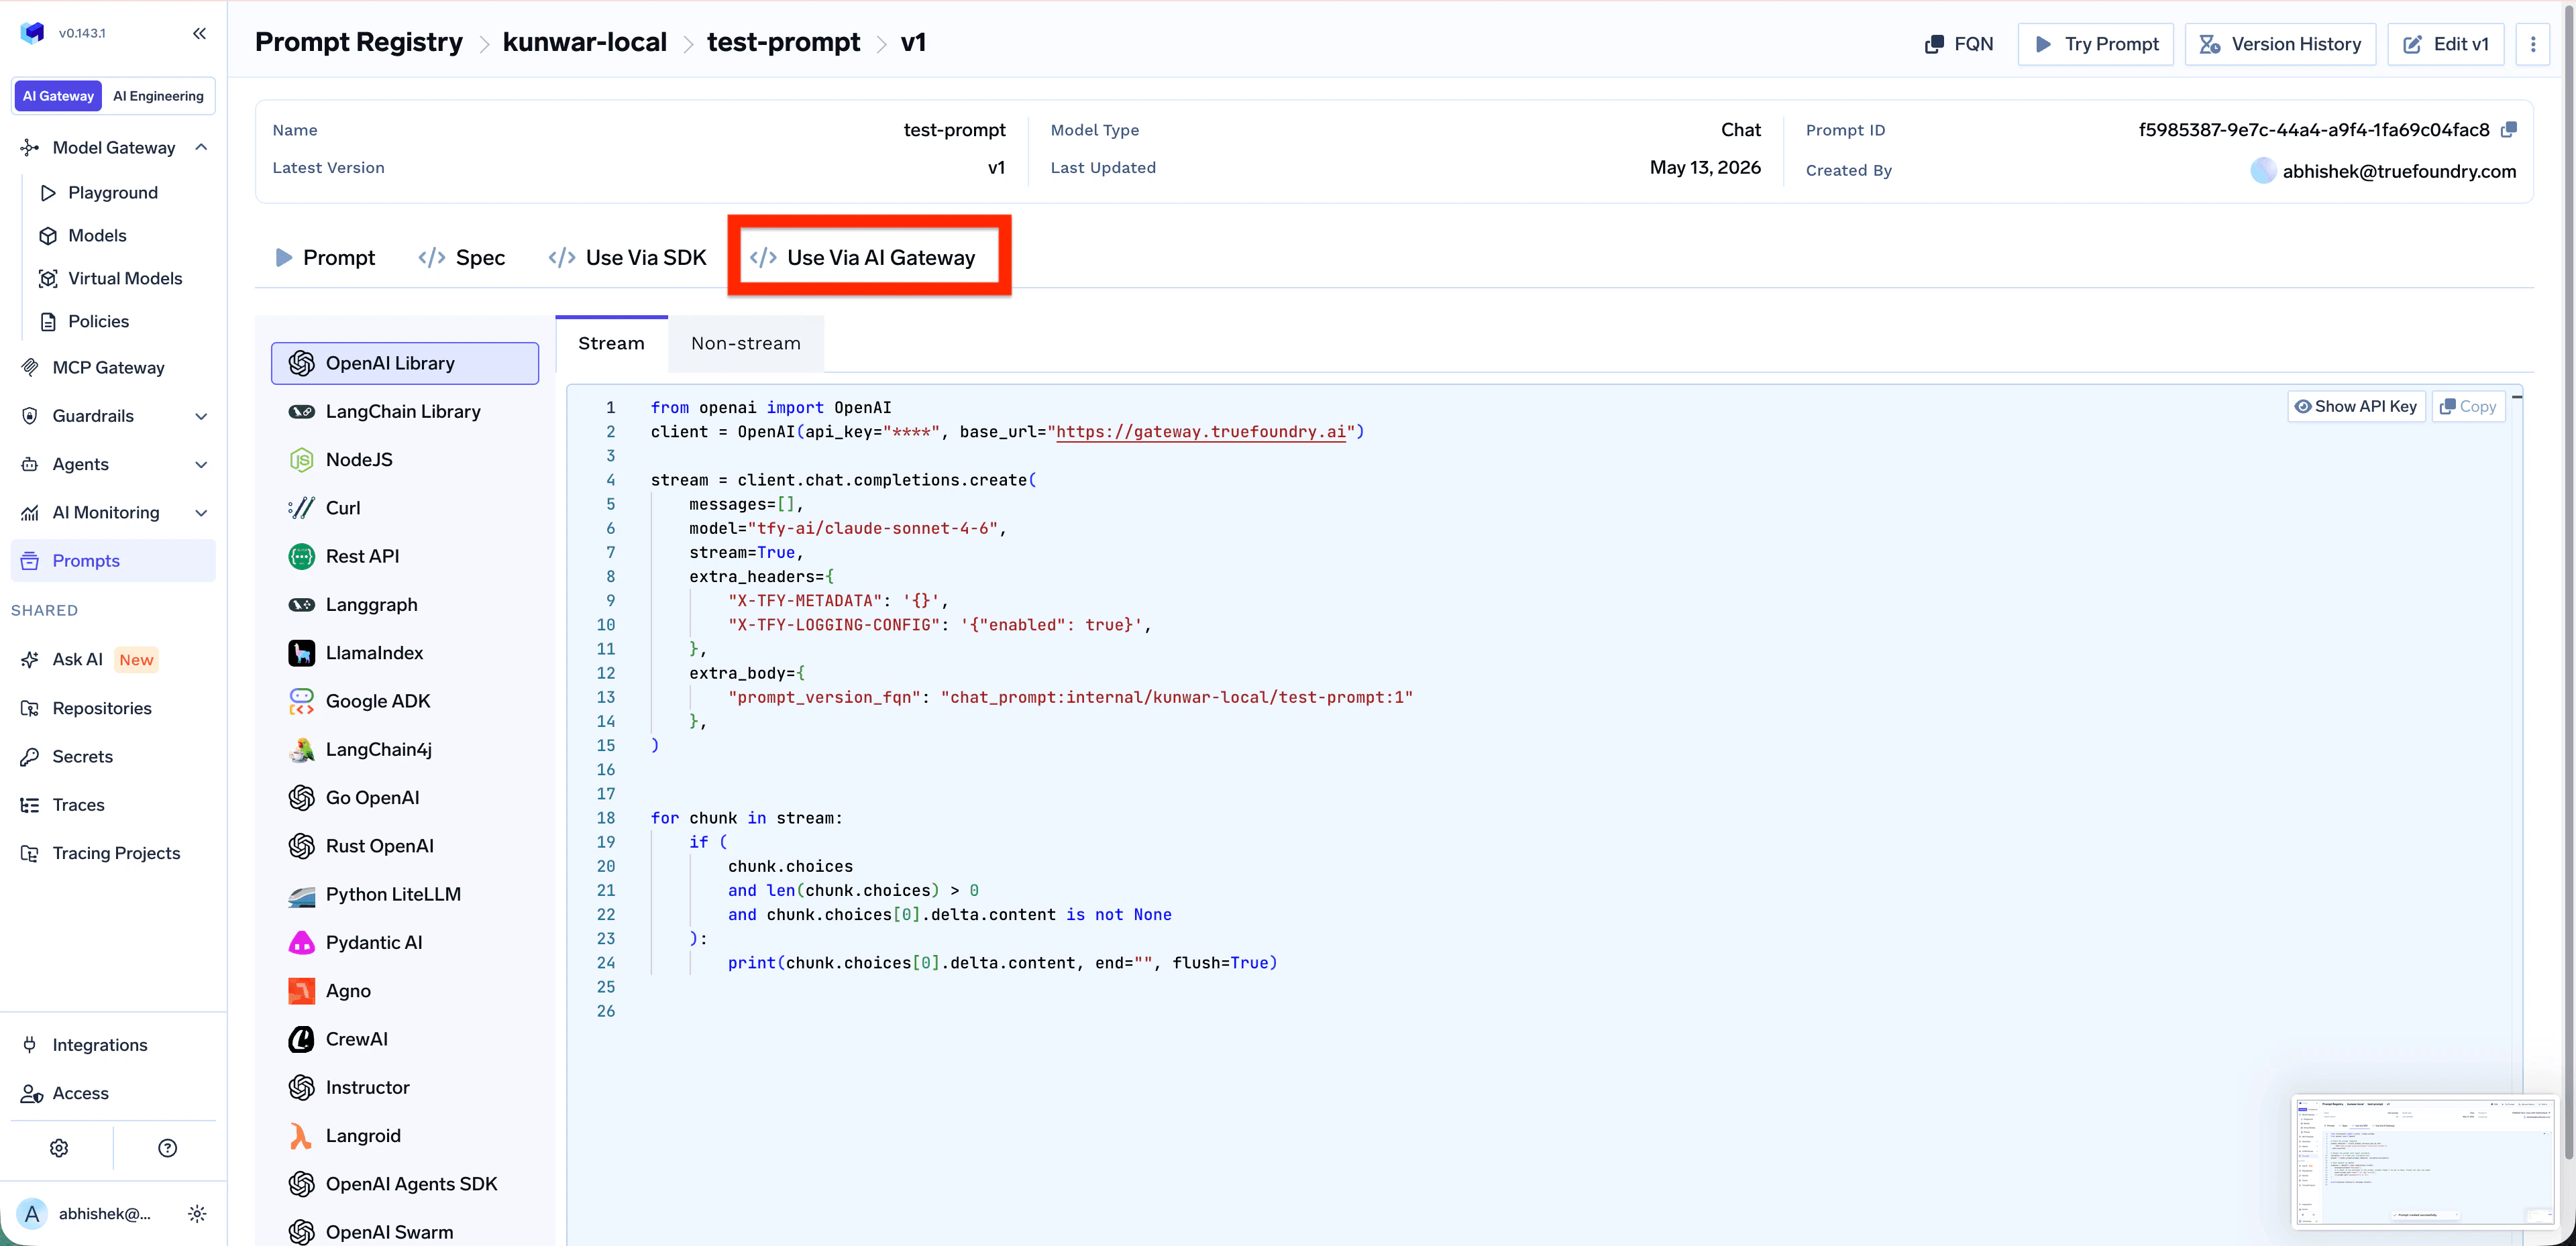
prompt_version_fqn— The fully qualified name of your prompt versionprompt_variables(optional) — Variables to substitute into the prompt template
Important considerations
- If the prompt version doesn’t have a model configured, pass the model in the request body via the
modelparameter - If you specify a model in the request body and the prompt version already has one configured, the request body model takes precedence
- Any
messagespassed in the request body are appended to the messages defined in the prompt version
